Gonna start a build and see where it goes ===> TWINSCREW !!! :-p
Posted: Fri Apr 29, 2016 12:39 am
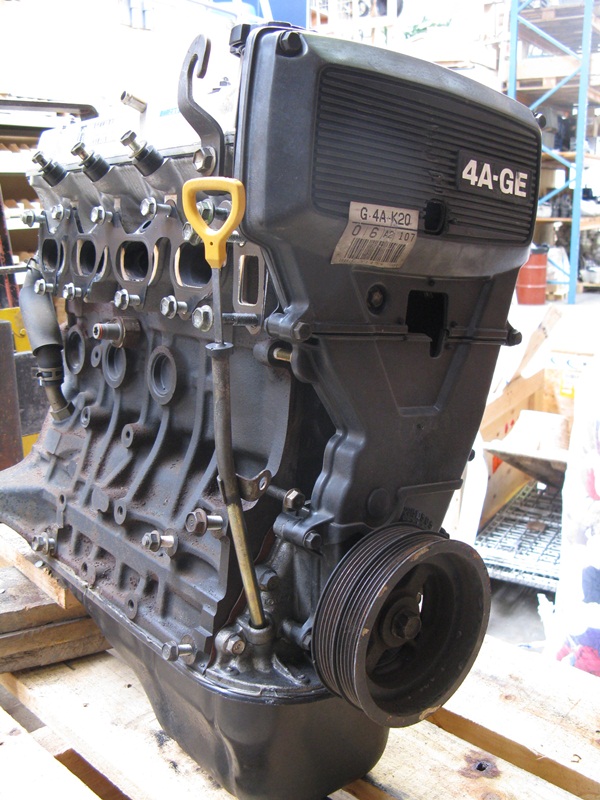
Five or six years ago I bought a used 4AGE smallport from a Jap parts importer
because it was the same engine that I already had in my car, and thought it would
be nice to have a spare. The engine came with manifolds and all accessories, so
I stripped those off and sold them. Ended up with a free longblock Like this...
Put that into dry storage and more or less forgot about it until I decided that it was
time for a new build. So I pulled it down to see what I had, and found I had lucked
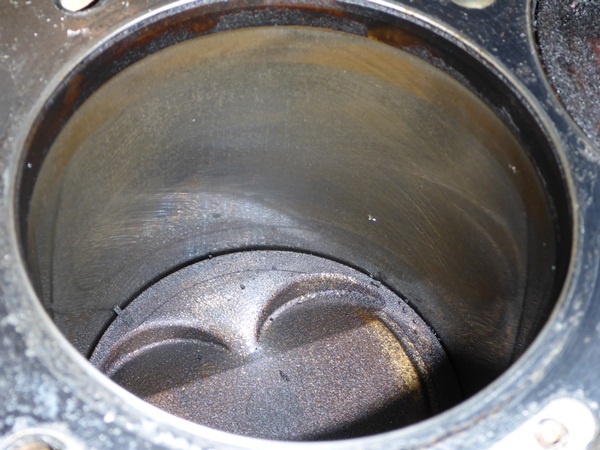
in with a 25 year old virgin This engine had never been violated... everything
was tight and unmarked. Hone marks still visible in the bore (after wiping off a bit
of surface rust), clean under the cam covers, cam journals like new, and the crank
pulley just slid off with a couple of gentle taps.
Super pleased with the condition of this engine, and it is kind of a shame to pull
it down. But stock just doesn't cut these days... and I have plans to do something
different this time. So next week the block goes out for a rebuild, and the head
goes for a cleanup and a few small mods.
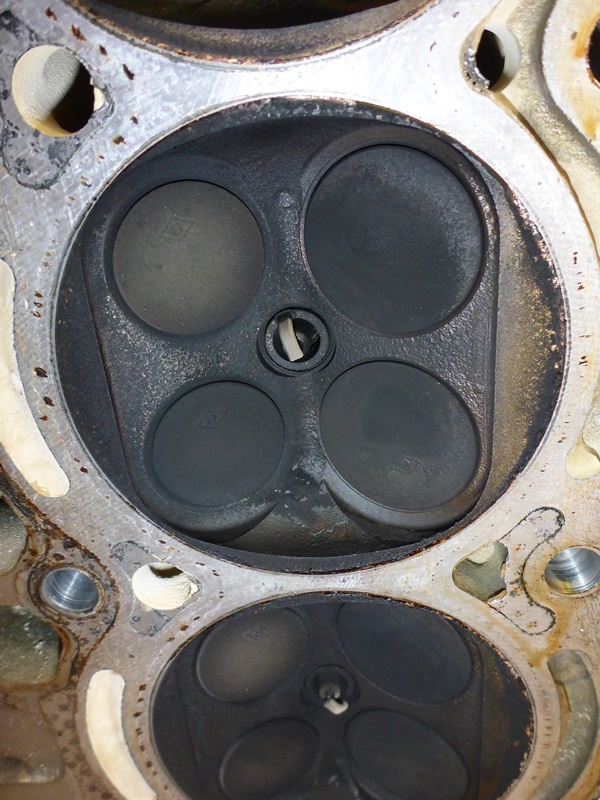
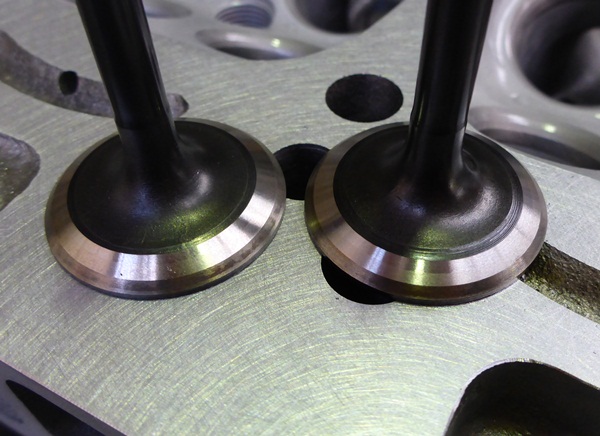
Got the head back with the chambers cleaned up....
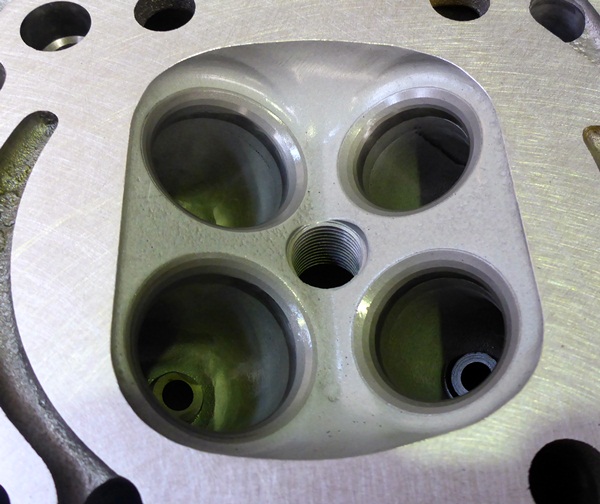
... and the intake valves backcut.
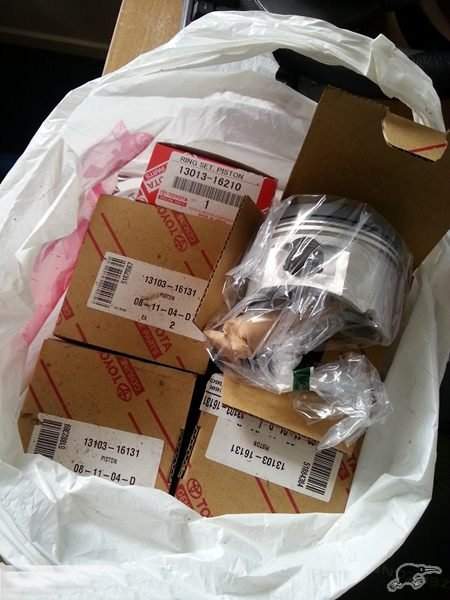
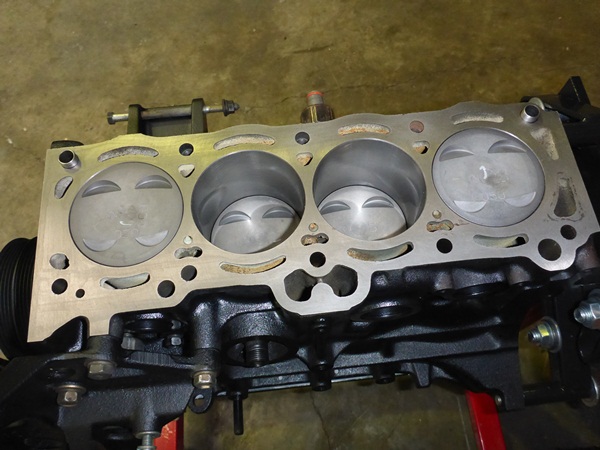
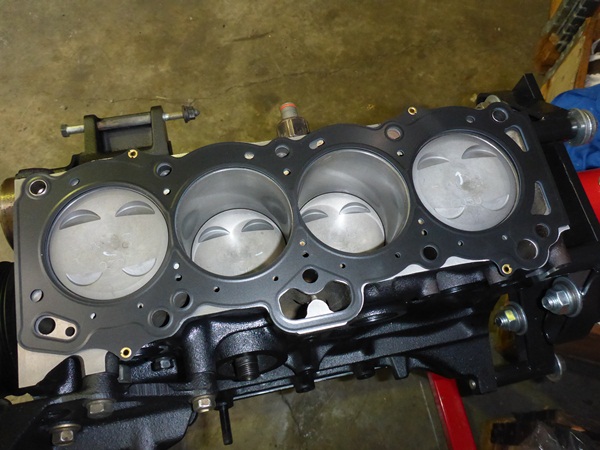
Got the block back all clean and tidy. Bored to 81.5mm to suit the GZE pistons,
decked just enough to clean up the surface, polished the crank and re-used the
original factory bearings as they were still in spec. The marks on the surface at
the far righthand side of the pic are rust stains; they can't be felt and the surface
is perfectly smooth.
Bought an Athena 1.0mm (0.040") thick x 83mm bore MLS head gasket as I couldn't
get an 82mm bore gasket off the shelf.
Used new OEM head bolts and torqued them to 75Nm (55ft-lbs). Had to take a punt
on this as I couldn't find any reliable specs for a MLS gasket used on a smallport.
Now I have to extract the TRD valve springs out of the old engine so I can swap the
springs and reassemble this head. I'll put the OEM springs back in the old engine
which is still in the car. Gonna use the rope trick and the new tool from Valvemaster.
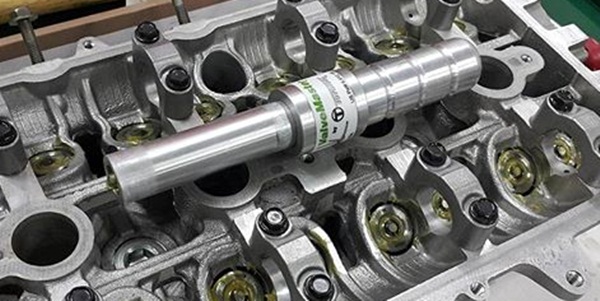
Well, as it turns out this tool does a pretty good job. I managed to swap the springs
over with the engine in the car, and then install the TRD springs on the head for the
new engine. One thing I did notice, is that the TRD springs are a bit more difficult to
compress compared to the factory springs. They need a really firm/quick shove on
the tool, and that can be a bit difficult to achieve leaning over the fender.
Working with the head on the bench at a good height is way easier. Makes fitting
stem seals a piece of cake as well, so I give this tool the thumbs up
Fitted the cams to the head with a bit of assembly lube on the cam journals and on
the cam lobes. Just a safety measure, as I will be turning the engine over by hand
until I see oil at the cams before firing it up.
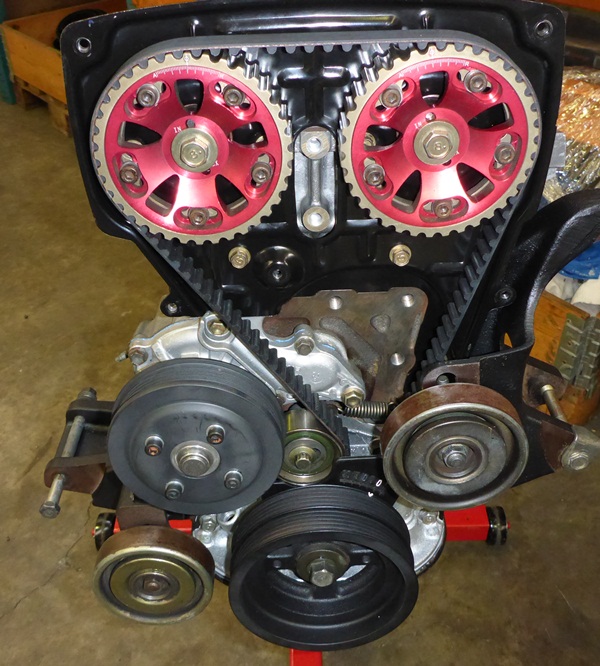
Put on a new timing belt with #1 cylinder at TDC and all the marks lined up, then
rotated it forward a couple of turns to set the tension.
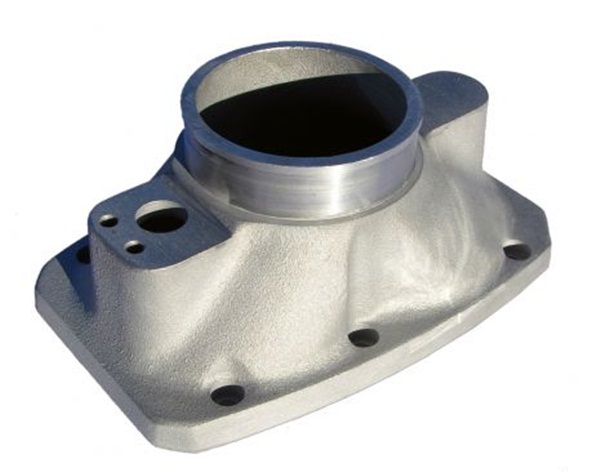
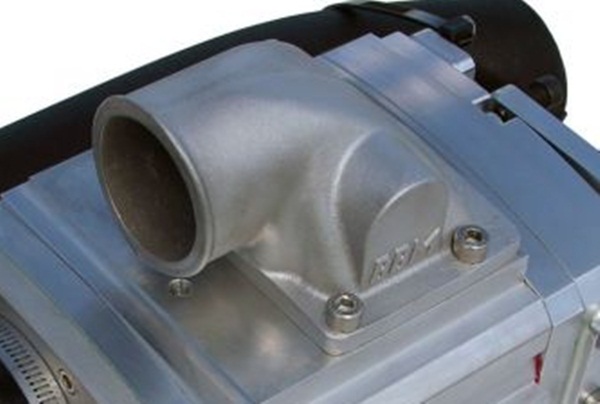
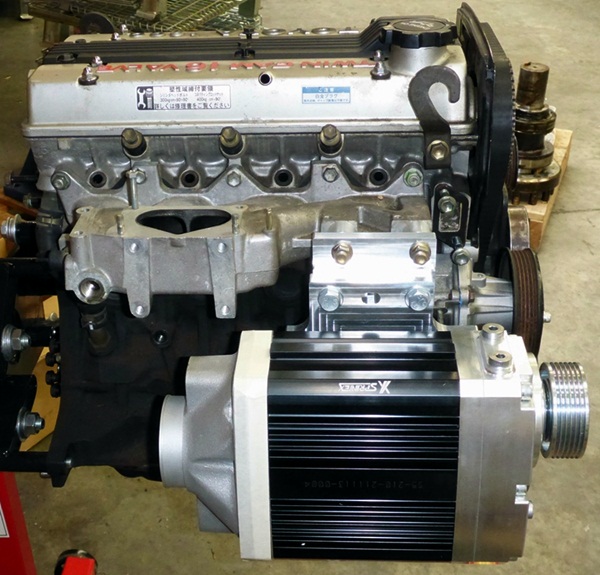
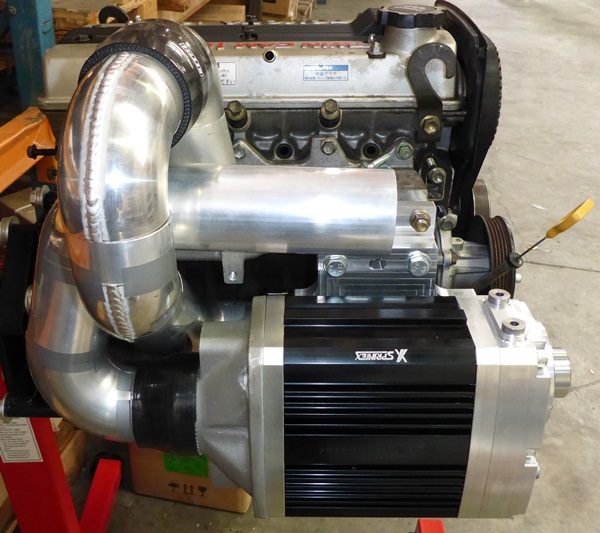
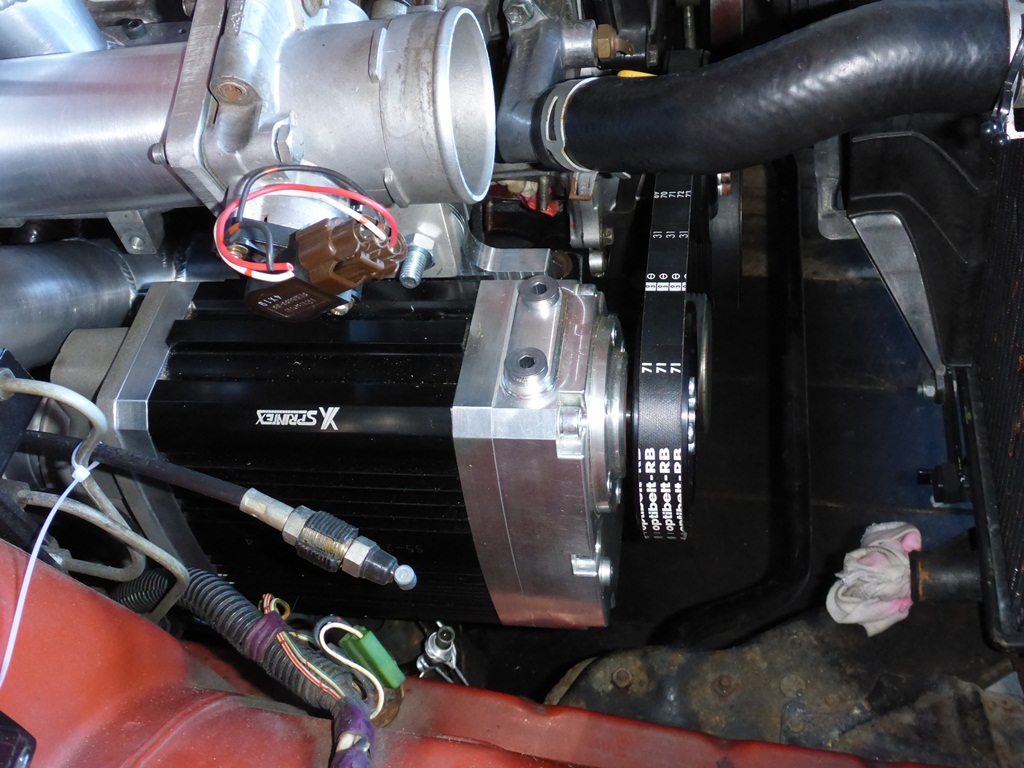
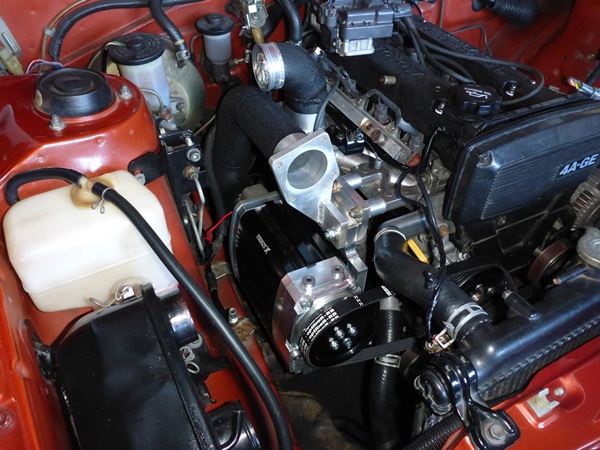
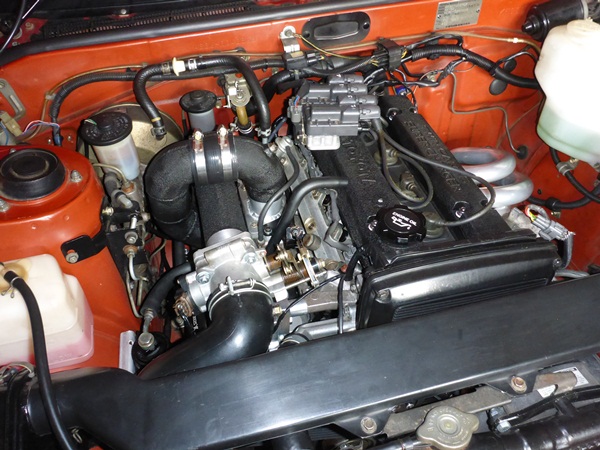
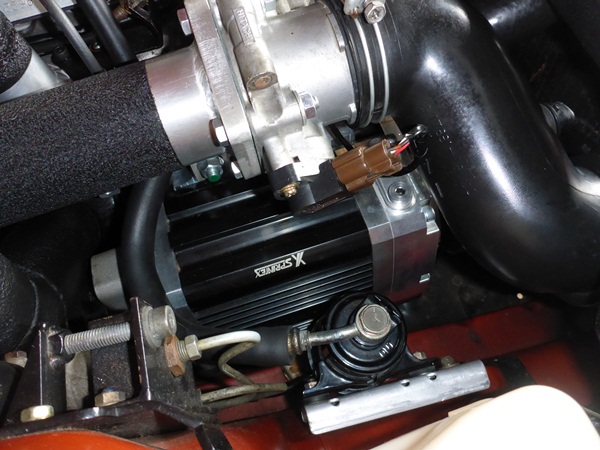
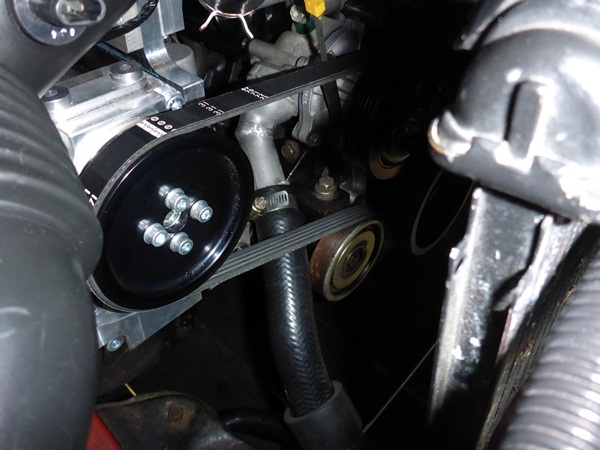
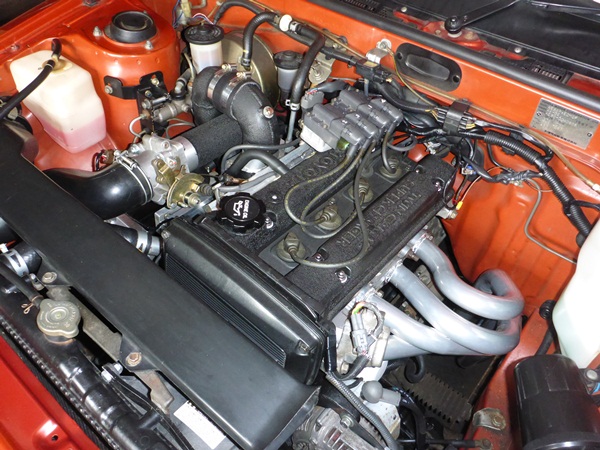
Gonna put my "Supercharger" cam covers on this engine, so it will look a bit like this
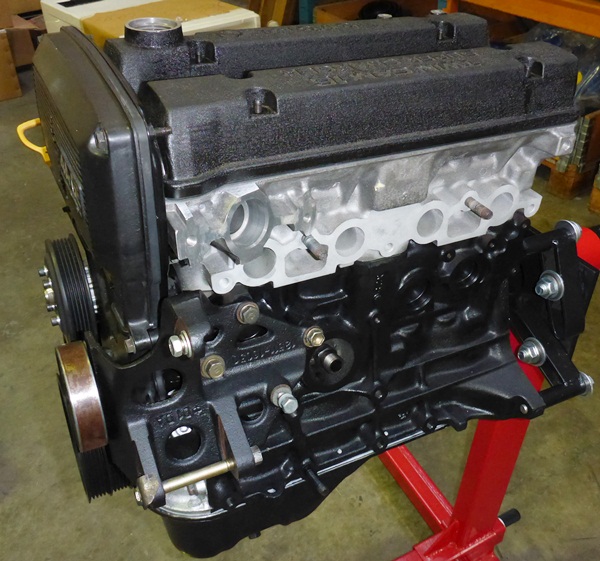
As you can see, I'm conservative in my color choices !!! Did what I hoped would be
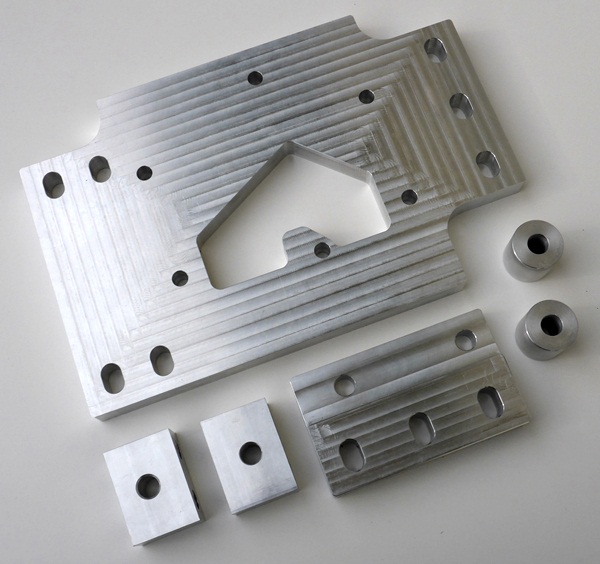
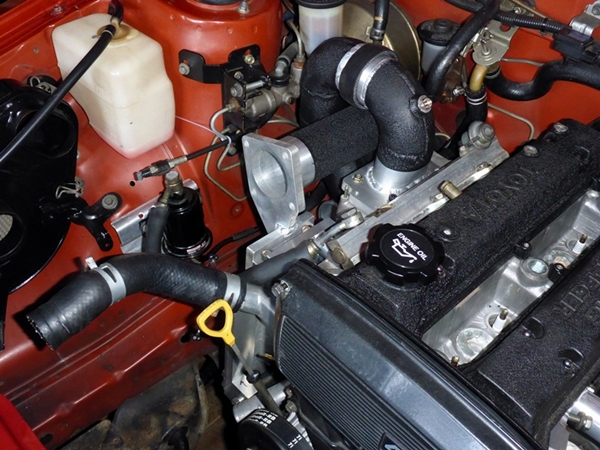
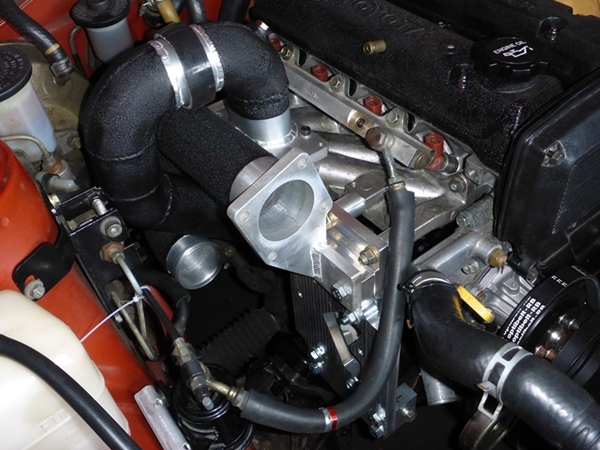
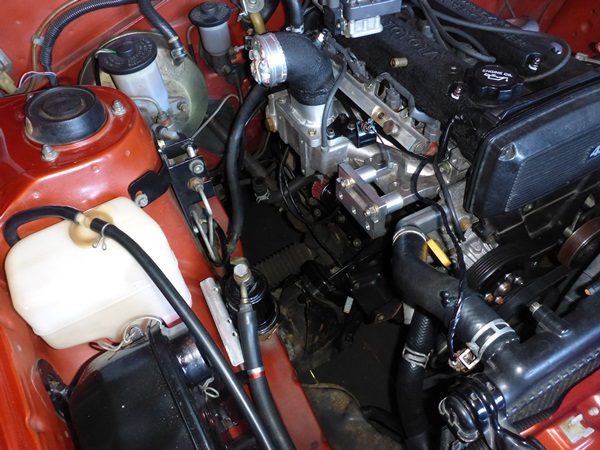
the final mockup to make sure all the pieces will fit...
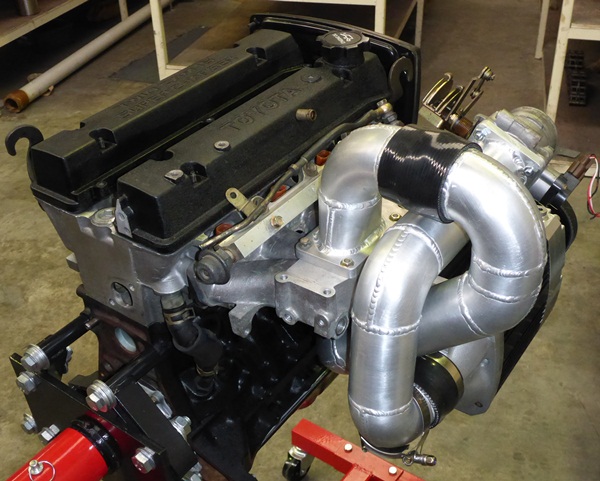
Found a belt alignment problem that will need fixing, but otherwise its looking solid.
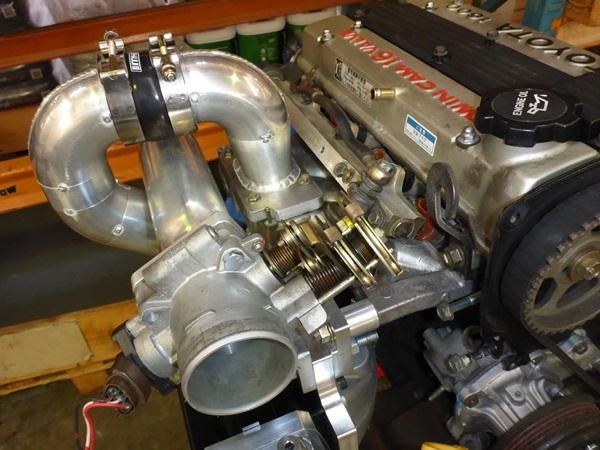
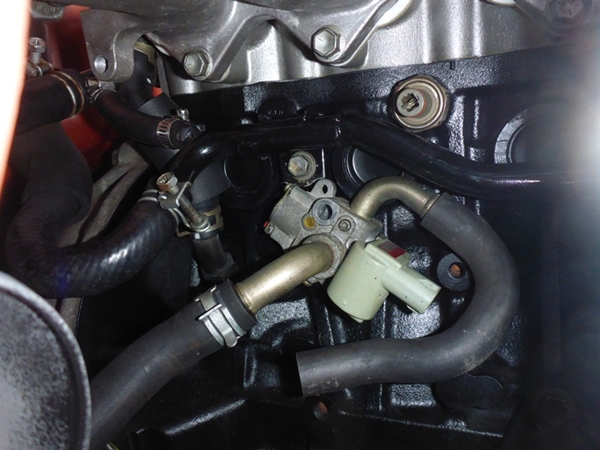
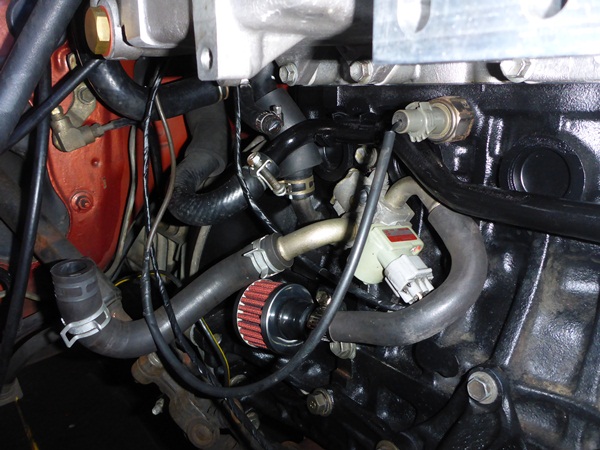
I'll probably use the smallport fuel rail as it is neater with the FPR at the rear, and I'll
need to find a new home for the IAT sensor as the ducting is in the way of the stock
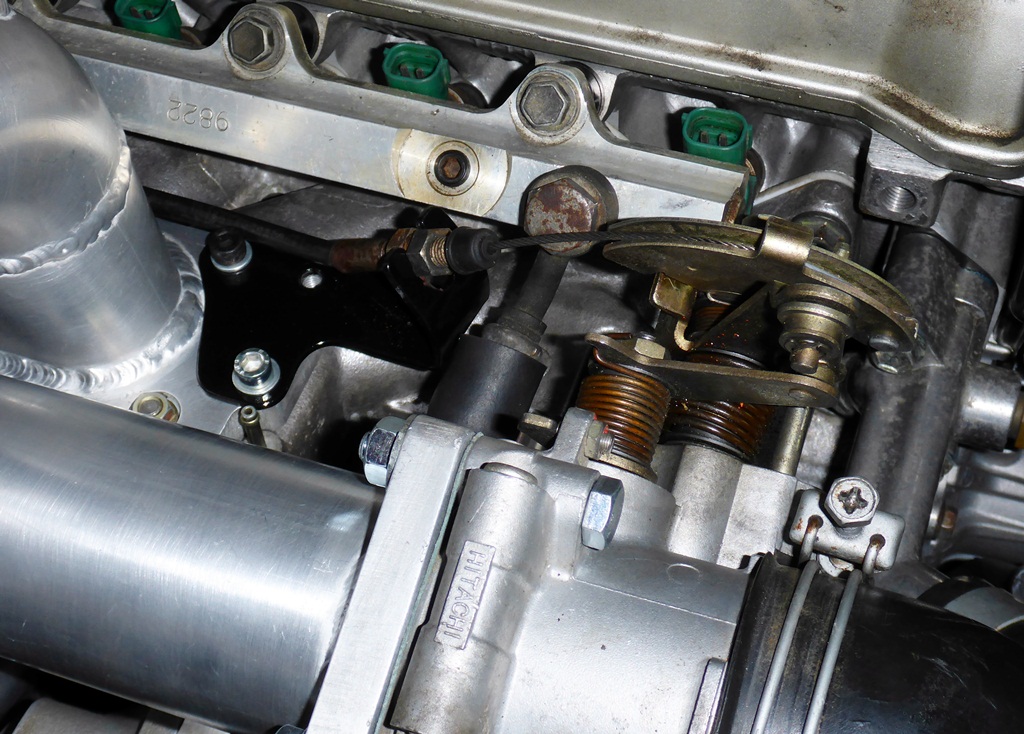
GZE location. Lots of small things to be sorted as they are discovered
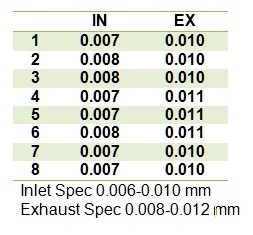
Checked the valve clearances as it is so much easier to do when the engine is out of
the car. The valves and seats were all in good condition so no valve grinding was done
and no shim adjustment was needed. The clearances are basically as set in the factory...
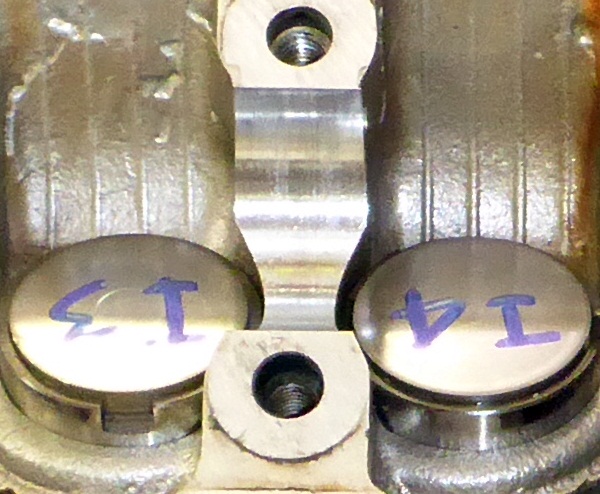
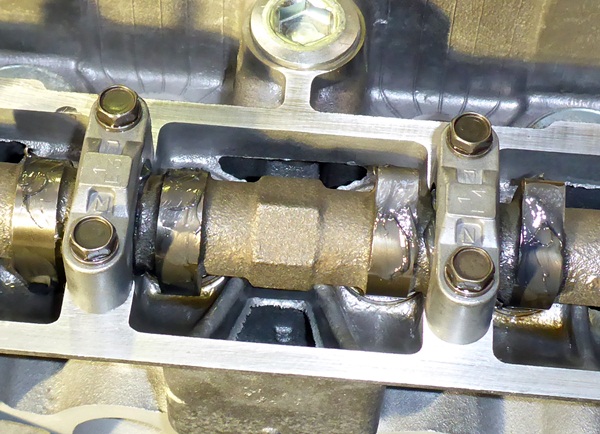
And here is a pic showing how to set the cams when reassembling the head...
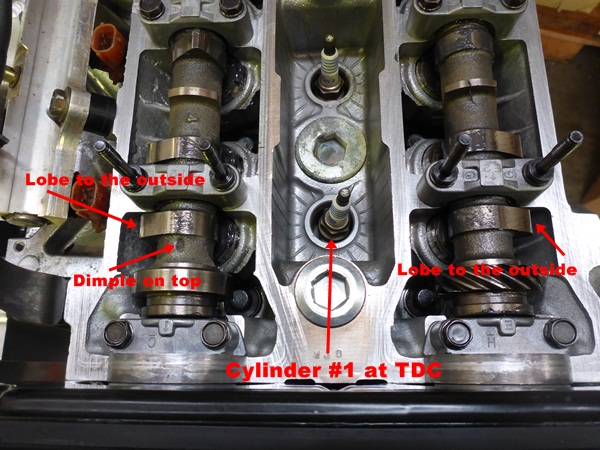
Put the engine at TDC on #1 cylinder then insert the cams with "ears out" on #1 cylinder.
The lobes on the inlet and exhaust cams should point away from each other towards the
outside of the head. The cams will lay in easily and you will do the least amount of work
tightening down the cam caps.
Cheers... jondee86
because it was the same engine that I already had in my car, and thought it would
be nice to have a spare. The engine came with manifolds and all accessories, so
I stripped those off and sold them. Ended up with a free longblock
Put that into dry storage and more or less forgot about it until I decided that it was
time for a new build. So I pulled it down to see what I had, and found I had lucked
in with a 25 year old virgin
was tight and unmarked. Hone marks still visible in the bore (after wiping off a bit
of surface rust), clean under the cam covers, cam journals like new, and the crank
pulley just slid off with a couple of gentle taps.
Super pleased with the condition of this engine, and it is kind of a shame to pull
it down. But stock just doesn't cut these days... and I have plans to do something
different this time. So next week the block goes out for a rebuild, and the head
goes for a cleanup and a few small mods.
Got the head back with the chambers cleaned up....
... and the intake valves backcut.
Got the block back all clean and tidy. Bored to 81.5mm to suit the GZE pistons,
decked just enough to clean up the surface, polished the crank and re-used the
original factory bearings as they were still in spec. The marks on the surface at
the far righthand side of the pic are rust stains; they can't be felt and the surface
is perfectly smooth.
Bought an Athena 1.0mm (0.040") thick x 83mm bore MLS head gasket as I couldn't
get an 82mm bore gasket off the shelf.
Used new OEM head bolts and torqued them to 75Nm (55ft-lbs). Had to take a punt
on this as I couldn't find any reliable specs for a MLS gasket used on a smallport.
Now I have to extract the TRD valve springs out of the old engine so I can swap the
springs and reassemble this head. I'll put the OEM springs back in the old engine
which is still in the car. Gonna use the rope trick and the new tool from Valvemaster.
Well, as it turns out this tool does a pretty good job. I managed to swap the springs
over with the engine in the car, and then install the TRD springs on the head for the
new engine. One thing I did notice, is that the TRD springs are a bit more difficult to
compress compared to the factory springs. They need a really firm/quick shove on
the tool, and that can be a bit difficult to achieve leaning over the fender.
Working with the head on the bench at a good height is way easier. Makes fitting
stem seals a piece of cake as well, so I give this tool the thumbs up
Fitted the cams to the head with a bit of assembly lube on the cam journals and on
the cam lobes. Just a safety measure, as I will be turning the engine over by hand
until I see oil at the cams before firing it up.
Put on a new timing belt with #1 cylinder at TDC and all the marks lined up, then
rotated it forward a couple of turns to set the tension.
Gonna put my "Supercharger" cam covers on this engine, so it will look a bit like this
As you can see, I'm conservative in my color choices !!! Did what I hoped would be
the final mockup to make sure all the pieces will fit...
Found a belt alignment problem that will need fixing, but otherwise its looking solid.
I'll probably use the smallport fuel rail as it is neater with the FPR at the rear, and I'll
need to find a new home for the IAT sensor as the ducting is in the way of the stock
GZE location. Lots of small things to be sorted as they are discovered
Checked the valve clearances as it is so much easier to do when the engine is out of
the car. The valves and seats were all in good condition so no valve grinding was done
and no shim adjustment was needed. The clearances are basically as set in the factory...
And here is a pic showing how to set the cams when reassembling the head...
Put the engine at TDC on #1 cylinder then insert the cams with "ears out" on #1 cylinder.
The lobes on the inlet and exhaust cams should point away from each other towards the
outside of the head. The cams will lay in easily and you will do the least amount of work
tightening down the cam caps.
Cheers... jondee86