I followed the forumla D rulebook when making my cage, i dont remember the exact dimensions that it stated, but it wasnt a specific size they needed to be, only a minimum and maximum surface area, which all of mine meet.
and yes, for FD tech they would drill a hole in each pipe to measure wall thickness, generally its a 3/16" hole.
Red Death Revival: Beams
Re: Red Death Revival: Beams
Cool, thanks for sharing, I appreciate it.
Everything looks great man.
Everything looks great man.
Re: Red Death Revival: Beams
thanks! hopefully i'll have more updates soon.
-
yellowsnow4free
- Club4AG Enthusiast
- Posts: 185
- Joined: Thu Jan 10, 2013 10:55 am
Re: Red Death Revival: Beams
LongGrain wrote:

Holy balls Batman!!!
This is impressive; inspiring even.
Once day I'd love to give my car an overhaul / restoration like this; keep up the good work
Re: Red Death Revival: Beams
thanks dudes.
-
yellowsnow4free
- Club4AG Enthusiast
- Posts: 185
- Joined: Thu Jan 10, 2013 10:55 am
Re: Red Death Revival: Beams
Hey LongGrain, I didn't think to ask this, but did you do the bodywork on the passenger side rear quarter yourself or did a shop do it?
It looks great My car needs a little work in that area too, and I was curious if you have any tips / advice / whatever.
Thanks!
(Also, can I ask where you located the donor panels?)
It looks great
Thanks!
(Also, can I ask where you located the donor panels?)
Re: Red Death Revival: Beams
my car is at a shop for all the fab work. I cant weld.
the donor panels came from two cars. the first one I was able to harvest the entire quarter panel, this car was in a junkyard.
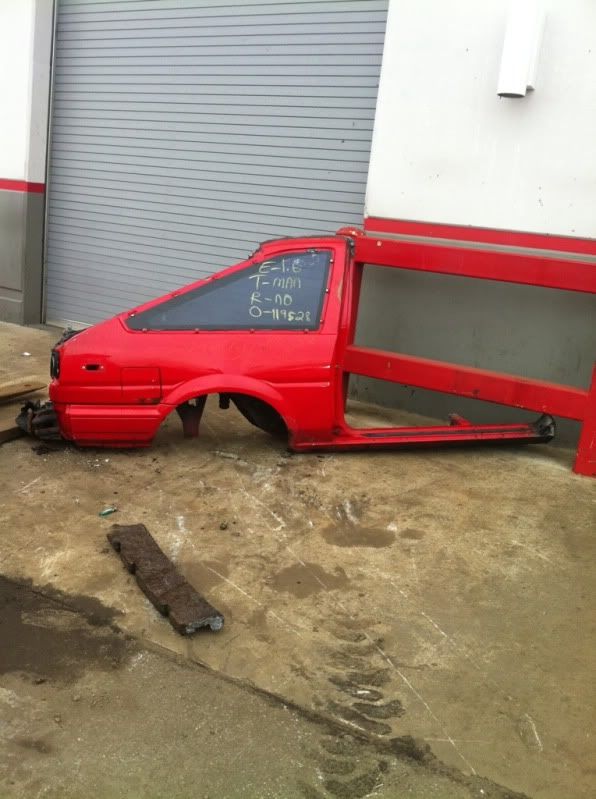
but that one sat for a long time, once in my possession while waiting to have the work done, and ended up getting rusty, so only a small part of it was used.
Then instead we used parts from this car (on the right), generally donated after a terrible front end drifting crash. The rear end of this car is now a couch.
Re: Red Death Revival: Beams
here are some of my most recent purchases
/gay race car parts.
Going down with satty this weekend to put in work. **** waiting around.


/gay race car parts.
Going down with satty this weekend to put in work. **** waiting around.
Re: Red Death Revival: Beams
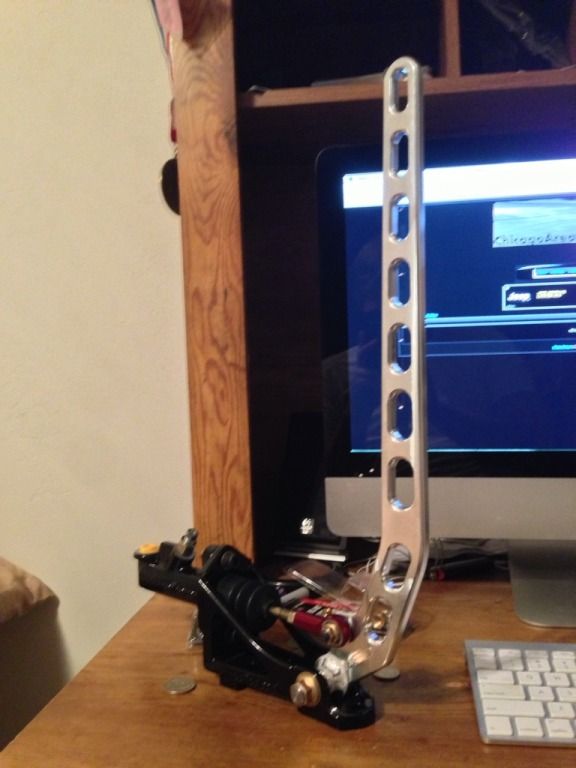
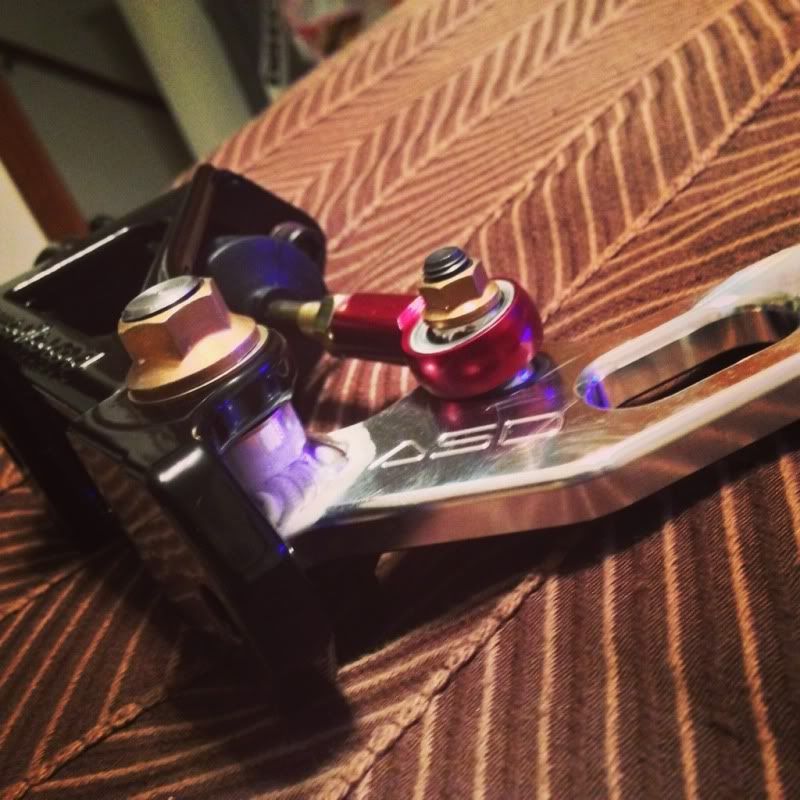
Nice man, I have that ASD hydy brake in my favorites. That'll be a summer time purchase or maybe sooner.
Where are you mounting it? I'm trying to figure that out now.
Where are you mounting it? I'm trying to figure that out now.
Re: Red Death Revival: Beams
^^^^ I'm not sure yet, we have to mount the engine/trans first so I know exactly where my shifter is going to be before I can think about where the ebrake is going to go.
Updates from this weekend.
Started off answering a desperate cry for help. My bro (satty) needed a stout towing vehicle to move some heavy crap.
Honda fit to the rescue, hauled this 600lb 2jz and a trans without even knowing it was there. This thing is awesome at hauling engines.
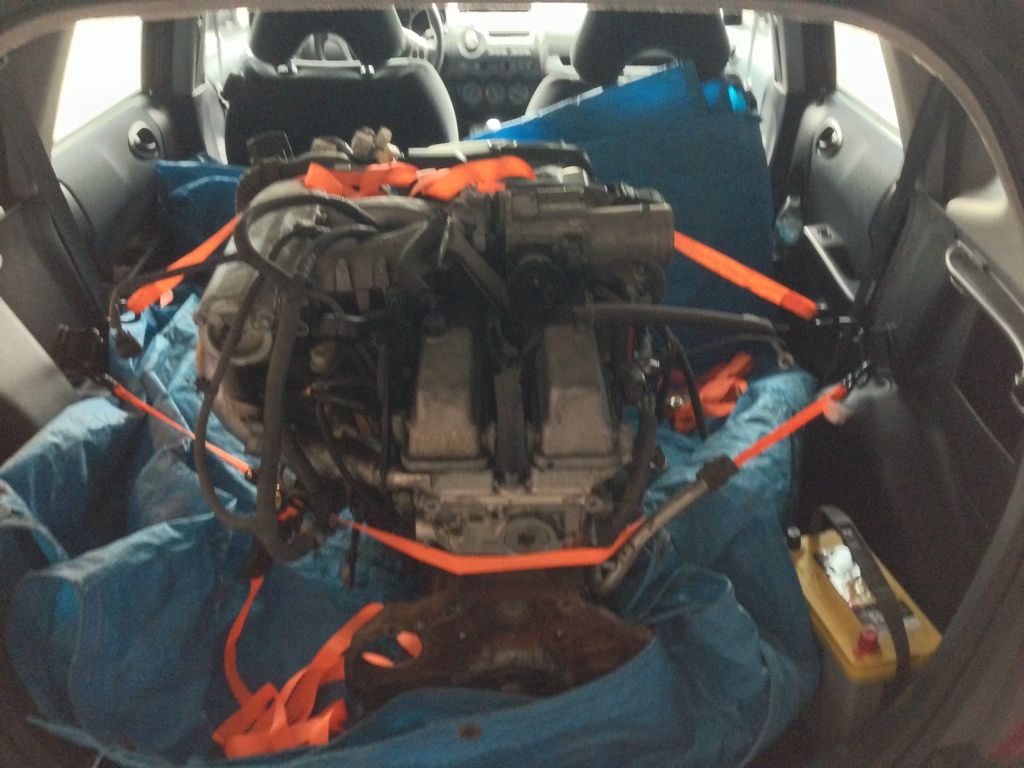
Got to DW and my engine was in the bay taking measurements and getting mocked up for mounts.
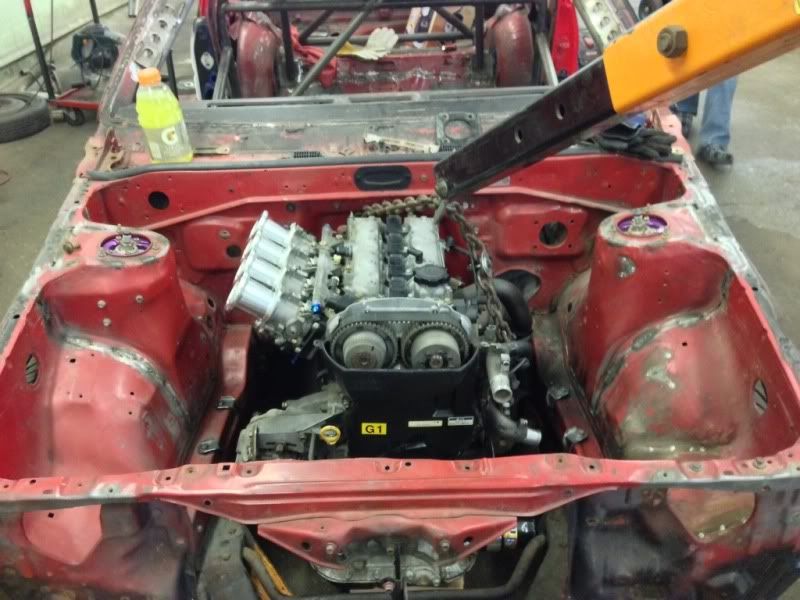
I dont know why everyone has such an issue fitting the motor and being able to close the hood. setting it on the subframe revealed that it should not take much work, but there was some oil pan clearancing that could be done to help out.
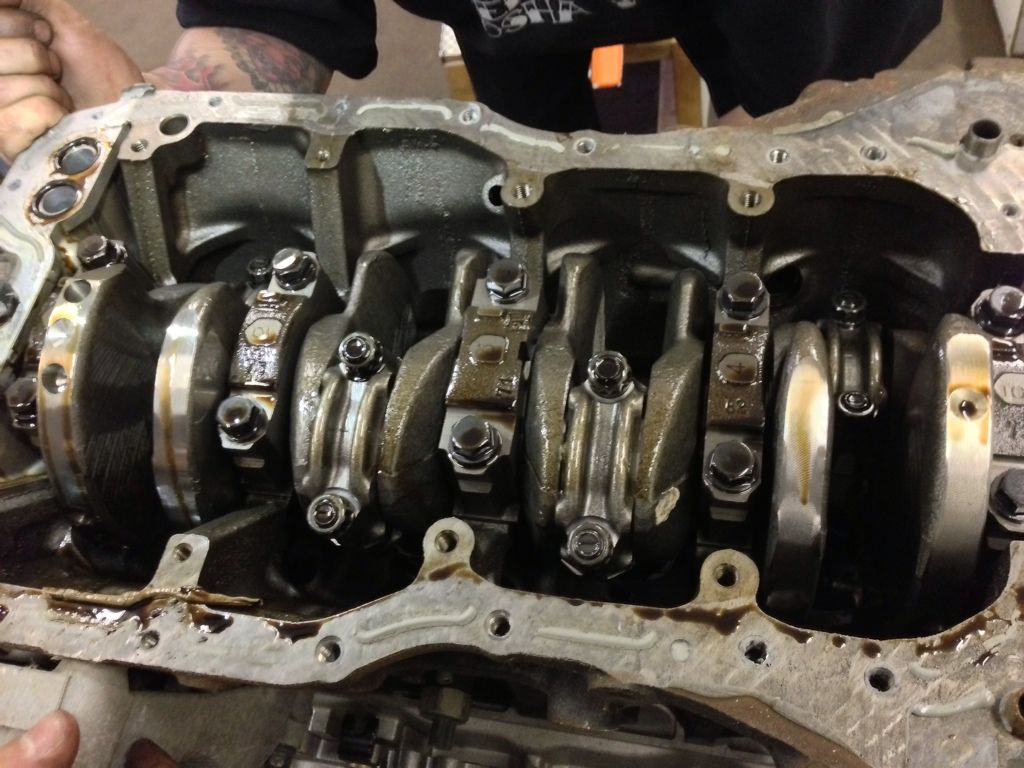
Upon taking the lower pan off, I was relieved to see that the engine looked brand new inside, not even oil stained.
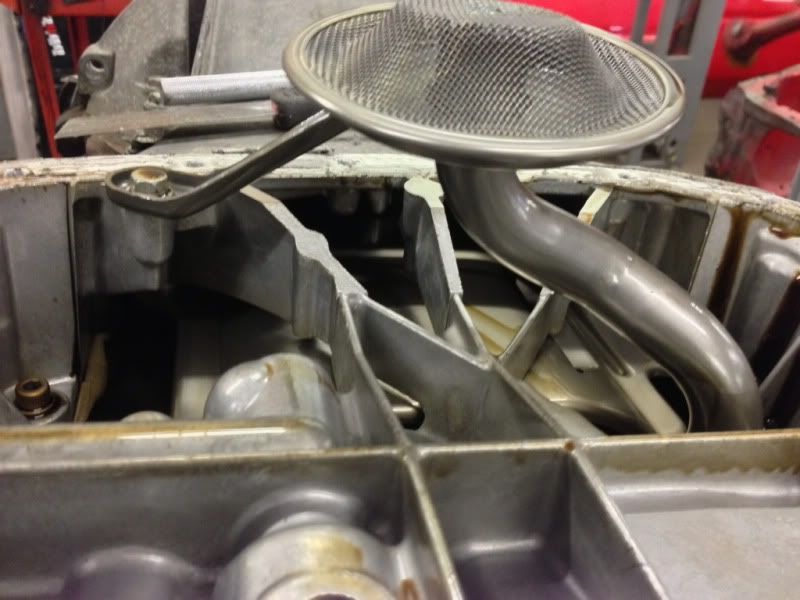
Then off came the upper pan. An equally brand new looking rotating assembly.
I did not take a "before" picture of the oil pan, so here is one from google.

you can see on the bell housing side where it bubbles up to match the transmission. This serves no purpose really other than to probably add some bracing.
Somewhere in here satty's retarded cousin showed up to pay vinny to put aftermarket wheels on his car, and upon his first test drive, he made it about a block from the shop and tried to get his ken block on, it worked.
So that was a minor setback for the day, having only a honda fit (with a 2j in it) and a jetta to try to pull it out with. (succeeded though)
And here is a cool picture of another customer's supra at vinny's, thing is COOL.
my front suspension was back on after lowering it another inch so i set my fender on it and its pretty low (mind you, this is with no engine, or anything else in the bay.)
back to the oil pan. we chopped the rear part off, leaving the trans mating flange and welded in a plate (not really necessary, but it will stop dirt and grime from getting in the bell housing. Vinny did not want me to take a picture of this because it was not finished here, but I did anyway.
And then Ironically, I forgot to take a picture of when it was finished, so that's all you get.
Here is a cool picture of the top of the upper pan, its very race car like.
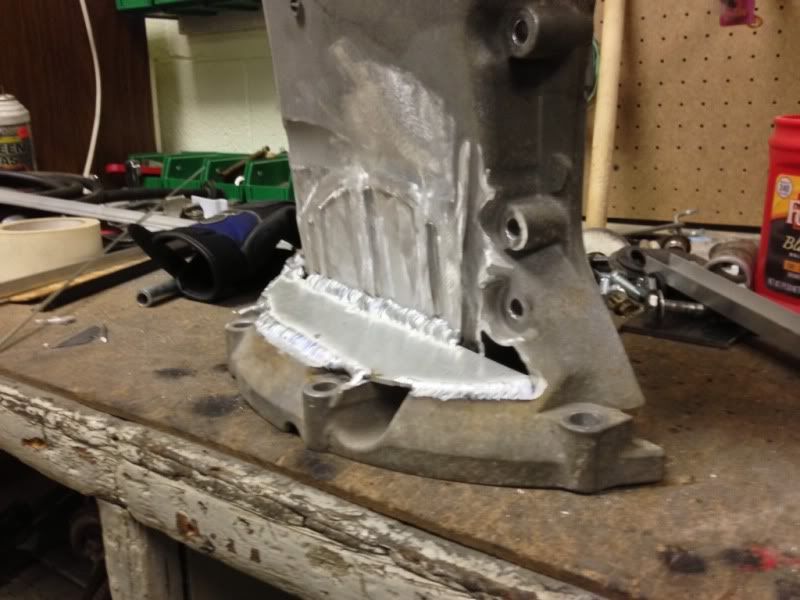
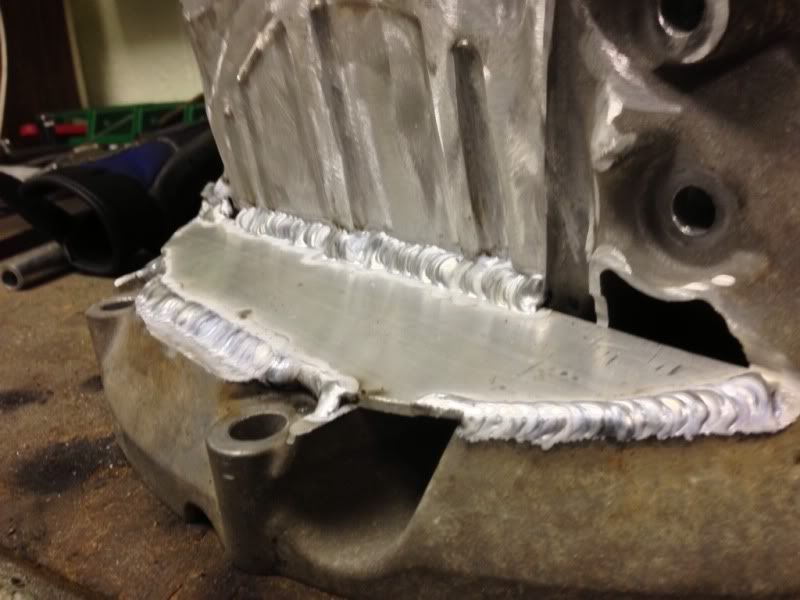
Meanwhile satty was plasma cutting and grinding on my subframe. and came up with this.
it looks very nice.
It will look like this when it is finished.
We made the parts for the mounts too, now its just a matter of assembling the engine, bolting on the trans and putting it back in the car to tack the mounts in place for final welding.
we also did some other things like cut out my shifter hole to (hopefully) accomodate the long ass 6sp trans, it might need to go even further than where we cut it, but we'll see.
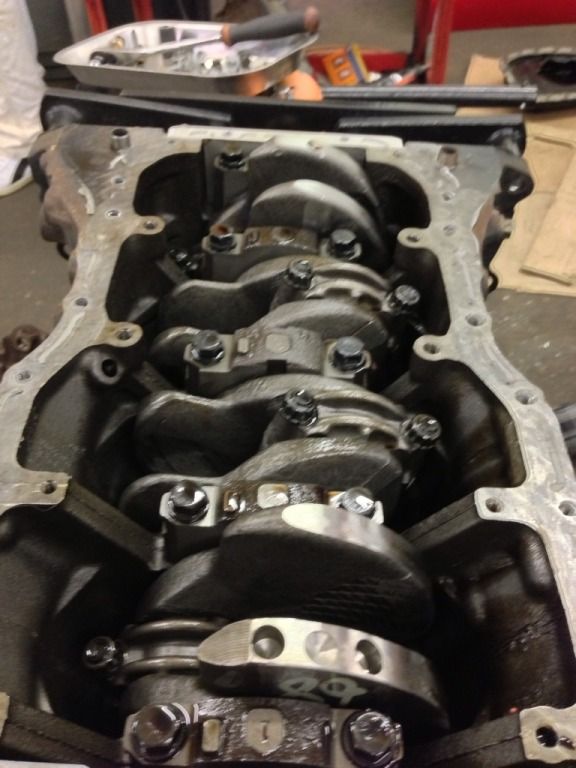
Moral of the story is the beams 3s is built like a brick **** house (whatever that means). Thing has oil squirters even though it is not turbo, has huge oversized beefy rods, crank is machined and balanced, Oil pan is reminiscent of a dry sump configuration straight from the factory with tons of bracing, Not to mention the 11.5:1 compression, full titanium valvetrain, etc in the top end.
Updates from this weekend.
Started off answering a desperate cry for help. My bro (satty) needed a stout towing vehicle to move some heavy crap.
Honda fit to the rescue, hauled this 600lb 2jz and a trans without even knowing it was there. This thing is awesome at hauling engines.

Got to DW and my engine was in the bay taking measurements and getting mocked up for mounts.

I dont know why everyone has such an issue fitting the motor and being able to close the hood. setting it on the subframe revealed that it should not take much work, but there was some oil pan clearancing that could be done to help out.
Upon taking the lower pan off, I was relieved to see that the engine looked brand new inside, not even oil stained.

Then off came the upper pan. An equally brand new looking rotating assembly.


I did not take a "before" picture of the oil pan, so here is one from google.
you can see on the bell housing side where it bubbles up to match the transmission. This serves no purpose really other than to probably add some bracing.
Somewhere in here satty's retarded cousin showed up to pay vinny to put aftermarket wheels on his car, and upon his first test drive, he made it about a block from the shop and tried to get his ken block on, it worked.

So that was a minor setback for the day, having only a honda fit (with a 2j in it) and a jetta to try to pull it out with. (succeeded though)
And here is a cool picture of another customer's supra at vinny's, thing is COOL.

my front suspension was back on after lowering it another inch so i set my fender on it and its pretty low (mind you, this is with no engine, or anything else in the bay.)

back to the oil pan. we chopped the rear part off, leaving the trans mating flange and welded in a plate (not really necessary, but it will stop dirt and grime from getting in the bell housing. Vinny did not want me to take a picture of this because it was not finished here, but I did anyway.


And then Ironically, I forgot to take a picture of when it was finished, so that's all you get.
Here is a cool picture of the top of the upper pan, its very race car like.
Meanwhile satty was plasma cutting and grinding on my subframe. and came up with this.

it looks very nice.
It will look like this when it is finished.
We made the parts for the mounts too, now its just a matter of assembling the engine, bolting on the trans and putting it back in the car to tack the mounts in place for final welding.
we also did some other things like cut out my shifter hole to (hopefully) accomodate the long ass 6sp trans, it might need to go even further than where we cut it, but we'll see.
Moral of the story is the beams 3s is built like a brick **** house (whatever that means). Thing has oil squirters even though it is not turbo, has huge oversized beefy rods, crank is machined and balanced, Oil pan is reminiscent of a dry sump configuration straight from the factory with tons of bracing, Not to mention the 11.5:1 compression, full titanium valvetrain, etc in the top end.
-
grappletech

- Club4AG Expert
- Posts: 344
- Joined: Sat Jan 12, 2013 12:13 pm
Re: Red Death Revival: Beams
As far as the mounts are concerned. how did you do it? did you not use subframe spacers? Or did you just use the circular mount to space the engine down?
87 GTS Coupe stock and Super Duper Clean
87 GTS Coupe Beams 3sge (under construction cuz I'm slow and lazy and broke-FML)
87 SR5 Coupe Shell. (Sold)
86 SR5 Hatch Shell
86 GT-SR5 Coupe 20v Swap
87 GTS Coupe Beams 3sge (under construction cuz I'm slow and lazy and broke-FML)
87 SR5 Coupe Shell. (Sold)
86 SR5 Hatch Shell
86 GT-SR5 Coupe 20v Swap
Re: Red Death Revival: Beams
I got a beams in my 86. Makin new mounts for it soon since it sits to low for my liking.
You can shorten the shifter 2" closer towards stock position if you didn't know. That's what I did. It's easy. 4bolts, and 1 pin. Takes 5min. If you want I can send you the link.
Good luck on your awesome build!
You can shorten the shifter 2" closer towards stock position if you didn't know. That's what I did. It's easy. 4bolts, and 1 pin. Takes 5min. If you want I can send you the link.
Good luck on your awesome build!
-
MisterJerk
- Club4AG Pro
- Posts: 582
- Joined: Wed Jan 09, 2013 6:10 pm
Re: Red Death Revival: Beams
post the link.. inquiring minds want to know.
RTFM!!!!!!!!!!! --> http://www.aeu86.org/technical/
Re: Red Death Revival: Beams
Normal
Removed
Flipped.
Not my pictures, pretty easy. Copy and pasted from Paul's awesome build.
Here's my shitty build
http://www.dorikaze.net/showthread.php? ... ause/page2
-
MisterJerk
- Club4AG Pro
- Posts: 582
- Joined: Wed Jan 09, 2013 6:10 pm
Re: Red Death Revival: Beams

This made me LOL..
Nice coupe!
RTFM!!!!!!!!!!! --> http://www.aeu86.org/technical/
Re: Red Death Revival: Beams
its a hatch.
yes i knew you could flip the shifter, did that the day I brought it home from MO.
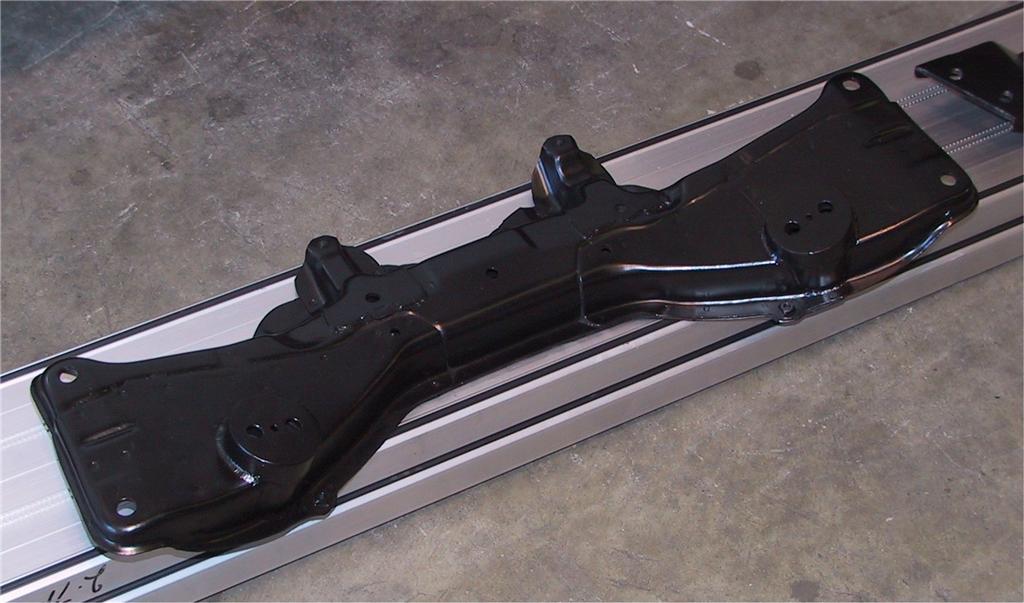
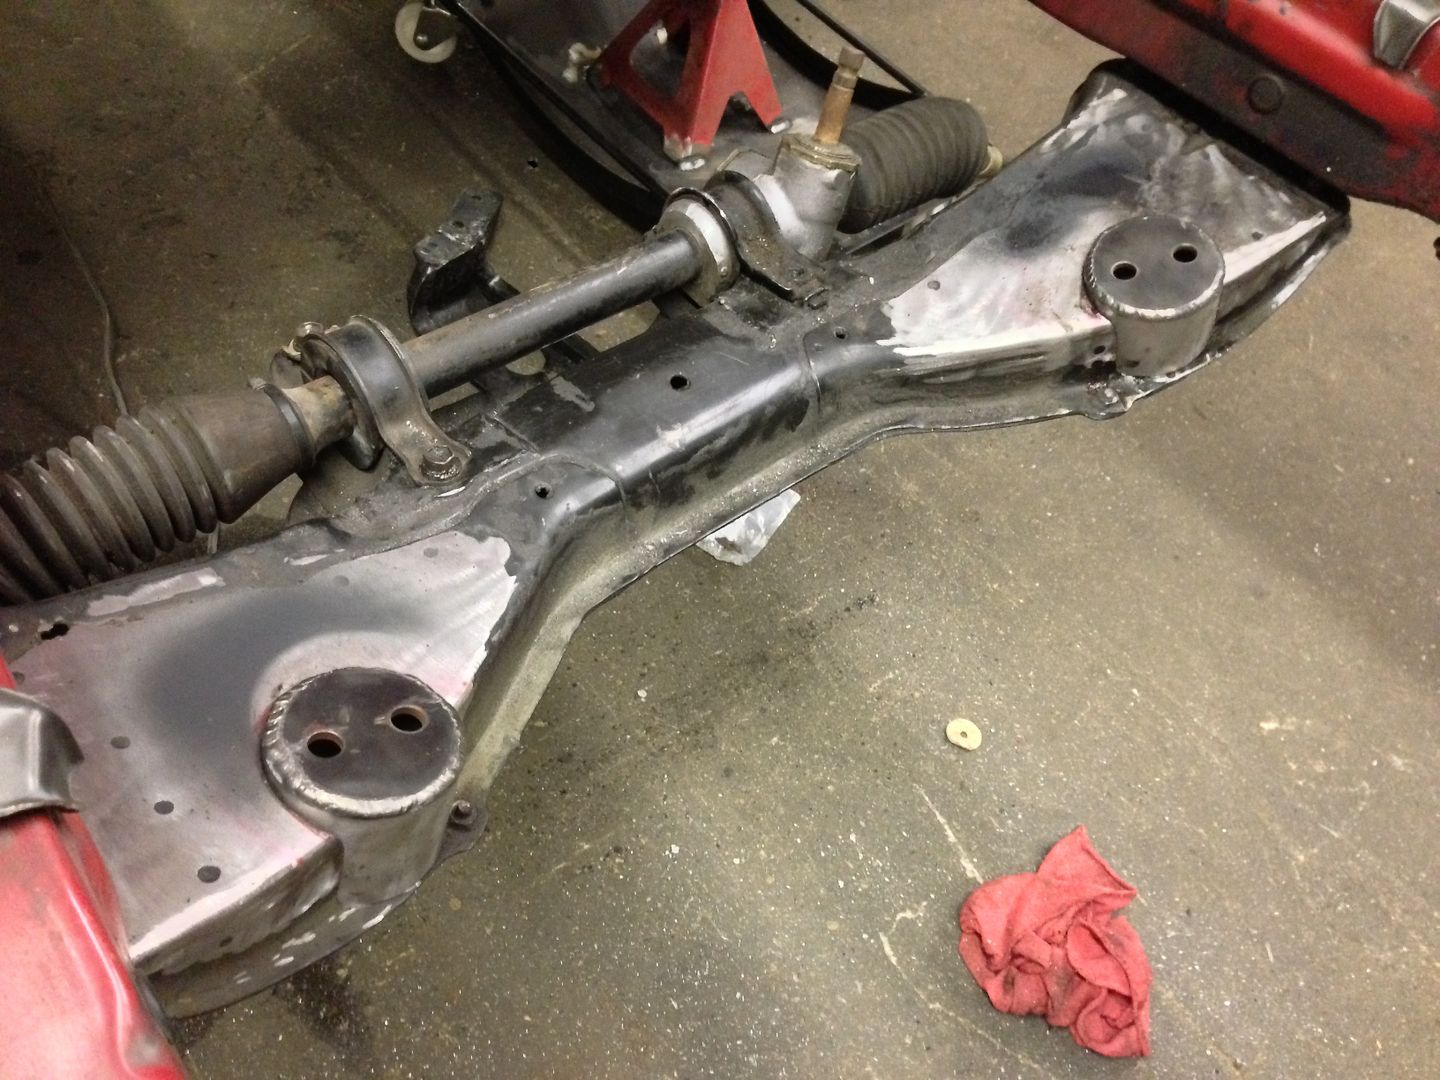
with the mounts we are making we should not have to space the subframe at all. If we do it should not be more than 5 or 10mm for hood clearance.
i'm using the stock beams mounts and making pads on the OEM subframe for them to drop into, you can see how those are made on that black subframe picture I posted.
yes i knew you could flip the shifter, did that the day I brought it home from MO.
with the mounts we are making we should not have to space the subframe at all. If we do it should not be more than 5 or 10mm for hood clearance.
i'm using the stock beams mounts and making pads on the OEM subframe for them to drop into, you can see how those are made on that black subframe picture I posted.
Re: Red Death Revival: Beams
I also used stock altezza mounts but inserted a metal sleeve in that the altezza mounts bolt to.
It's close without spacing the crossmember. It's either space it, or trim underneath your hood. Everyone that i seen who has done the swap has spaced the crossmember, or cut tranny tunnel and firewall. Except assassin10000. But he is running W58 and he trimmed the bottom of his hood.
Good luck man. Nice build.
Re: Red Death Revival: Beams
i'm trying my best to do this without spacing, I dont want to ruin my suspension geometry/roll center by placing huge blocks between my subframe and the car. assassin did his without spacing, and the guy that i'm modeling my mounts/subframe off of (billzilla) only had to space his 10mm or less. to make the engine fit. If they did it, so can I.
like I said, if I have to space it a little, then whatever, but i'm giong to try to get it done and keep the LCA's in the stock location.
like I said, if I have to space it a little, then whatever, but i'm giong to try to get it done and keep the LCA's in the stock location.
Re: Red Death Revival: Beams
You could always get RCA's to drop your lcontrol arms. That's what I did. I use to run 40mm now I got 50mm
It's better not to drop it though.
I will stay tuned and see what you do.
It's better not to drop it though.
I will stay tuned and see what you do.
Re: Red Death Revival: Beams
I already have those too..
-
grappletech
- Club4AG Expert
- Posts: 344
- Joined: Sat Jan 12, 2013 12:13 pm
Re: Red Death Revival: Beams
ok...i was just wondering with the subframe. I will be experimenting with fwe things... I like the cleanliness of yours!!!
87 GTS Coupe stock and Super Duper Clean
87 GTS Coupe Beams 3sge (under construction cuz I'm slow and lazy and broke-FML)
87 SR5 Coupe Shell. (Sold)
86 SR5 Hatch Shell
86 GT-SR5 Coupe 20v Swap
87 GTS Coupe Beams 3sge (under construction cuz I'm slow and lazy and broke-FML)
87 SR5 Coupe Shell. (Sold)
86 SR5 Hatch Shell
86 GT-SR5 Coupe 20v Swap
Re: Red Death Revival: Beams
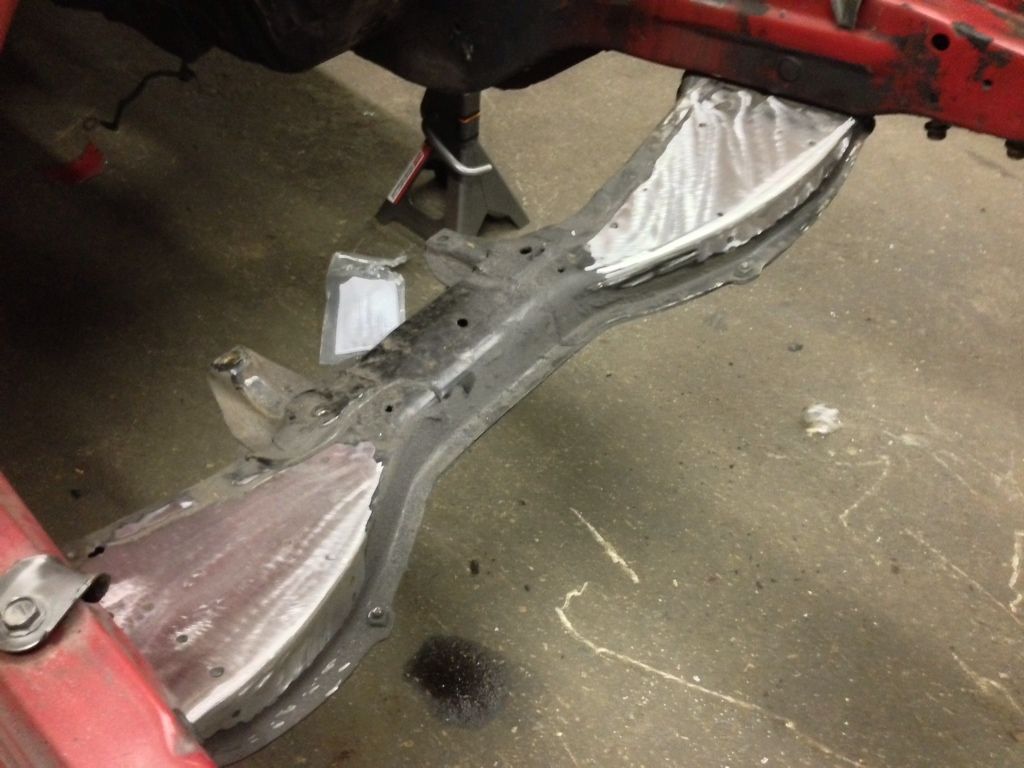
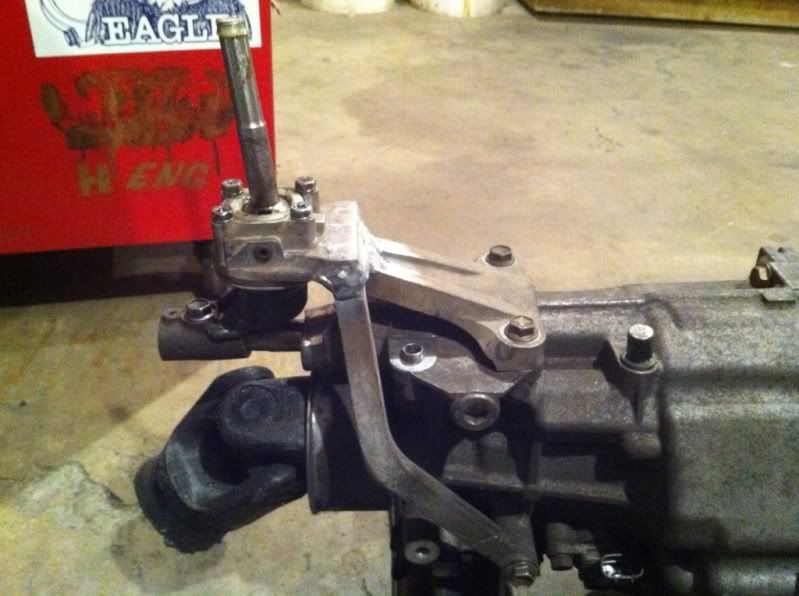
This thing was scraped up, almost scraped through in one spot (i think it was just from being dragged on the foor at some point)

3/16" skid plate

and


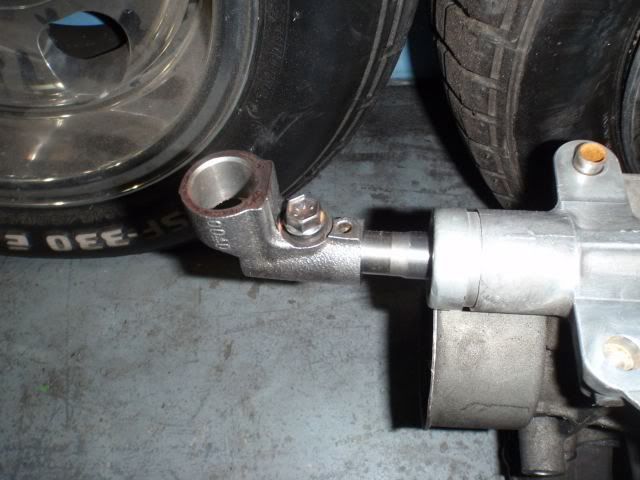
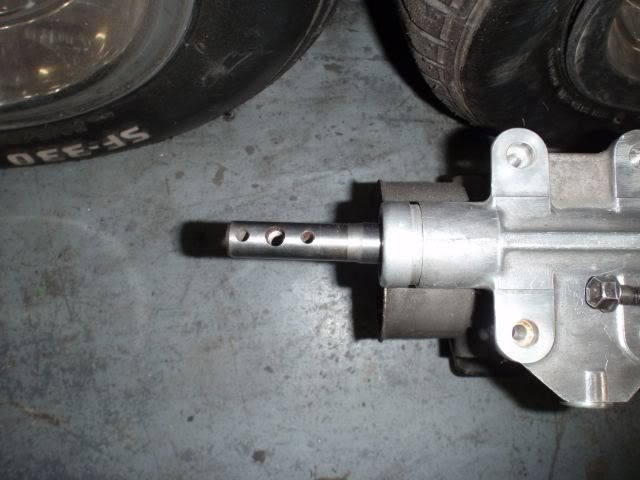
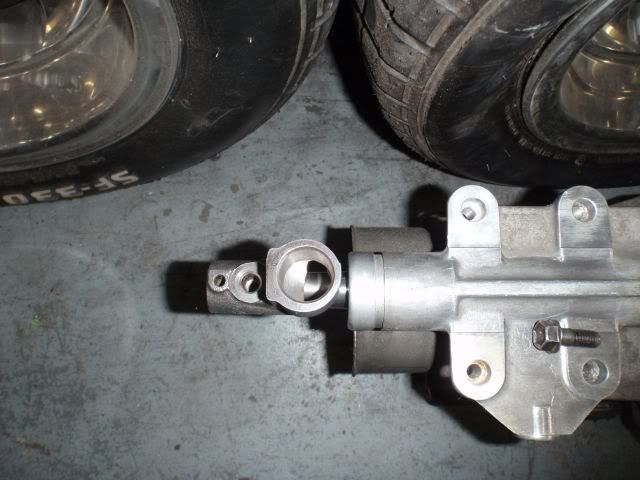
shifter bracket is not bolted on properly in this photo, it will be about 2" further forward than this in real life, you can see the bolt holes where it should be bolted in the photo.
3/16" skid plate
and
shifter bracket is not bolted on properly in this photo, it will be about 2" further forward than this in real life, you can see the bolt holes where it should be bolted in the photo.
Re: Red Death Revival: Beams
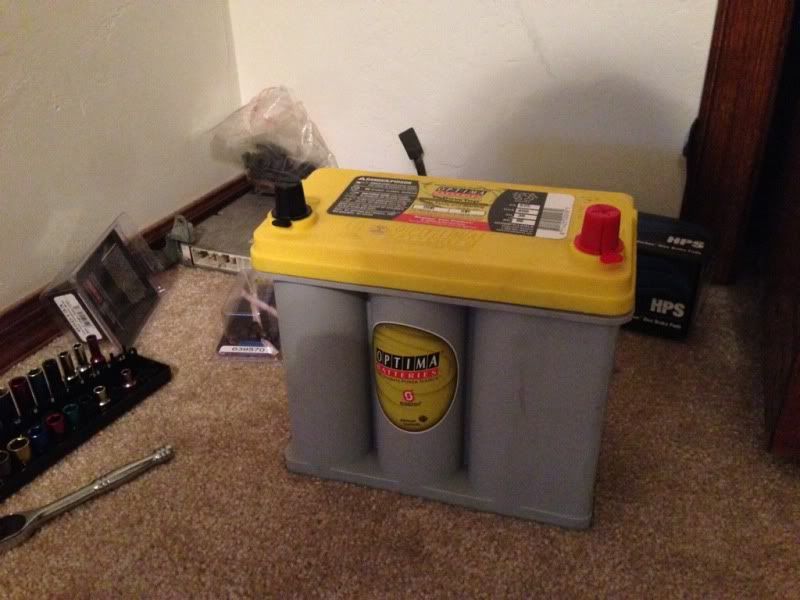
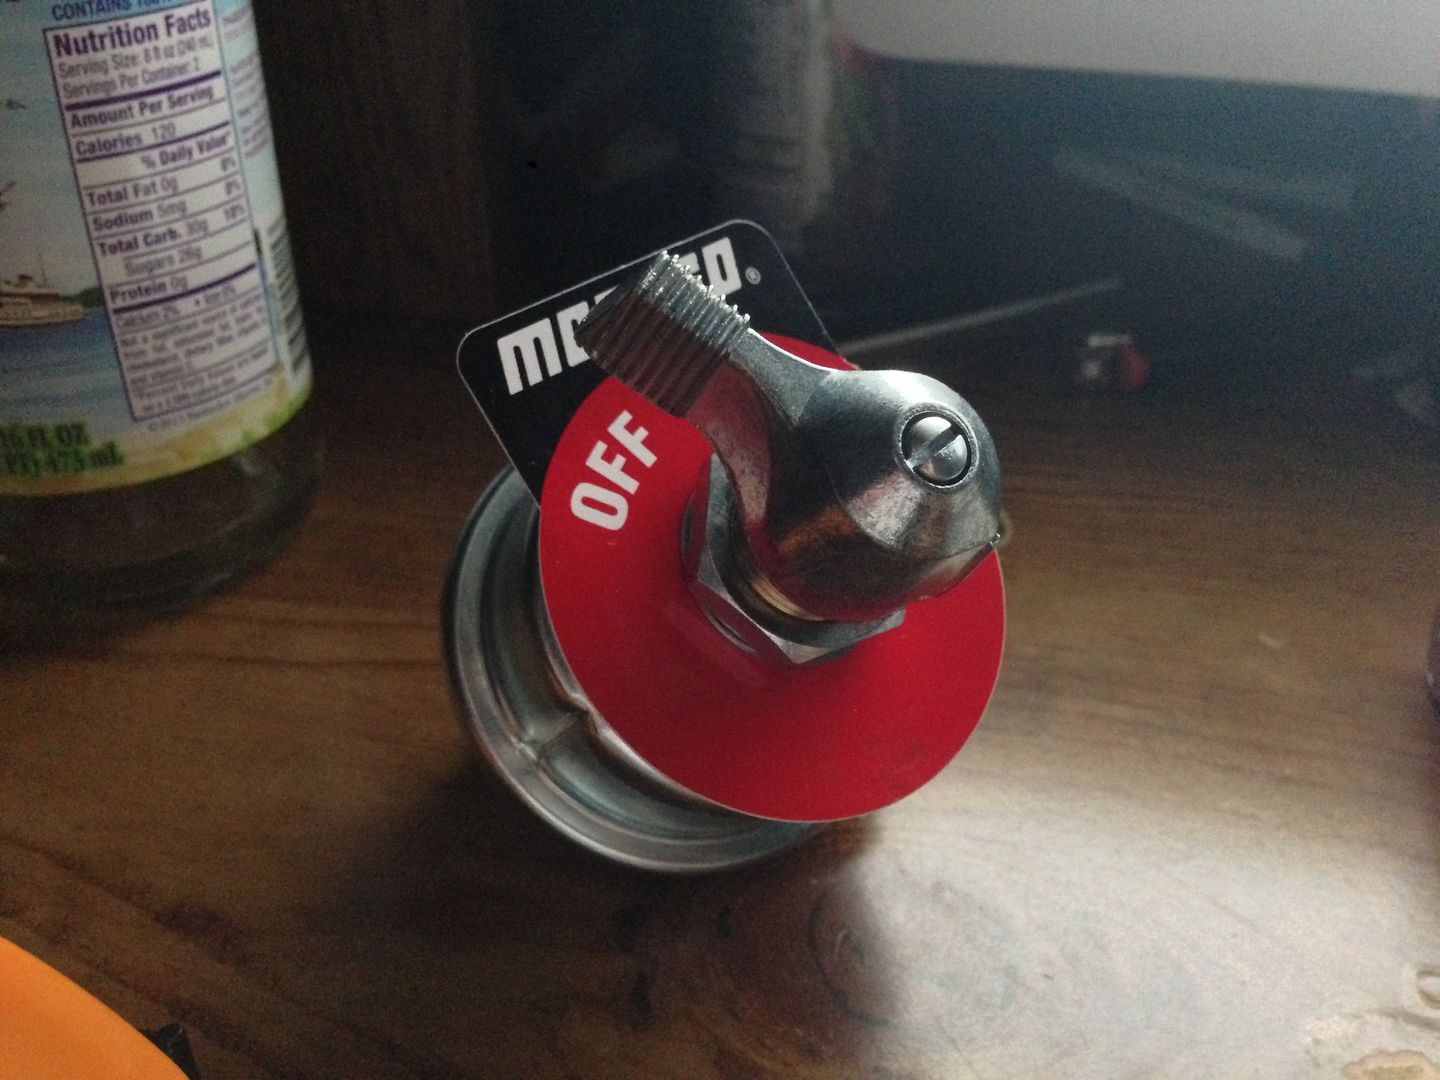
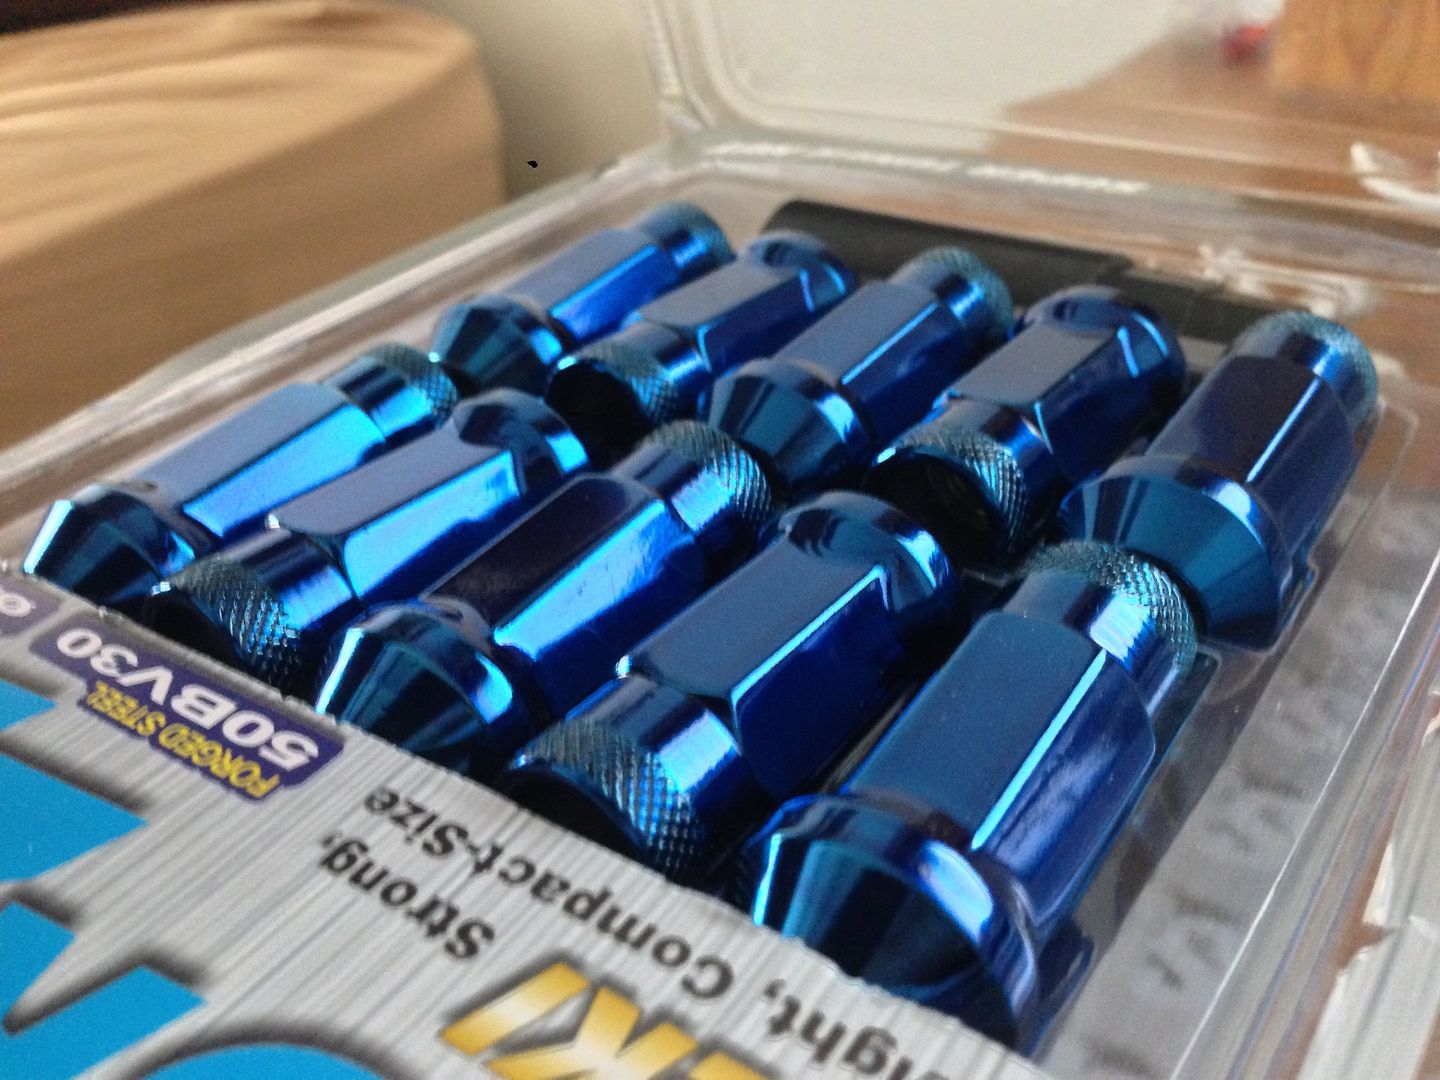
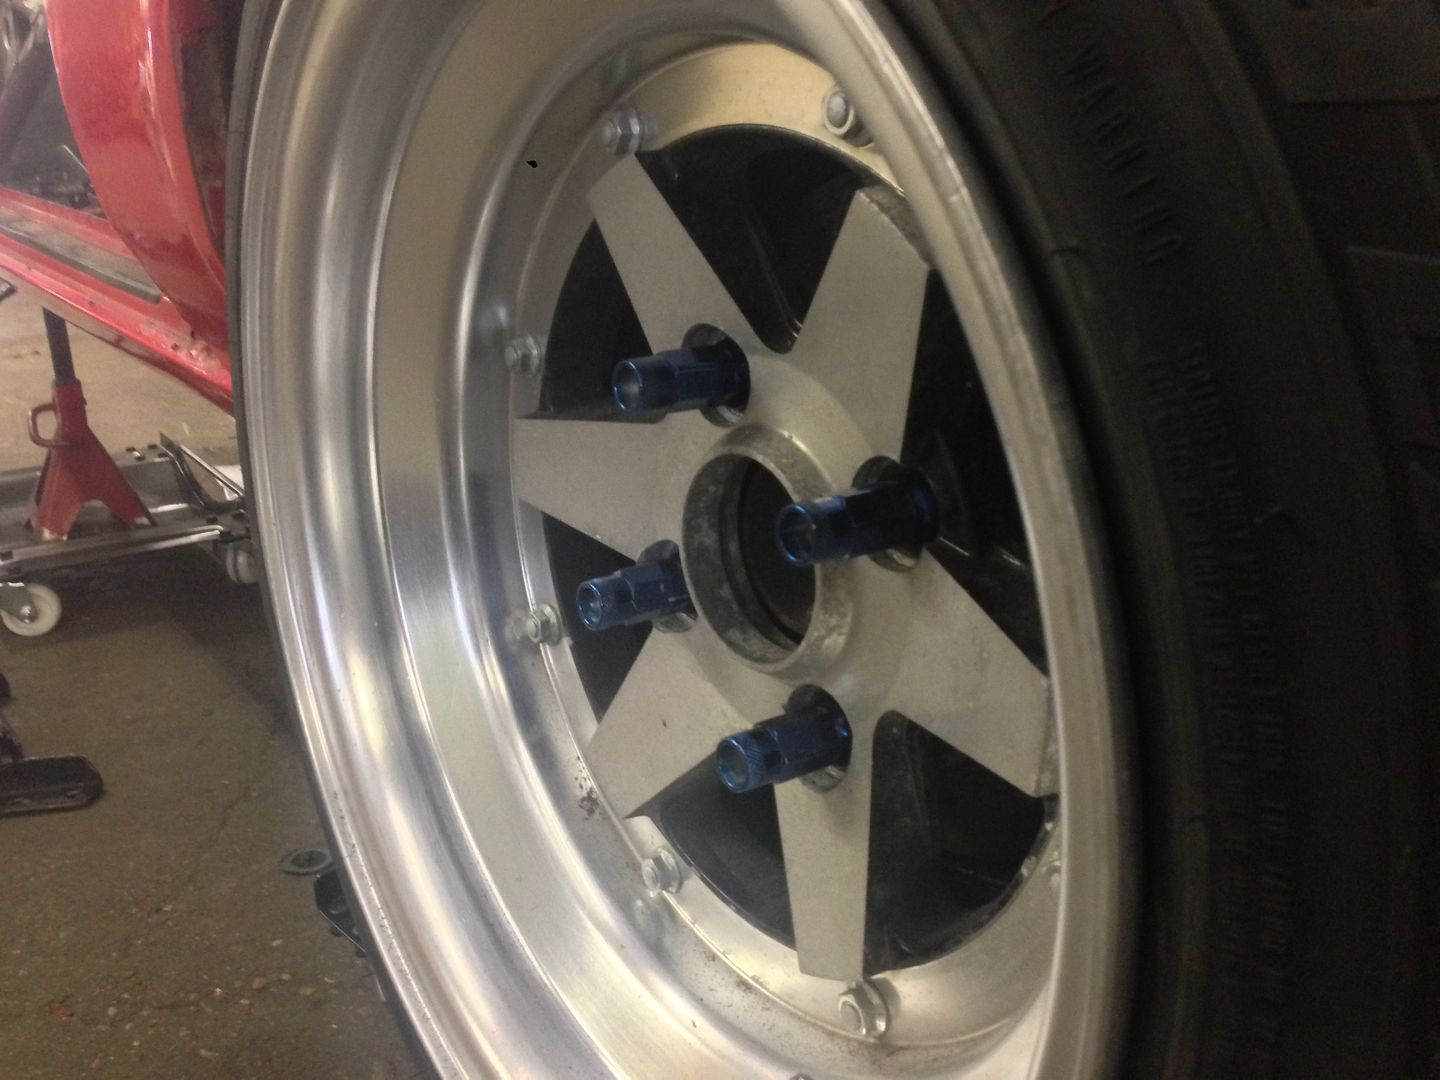
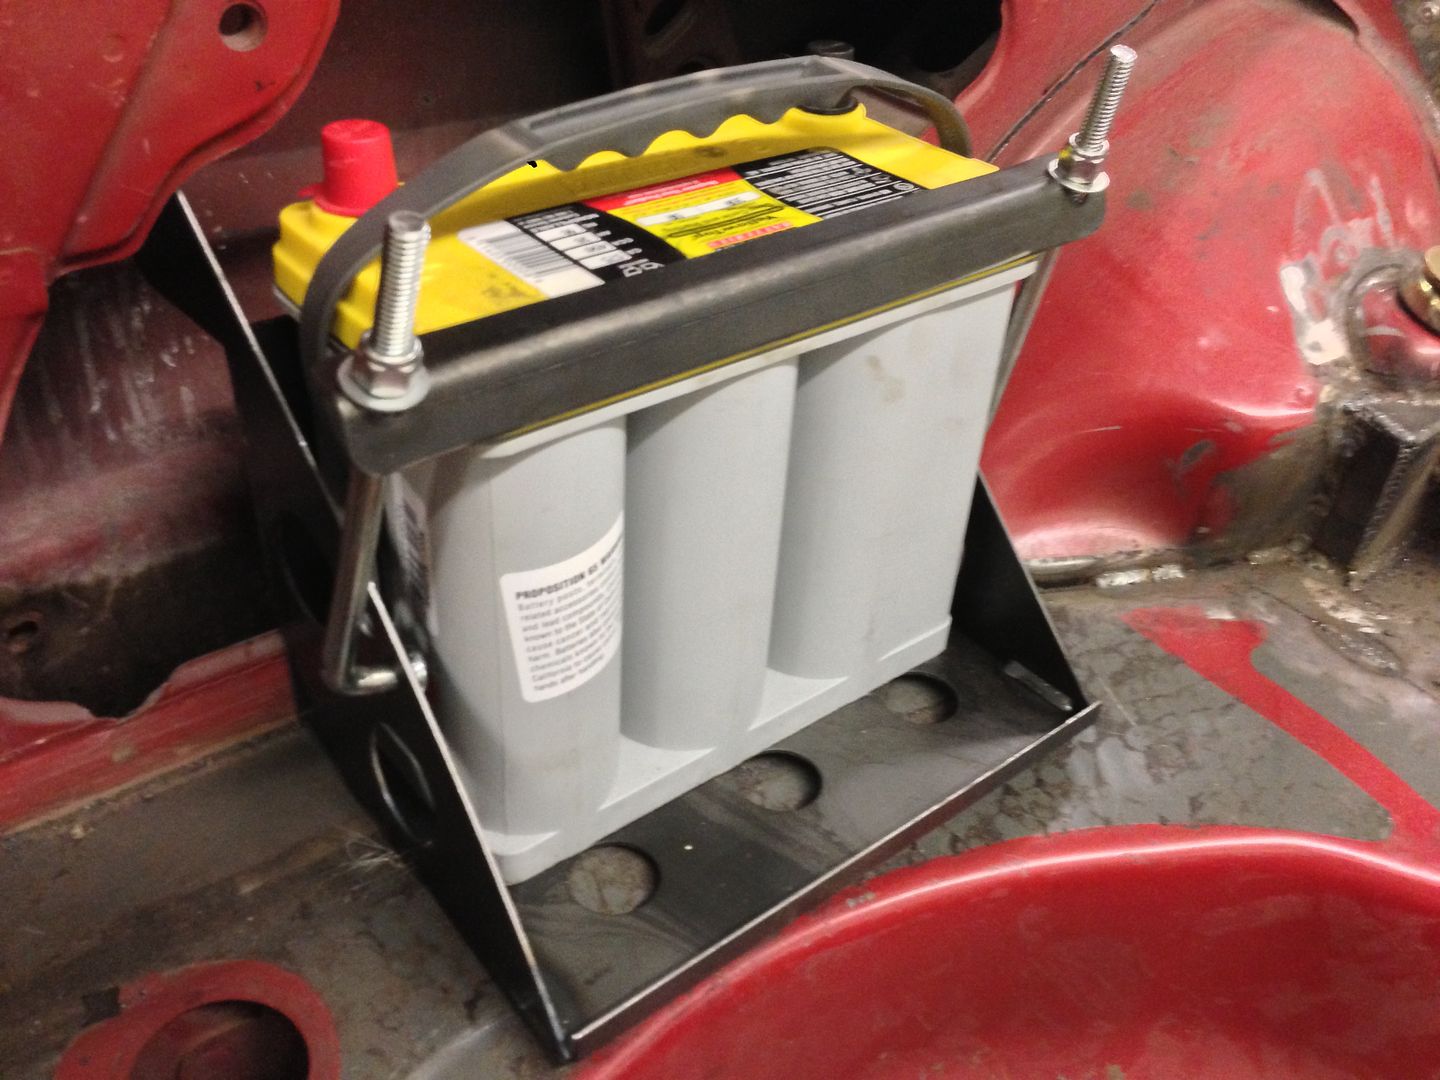
Got some more parts and did some more things.
kill switch
Lug nuts
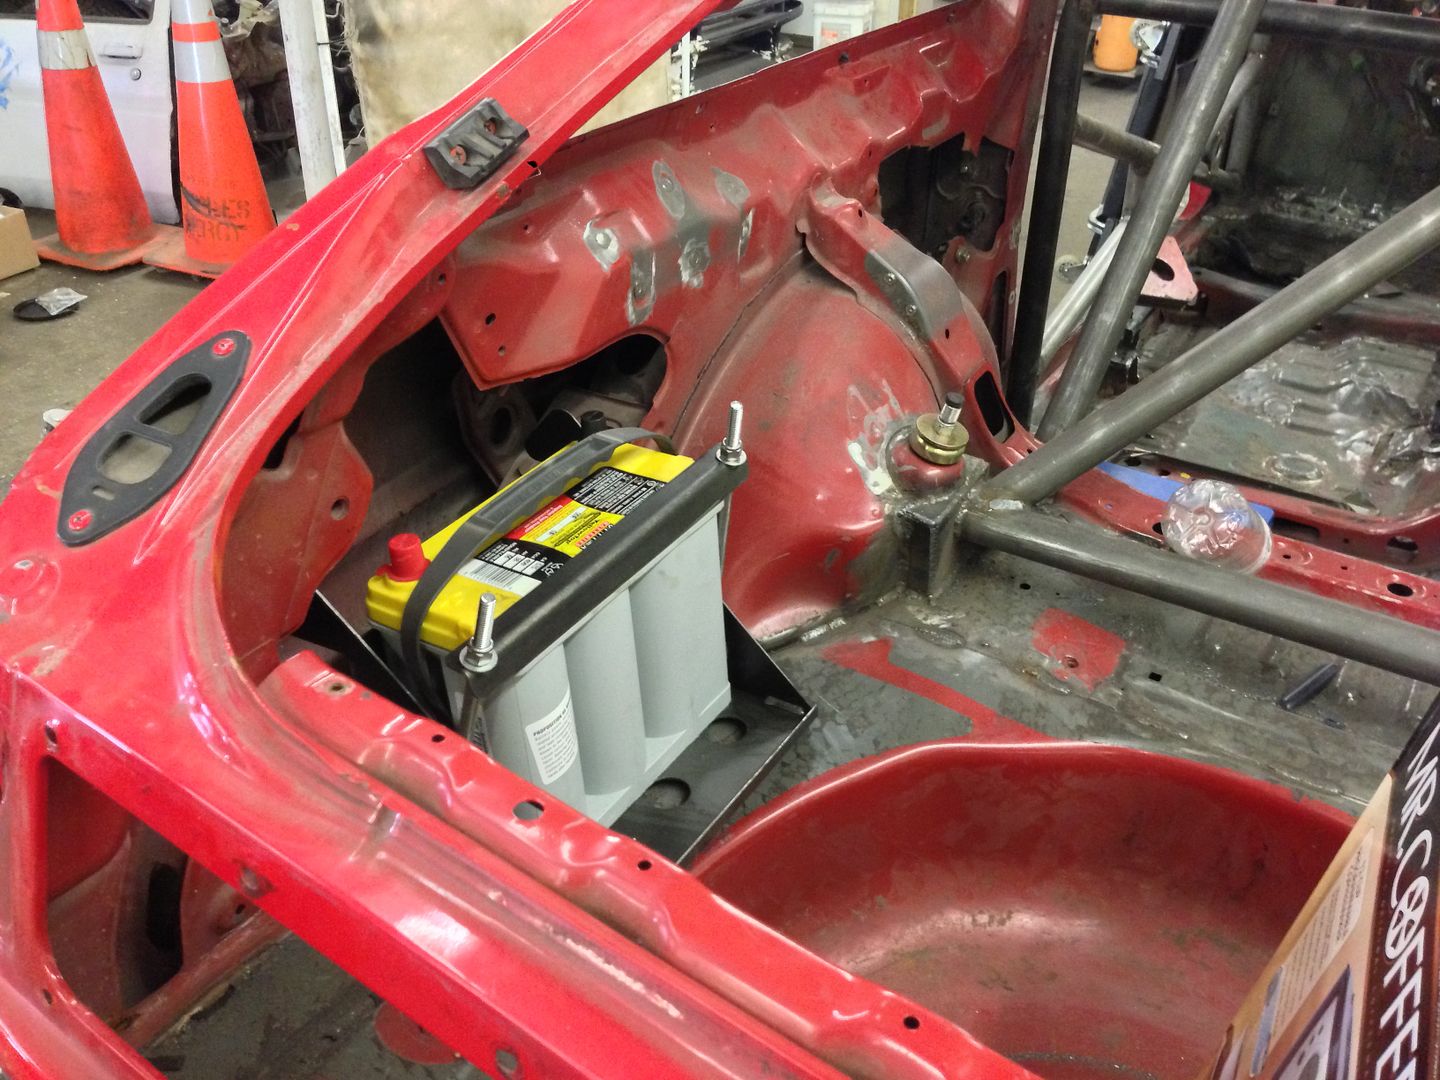
battery hold down (not actually mounted to car yet)
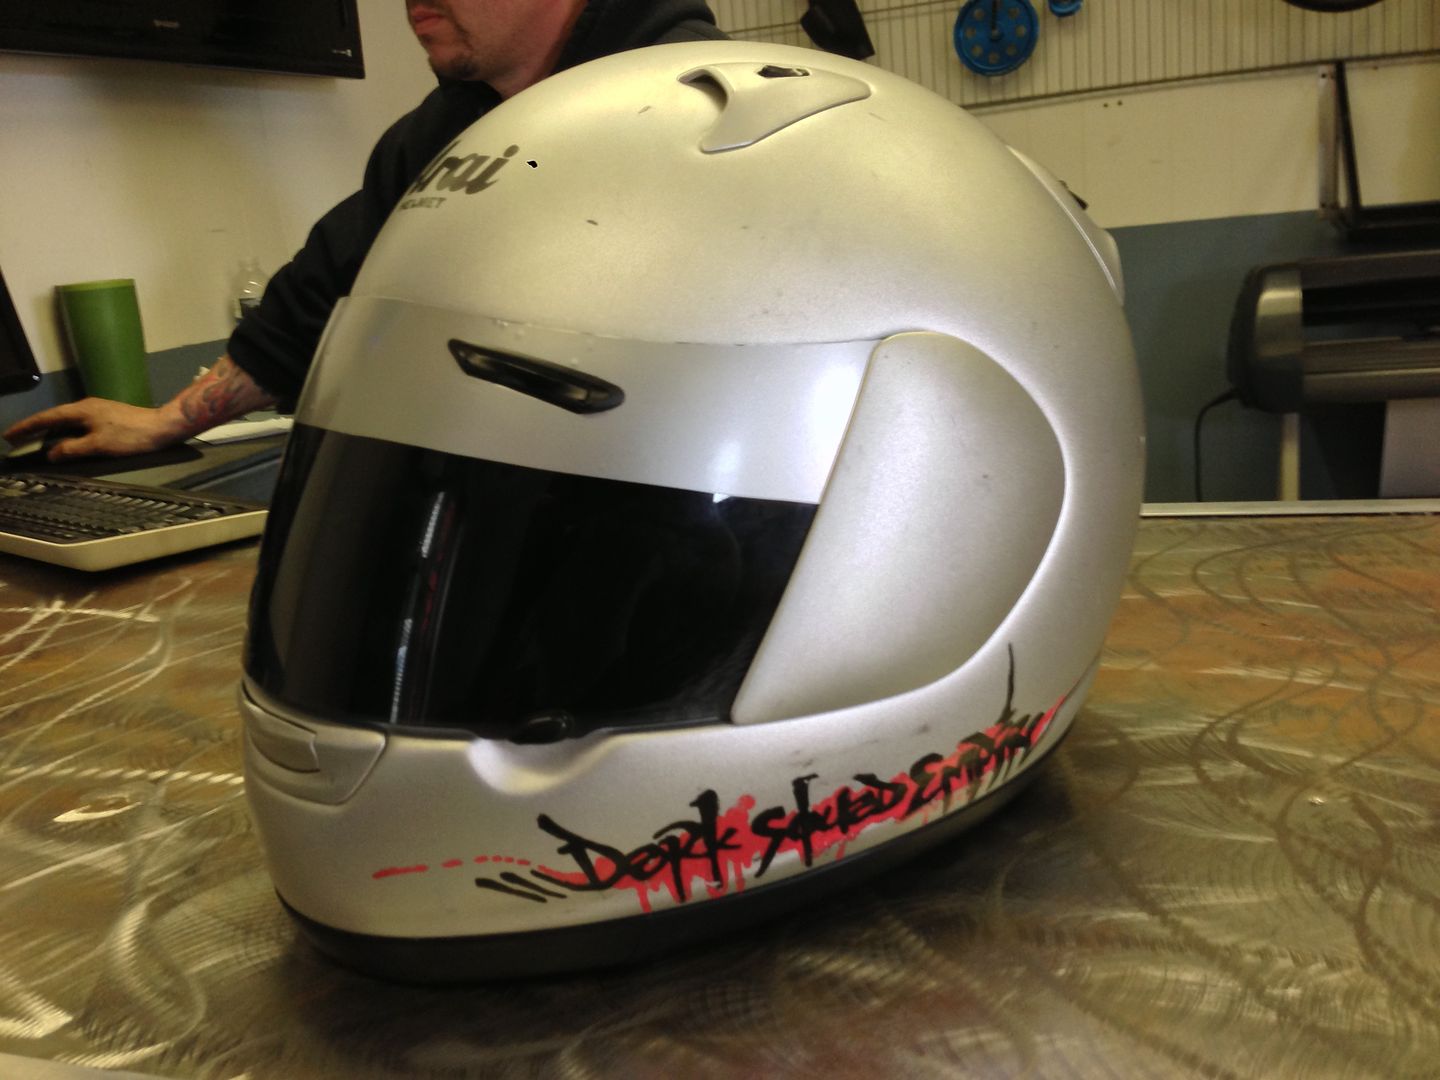
helmet stuff and things
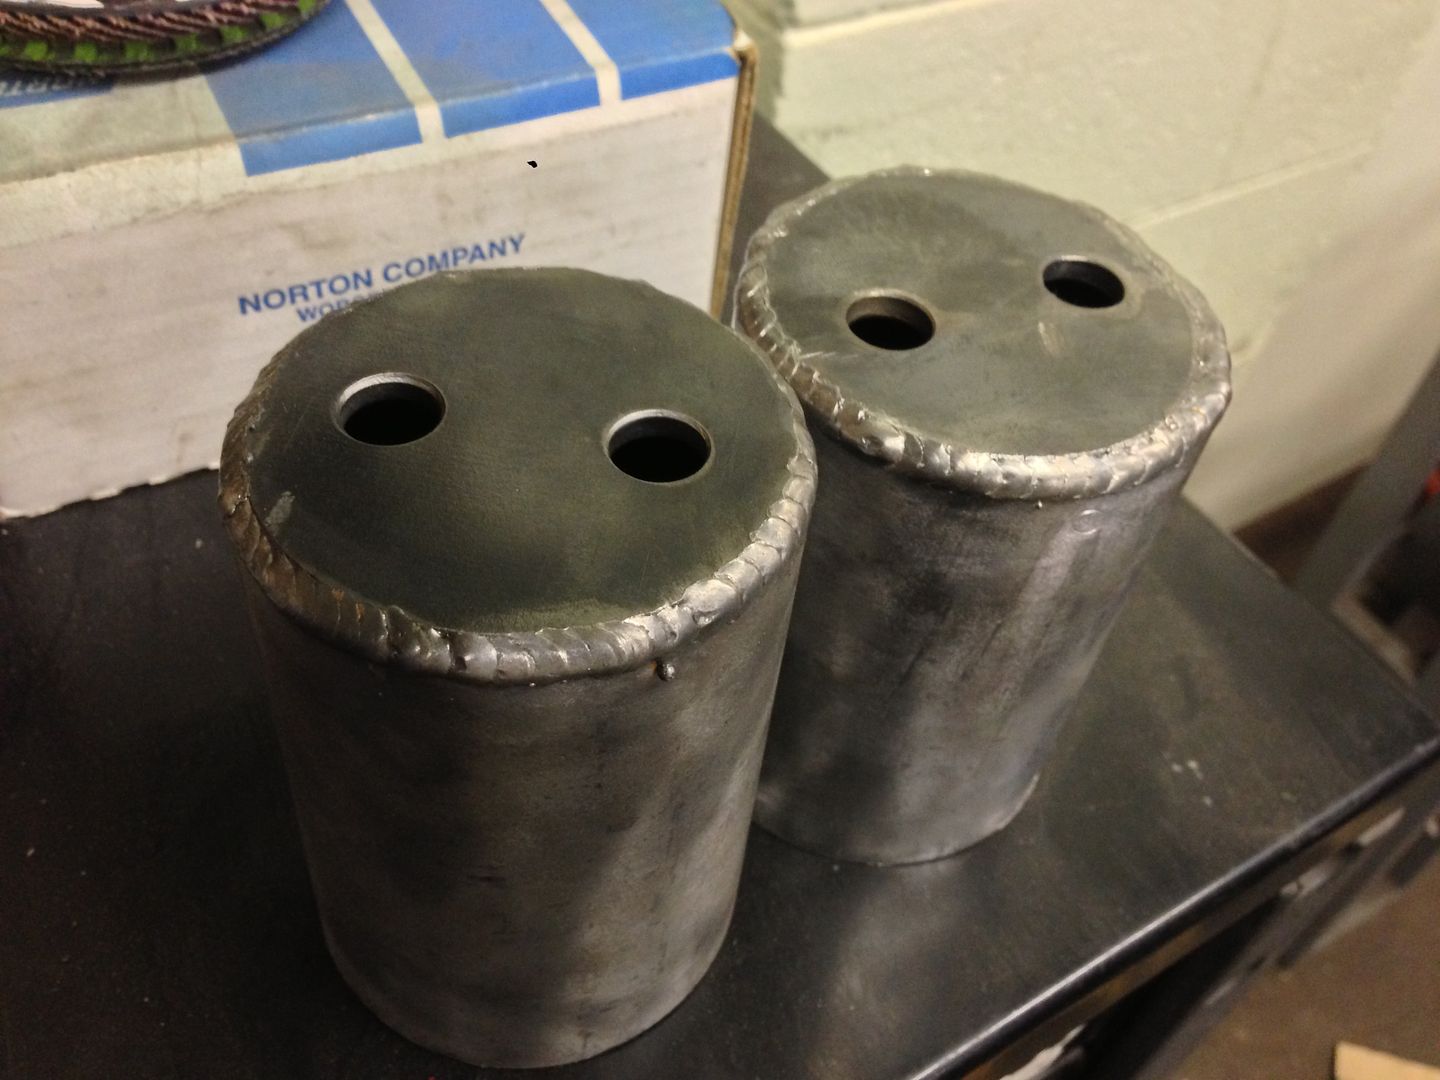
engine mounts
kill switch

Lug nuts


battery hold down (not actually mounted to car yet)


helmet stuff and things

engine mounts


Re: Red Death Revival: Beams
I foresee swaybar clearance problems with you mounting the engine that far forward.
"Working on cars is not what I do... it's who I am." Steve Metcalf
Re: Red Death Revival: Beams
we'll see I guess once its in its final location, We had it tucked up against the firewall as much as possible without hammering/modding it. rear of the valve cover has about 1/2" clearance from the firewall.

Re: Red Death Revival: Beams
any updates bro?

ANYONE CAN BUY A NEW CAR. IT TAKES A TRUE ENTHUSIAST
TO BREATHE LIFE INTO AN OLDER ONE.

Re: Red Death Revival: Beams
Been following this one since it came up, keep it coming, work is great!
Re: Red Death Revival: Beams
So inspiring, keep it coming!