Riddleyo's 1986 GTS 20V
Re: Riddleyo's 1986 GTS 20V
Nice work man! I haven't updated mine in a while but i am also in the process of spraying the interior plastics. I love SEM but ive noticed it scratches easy so ive also sprayed my pieces with a low lusted SEM clear that seems to do the job. Just a heads up. Looks great!!!

Re: Riddleyo's 1986 GTS 20V
Thanks guys.
I'm not sure if it is my prep or luck, but I have had really good results with "SEM Landau Black" and find it really hard to scratch off. I use a scotchbrite pad to take the sheen off the plastic, then scrub with a detergent like simple green, then a final wipe with denatured alcohol. After spraying and letting it cure for a couple of days, it seems like it is almost unscratchable - almost like the plastic has been dyed black. I don't even use a clear! Maybe I will try it out on a test piece and see how it looks.
shagymc wrote:Nice work man! I haven't updated mine in a while but i am also in the process of spraying the interior plastics. I love SEM but ive noticed it scratches easy so ive also sprayed my pieces with a low lusted SEM clear that seems to do the job. Just a heads up. Looks great!!!
I'm not sure if it is my prep or luck, but I have had really good results with "SEM Landau Black" and find it really hard to scratch off. I use a scotchbrite pad to take the sheen off the plastic, then scrub with a detergent like simple green, then a final wipe with denatured alcohol. After spraying and letting it cure for a couple of days, it seems like it is almost unscratchable - almost like the plastic has been dyed black. I don't even use a clear! Maybe I will try it out on a test piece and see how it looks.
Re: Riddleyo's 1986 GTS 20V
If that works, don't change it! I re sprayed my side mirrors a gloss black after fixing all of it and just walking by and rubbing one it messed it up. Could be different plastics, who knows but I was told to try clearing over it and that's whats worked for me. You're **** looks good man!
Re: Riddleyo's 1986 GTS 20V
Here is the fuel pump bracket from the junkyard that I set out to restore. It has rusty lines full of pinholes.
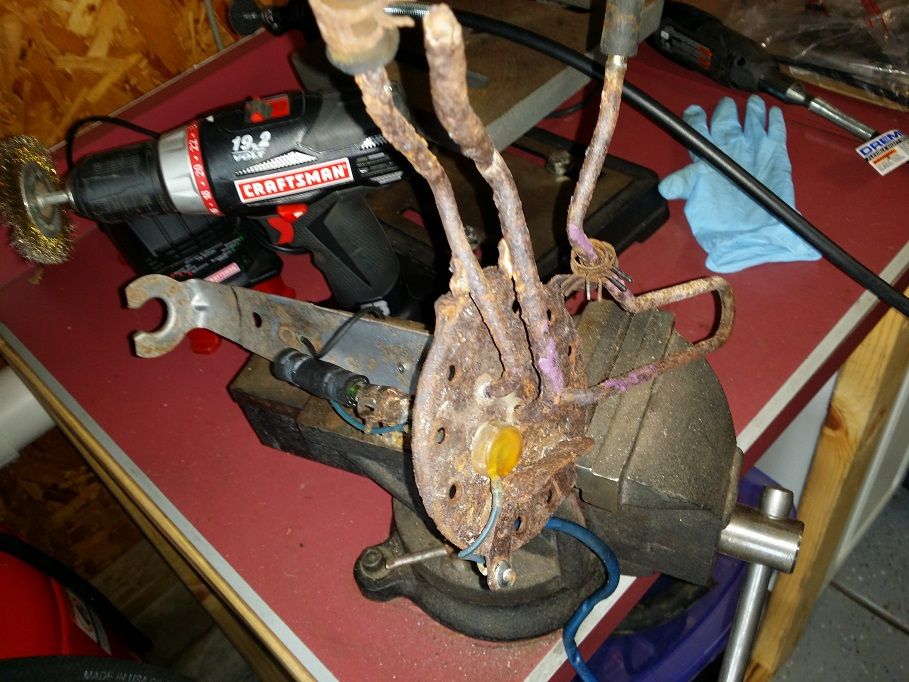
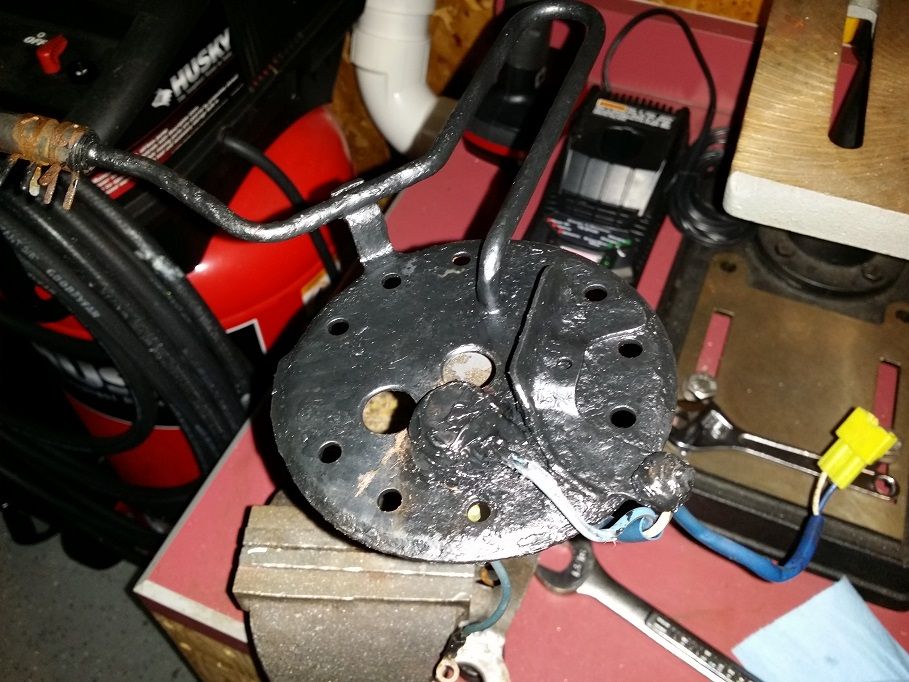
So I cut off the old rusty lines and drilled out where they used to be attached to the bracket body. Blasted the rust with my soda blaster then painted on black rust protection. The evap line turned out to survive the rust aside from one pinhole which was repaired. I also hotglued the wire connections to prevent future oxidation. The thing doesn't look pretty, but it should work well and last a while. I still need to put one more coat of paint on this.
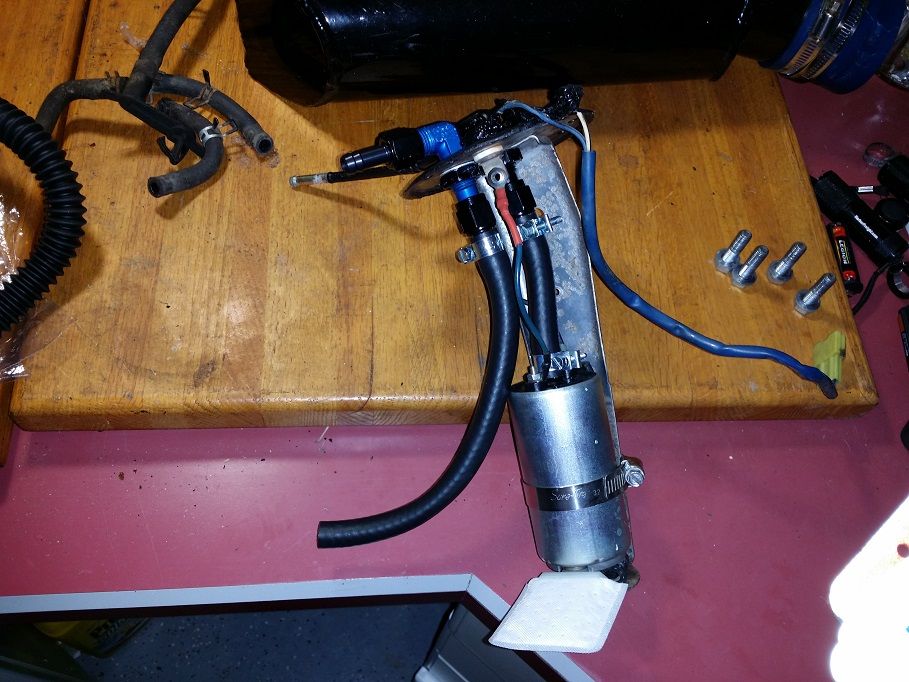
Then I attached bulkhead AN fittings. I hate the red and blue scheme so I went with black/blue fittings. New OEM Denso fuel pump with a new fuel sock. New Gates Submersible 3/8" fuel line. New fuel injection clamps. I worm clamped the fuel pump to the bracket and used rubber fuel line as isolators between the parts. I still have a Walbro 255 fuel pump, but I want to go back to OEM and see how that goes - sound wise. Fuel pump whine sounds almost like a supercharger, but it isn't all that exciting to listen to. OEM should be nice and quiet.
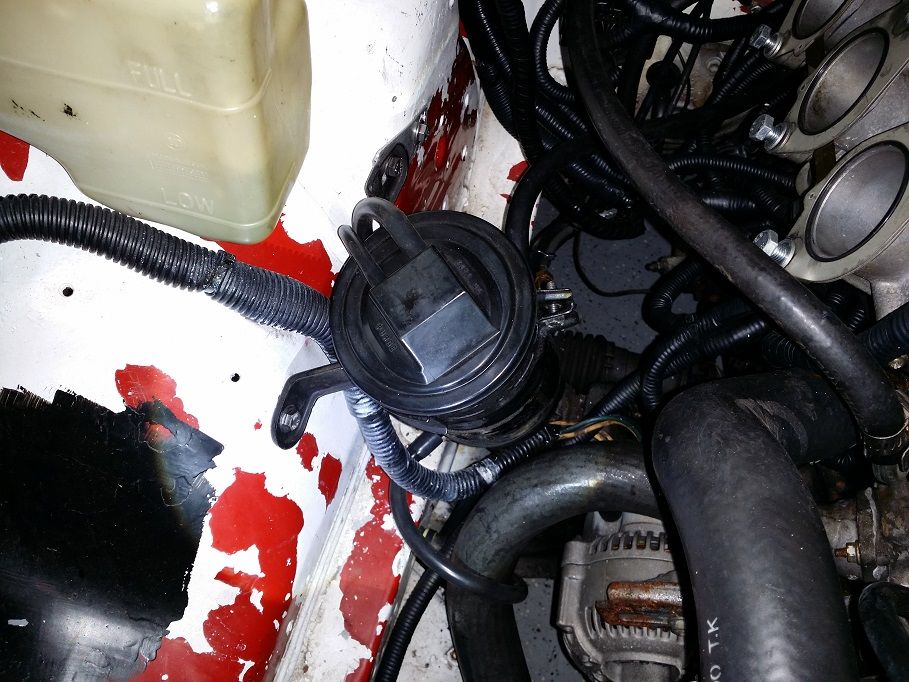
What excites me the most about this mod (actually reverting back to OEM) is this evap line!
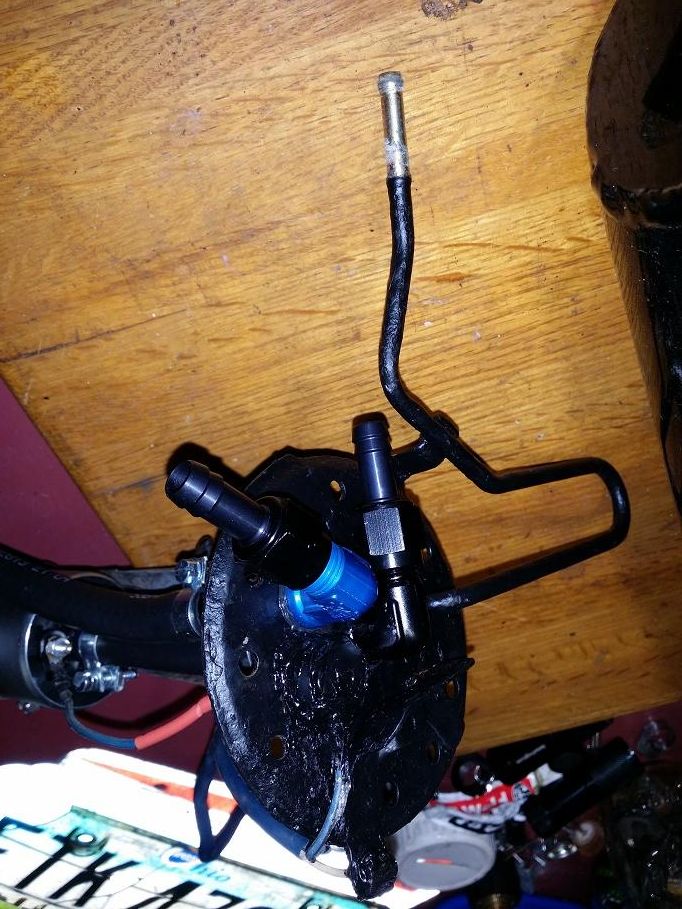
Why? So the previous owner vented the fuel cell to the atmosphere. This is bad for a variety of reasons. First is, you waste fuel. Gasoline evaporates extremely fast and my high octane fuel that I paid for literally floats out of my tank. Second is I have a constant cloud of flammable gas next to my car which is really stinky and not to mention, a fire hazard. Third is that unburnt hydrocarbons are a huge source of smog for the environment. It really is a shame that people remove these from their cars for "looks" or because "racecar". Sooo.. I went to the junkyard and bought a nice plastic charcoal canister from a Toyota Camry. Hooked up all the vacuum lines and attached it to my engine bay. Grr.. as a side note, this engine bay is driving me crazy with the flaky piss poor paint job!!! That is a future project to come.
So I cut off the old rusty lines and drilled out where they used to be attached to the bracket body. Blasted the rust with my soda blaster then painted on black rust protection. The evap line turned out to survive the rust aside from one pinhole which was repaired. I also hotglued the wire connections to prevent future oxidation. The thing doesn't look pretty, but it should work well and last a while. I still need to put one more coat of paint on this.
Then I attached bulkhead AN fittings. I hate the red and blue scheme so I went with black/blue fittings. New OEM Denso fuel pump with a new fuel sock. New Gates Submersible 3/8" fuel line. New fuel injection clamps. I worm clamped the fuel pump to the bracket and used rubber fuel line as isolators between the parts. I still have a Walbro 255 fuel pump, but I want to go back to OEM and see how that goes - sound wise. Fuel pump whine sounds almost like a supercharger, but it isn't all that exciting to listen to. OEM should be nice and quiet.
What excites me the most about this mod (actually reverting back to OEM) is this evap line!
Why? So the previous owner vented the fuel cell to the atmosphere. This is bad for a variety of reasons. First is, you waste fuel. Gasoline evaporates extremely fast and my high octane fuel that I paid for literally floats out of my tank. Second is I have a constant cloud of flammable gas next to my car which is really stinky and not to mention, a fire hazard. Third is that unburnt hydrocarbons are a huge source of smog for the environment. It really is a shame that people remove these from their cars for "looks" or because "racecar". Sooo.. I went to the junkyard and bought a nice plastic charcoal canister from a Toyota Camry. Hooked up all the vacuum lines and attached it to my engine bay. Grr.. as a side note, this engine bay is driving me crazy with the flaky piss poor paint job!!! That is a future project to come.
Re: Riddleyo's 1986 GTS 20V
Way to go man. Thanks for the detailed descriptions and pics. I've got a spare mr2 dash I may just fix now.
7agte Aw11. 
Re: Riddleyo's 1986 GTS 20V
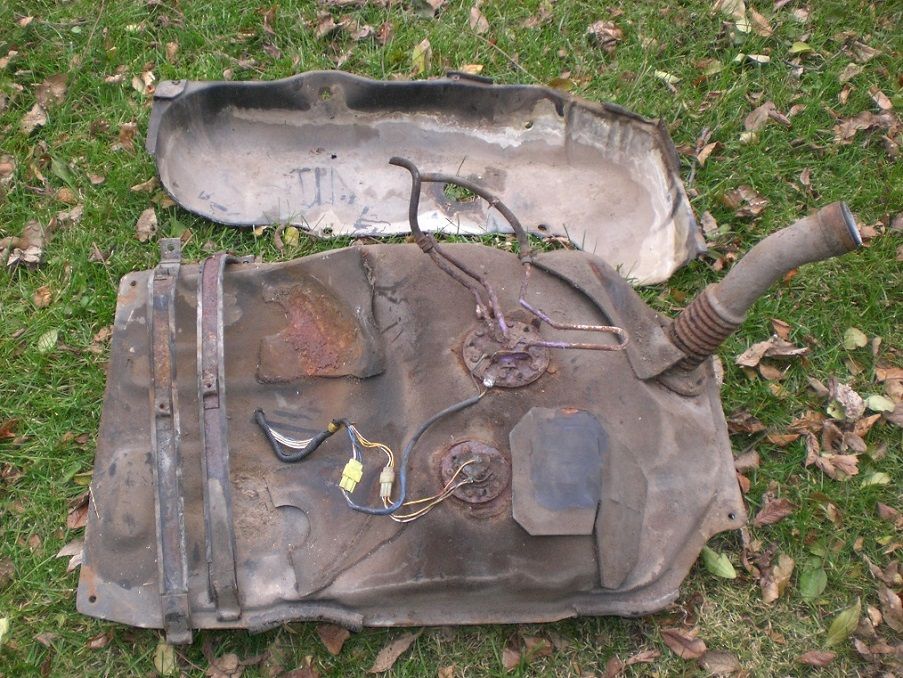
Here is what my gas tank parts looked like when I got them from the junkyard:
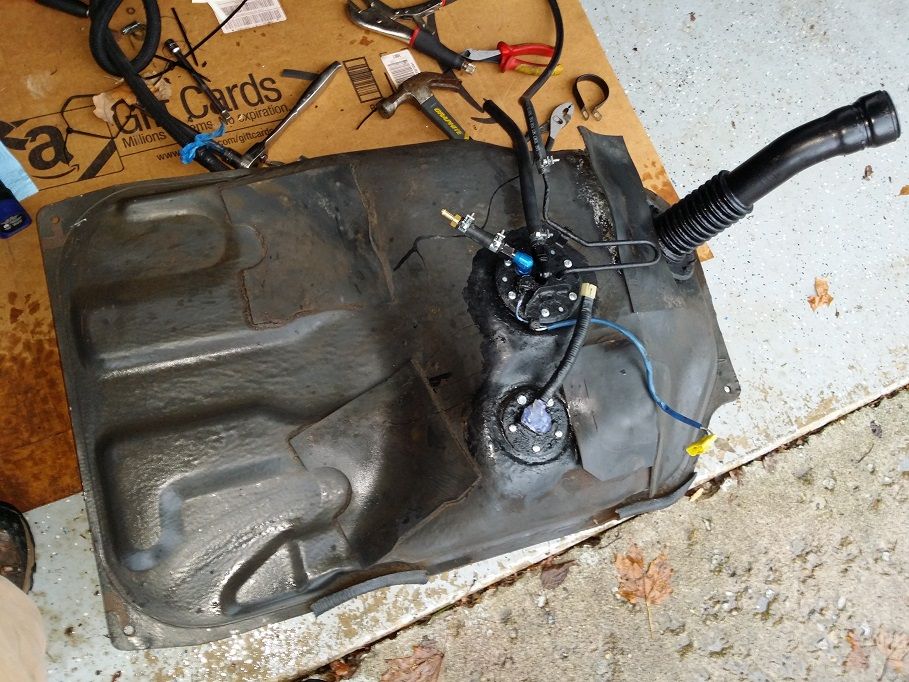
Now I assembled my fuel bracket with AN fittings to my fuel tank. The tank was wire brushed and rust protection applied:
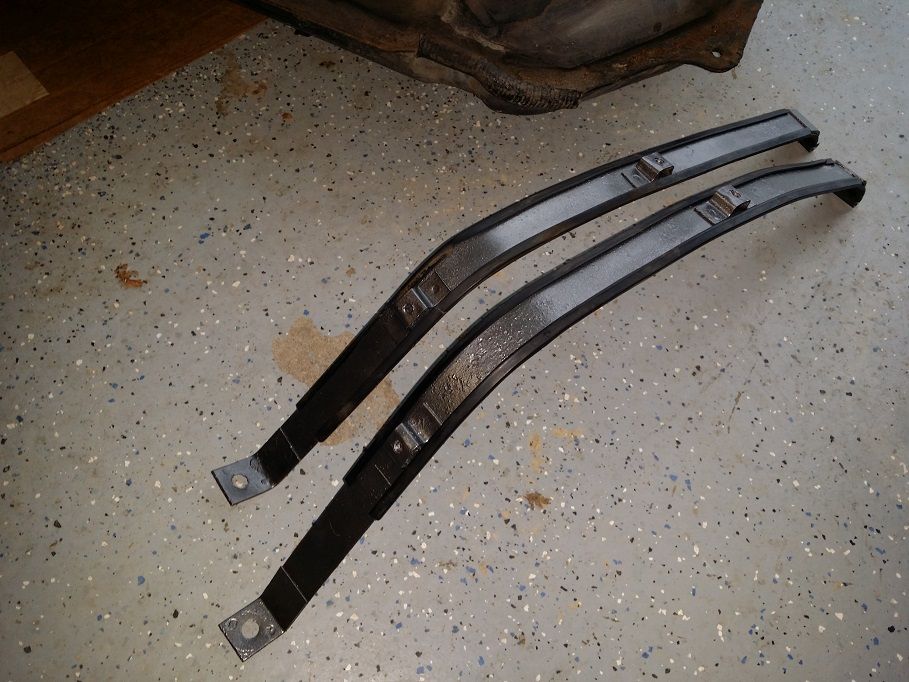
Straps were cleaned up and painted and rubber backing re-applied:
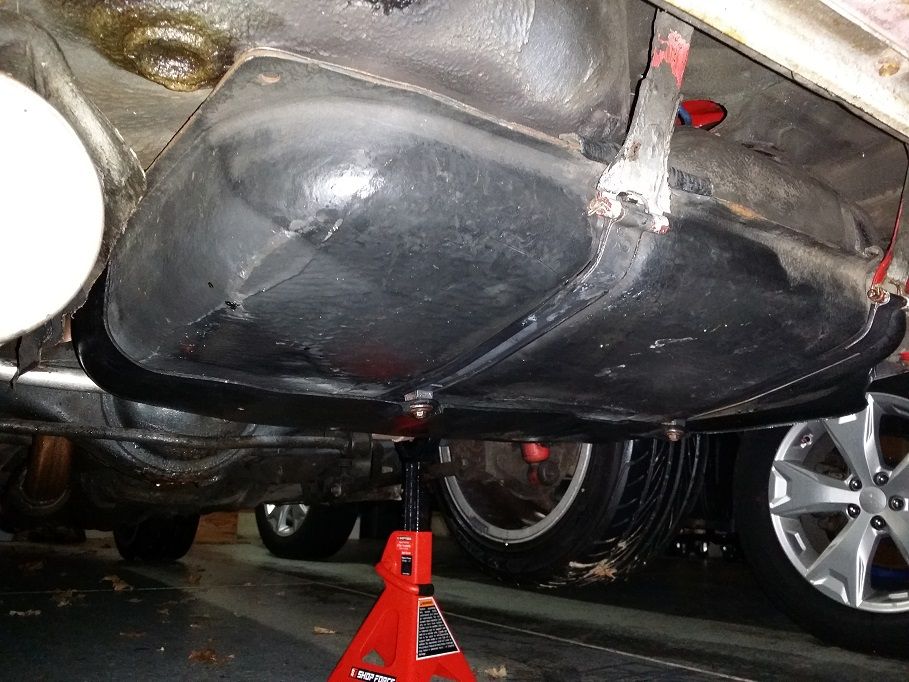
Junkyard gas tank in place with all the stock hardware and stock plastic gas tank guard:
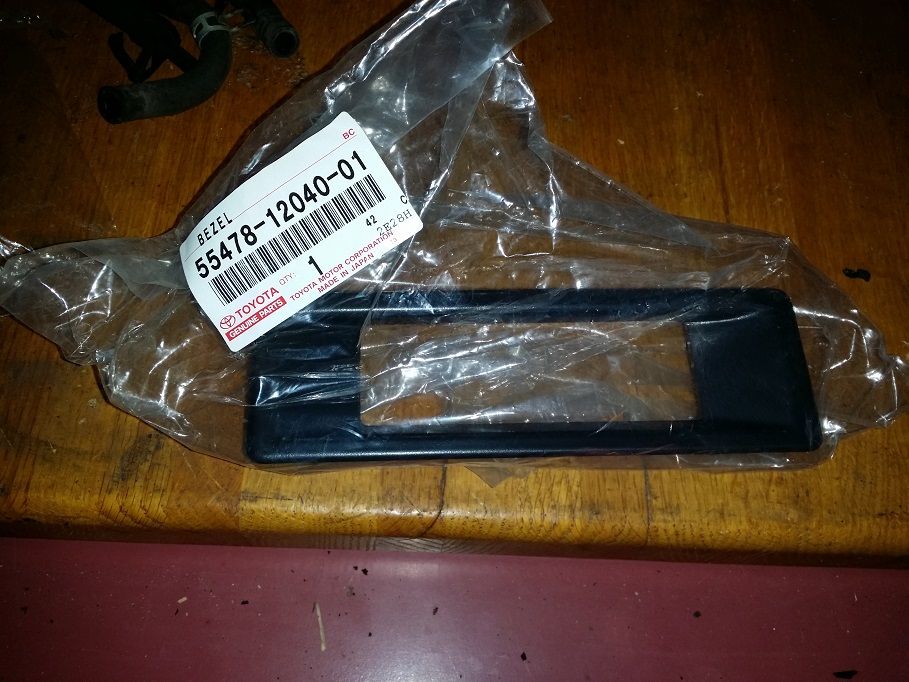
I just have fill it up with gas and test it out now. But meanwhile, I got an OEM part in the mail today!
Now I assembled my fuel bracket with AN fittings to my fuel tank. The tank was wire brushed and rust protection applied:
Straps were cleaned up and painted and rubber backing re-applied:
Junkyard gas tank in place with all the stock hardware and stock plastic gas tank guard:
I just have fill it up with gas and test it out now. But meanwhile, I got an OEM part in the mail today!
Re: Riddleyo's 1986 GTS 20V
Car has been sold, hopefully the new owner will take good care of it for the years to come.