Page 4 of 6
Re: My recap and ongoing final stretch of building my Hatch
Posted: Mon Apr 06, 2015 2:54 am
by shagymc
I think you're asking what I used to strip the paint and I just got some stripper from lowes. It's the goo off aerosol can stuff for epoxy and paint. I had to do it about 4 times but it worked really well at taking off the old stuff but not leaving any chemical residue on the cover. At least, so far it looks decent.
Re: My recap and ongoing final stretch of building my Hatch
Posted: Mon Apr 06, 2015 9:21 am
by grappletech
Yes, strip it. That's cool. I have to do the same to my beams cover and repaint it.
Re: My recap and ongoing final stretch of building my Hatch
Posted: Tue Apr 21, 2015 7:38 pm
by shagymc
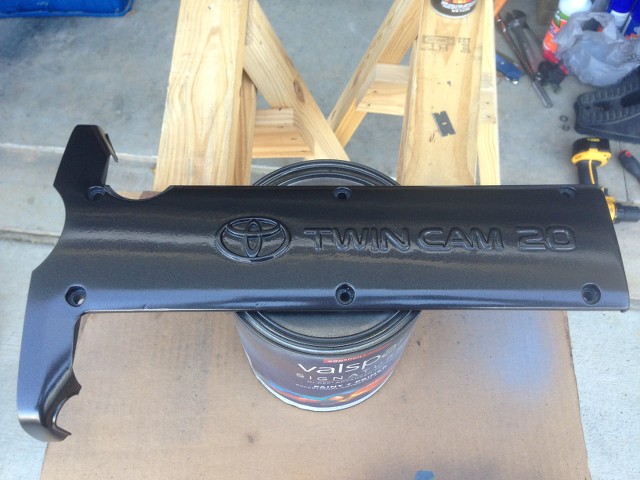
So I got the head and alternator back from the machine shop. and this week's progress has been pretty slow. I finished painting the plug cover for the valve cover. Just used the same black metallic paint that I used on the block.
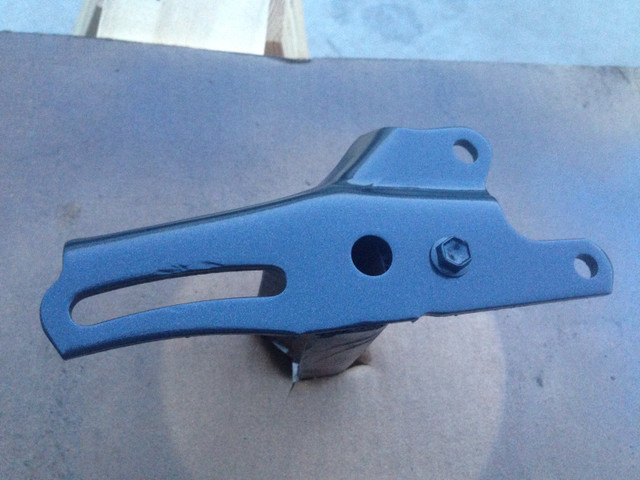
I also got the top alternator bracket painted too
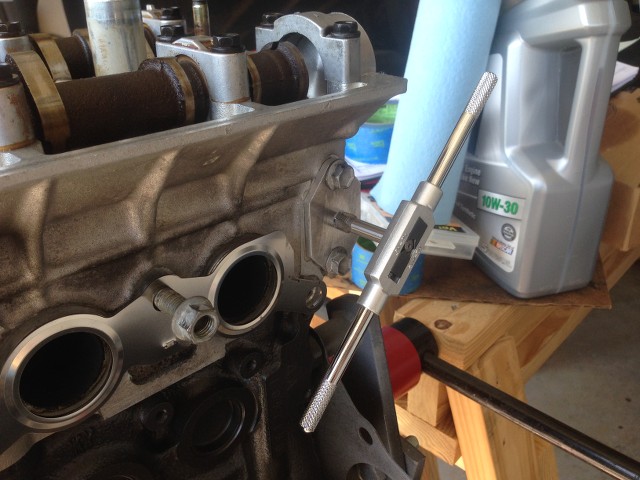
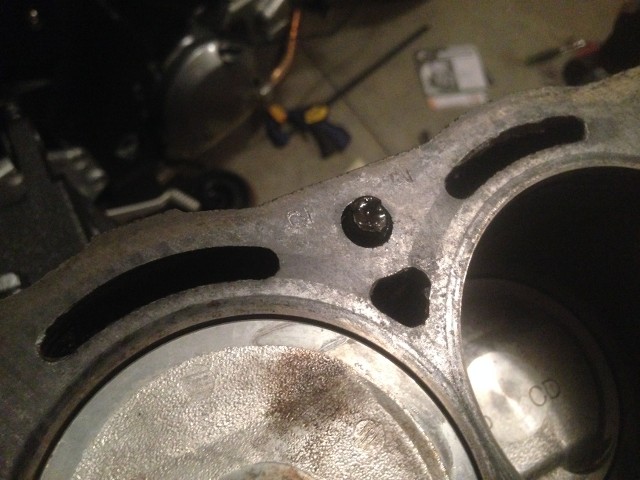
While trying to reinstall the head, I snapped a head bolt. I thought that it was going to be aweful trying to pull it out but I ended up being able to pull it out by hand.
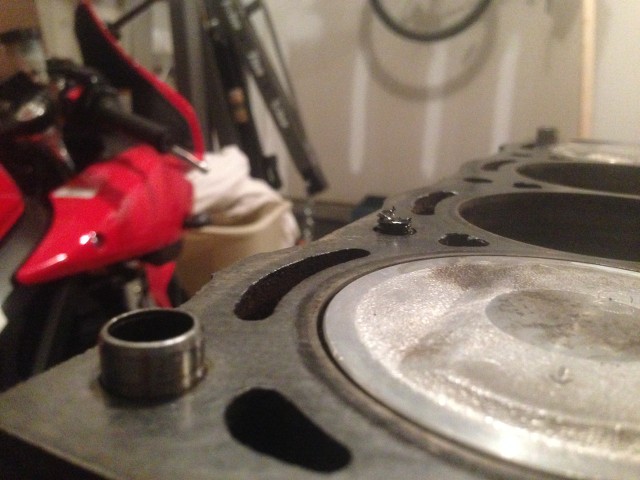
I pieced together the head and the valve cover just to see how the colors will match up. You can see the T3 gold and the metallic gold are a little off. I just don't know if I can accept that yet. I might try to mix the burnt copper and metallic gold. maybe I can get it a little closer
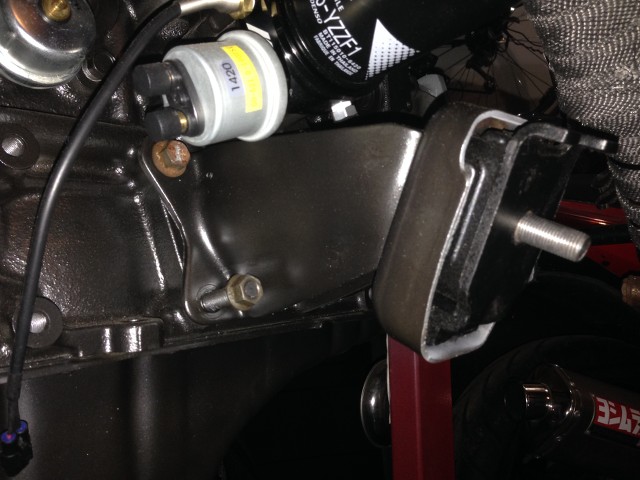
Because I was close to torque spec, I figured I ruined the head gasket so I hopped on Battle Garage for a new one and ended up ordering a new accessory pulley, cusco motor mounts, and a bag on top of the full gasket kit. That site is dangerous....
Re: My recap and ongoing final stretch of building my Hatch
Posted: Wed Apr 29, 2015 10:13 pm
by shagymc
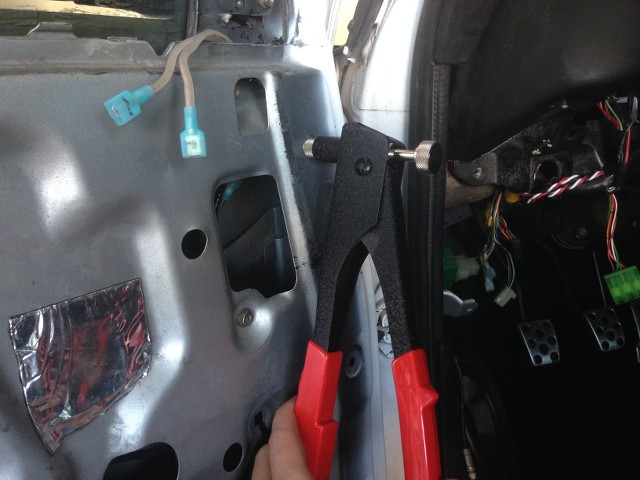
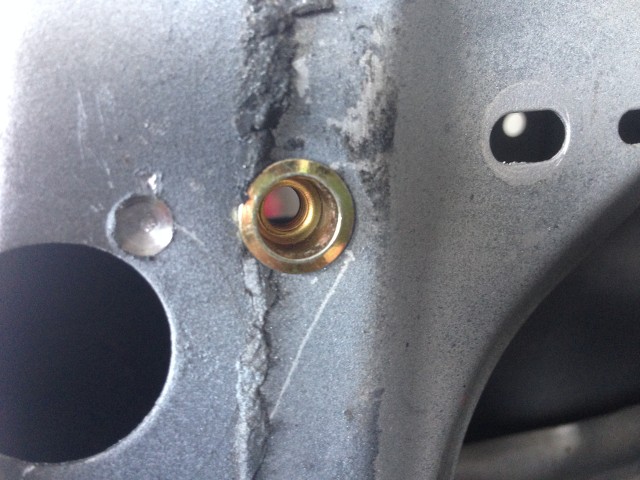
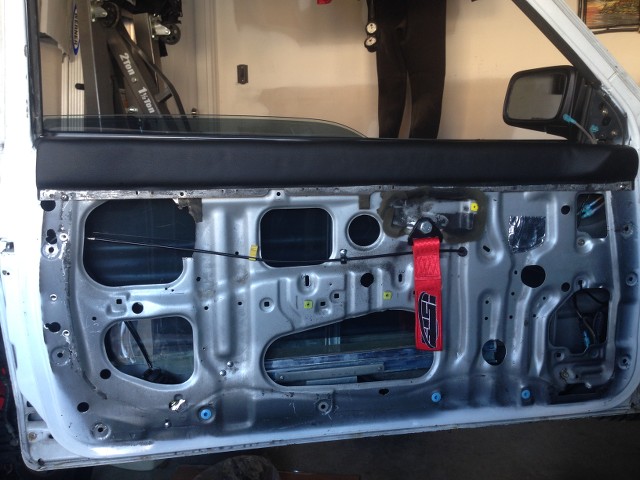
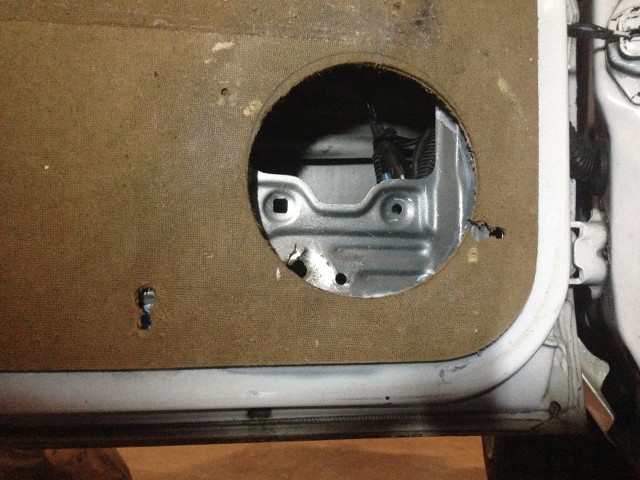
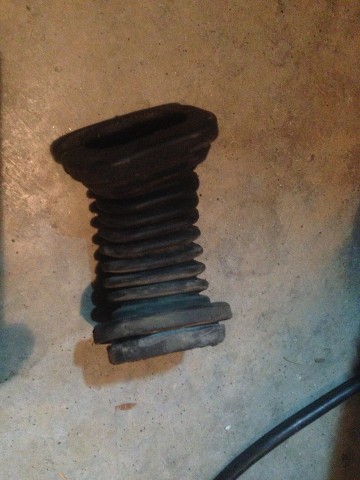
You may not remember, but I bought some random door grommets from a local junkyard since apparently these cars didn't come with proper door grommets. I already had the driver one installed and completed but tonight I finally got around to getting the passenger side done. Here's the grommet I'm working with:
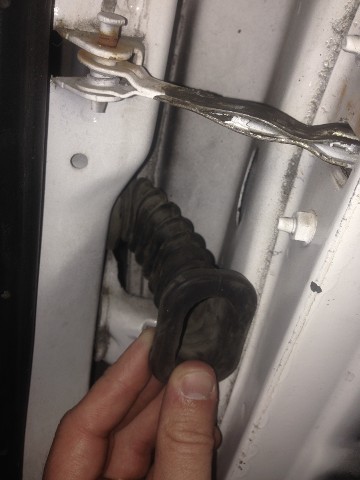
The car side fit with no modifications:
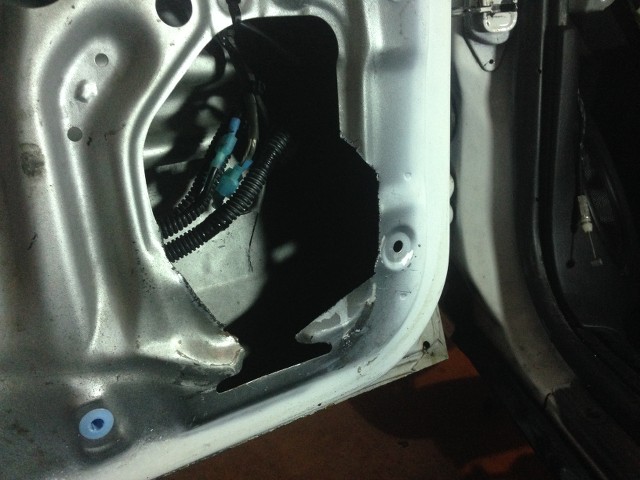
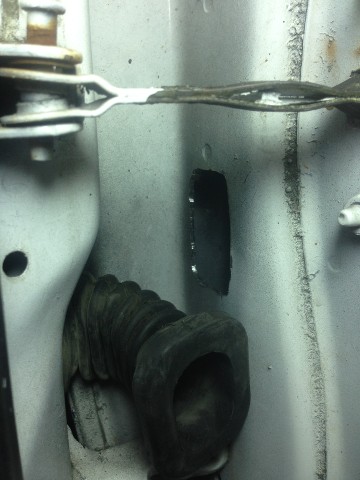
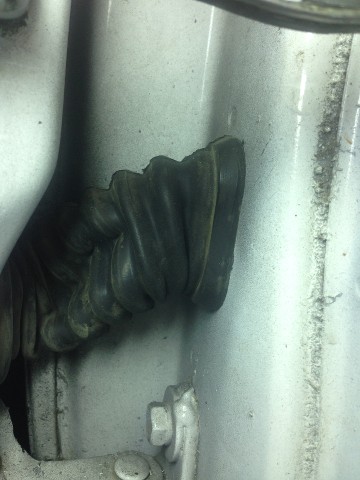
Unfortunately I had to make the door side bigger. Long story short; it sucked. But after some dremel work with the wrong bit and some paint to keep it rust free, I got the cut finished and a good looking, proper grommet:
Once the grommet was in, I ran the wires through for the door pop solenoid, the power window, the tweeter, and the emergency entry cable for the door if the solenoid fails. I used the same glow-in-the-dark handle for a BMW that I used on the driver side. The steel cable loops through the handle and then I used a small crimp cap to give it a clean finish.
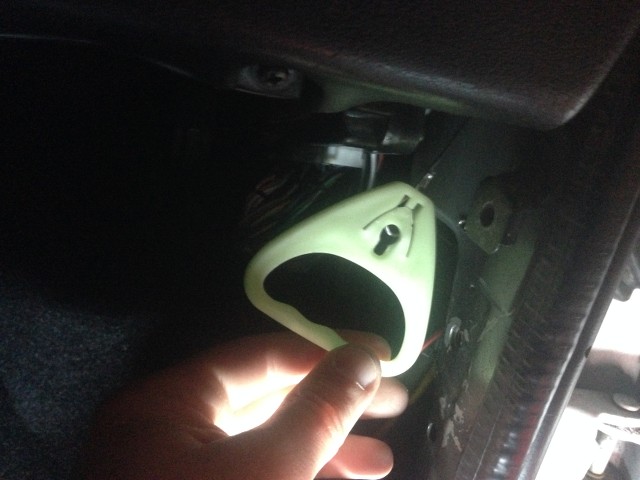
The handle tucks away behind the ECU in the kick. My next project is either to re design the door panels or to fix the rear hatch wing and re mount it. I'm waiting on parts for the motor so I can start piecing it back together. Hoping next weekend I can get some progress going.
Re: My recap and ongoing final stretch of building my Hatch
Posted: Mon May 18, 2015 8:08 pm
by shagymc
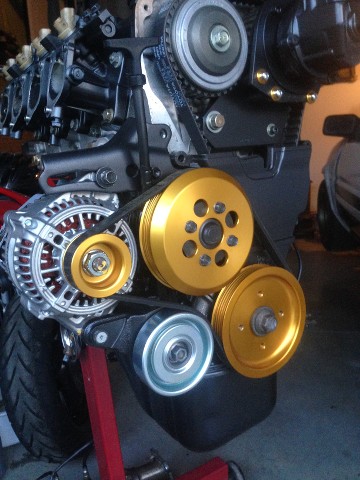
So I've been slowly collecting parts over the past month and I don't have all of them but you can see it's an array of BG and T3 stuff. I'm still awaiting the SQ V3 cooling kit and some stuff for the interior from Japan and a fellow member. I've mostly been working on the motor so here's what went on today.
Here you can see the motor parts I ordered. The full seal and gasket kit, new alternator pulley on the new alt, the cam and alt pulleys from T3, new tensioner, new idler pulley, new timing belt, new starter, and new plug wires.
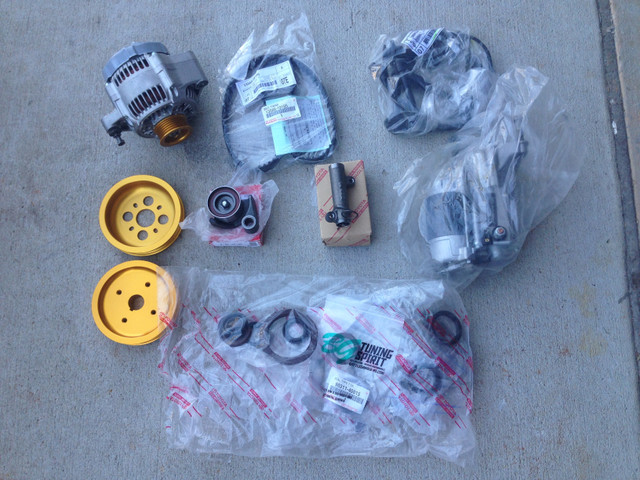
Since the head bolt broke, I also got some ARP head studs from BG, worth every penny.
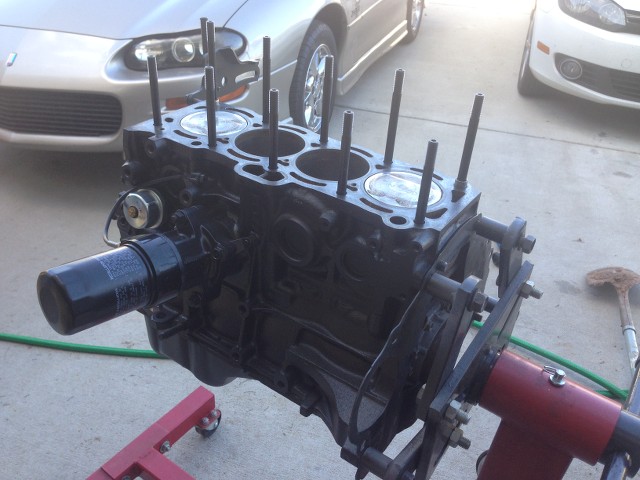
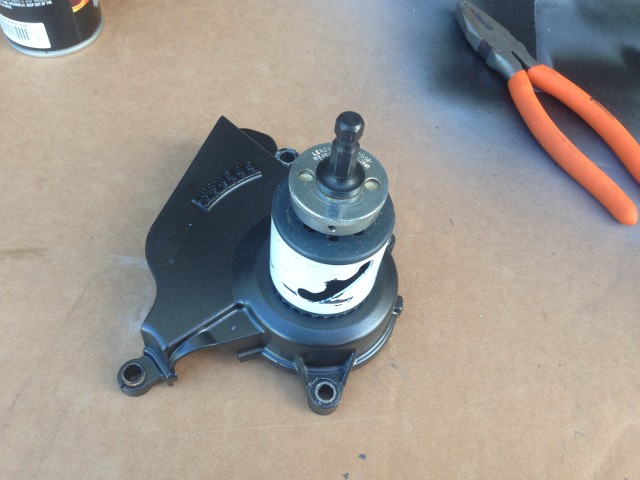
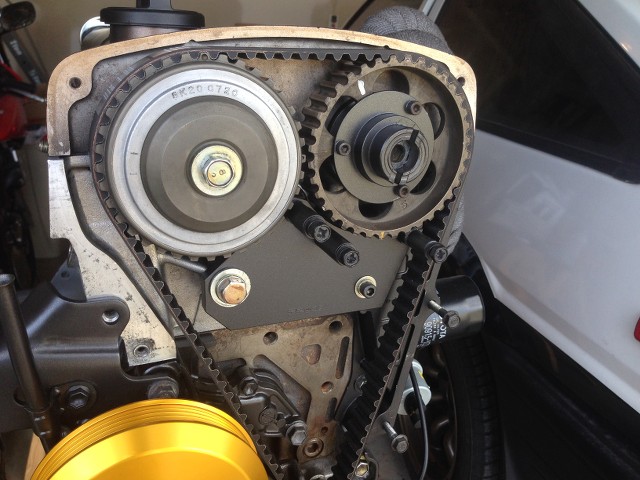
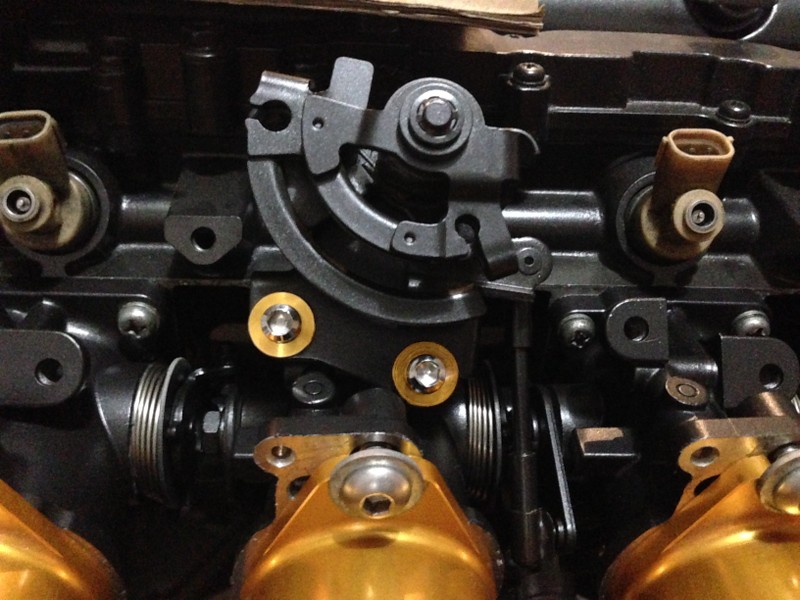
So I got the head bolted on and then installed the cams and the bearing caps. I also got the intake and exhaust cam pulleys on. A little paint on the back cam cover to make it nice and idler pulley in and torqued too

Tomorrow I have to get the aftermarket water temp sensor hole drilled and tapped along with finishing up putting the valve cover back on. I still have the new privacy cover to put on and I should have a glove box and kick panels to put in soon too.
Re: My recap and ongoing final stretch of building my Hatch
Posted: Mon May 18, 2015 9:27 pm
by grappletech
Great work!! Love seeing the progress on more than just people putting new wheels in their car
Re: My recap and ongoing final stretch of building my Hatch
Posted: Sat May 23, 2015 11:11 am
by shagymc
Re: My recap and ongoing final stretch of building my Hatch
Posted: Sun May 24, 2015 10:29 pm
by shagymc
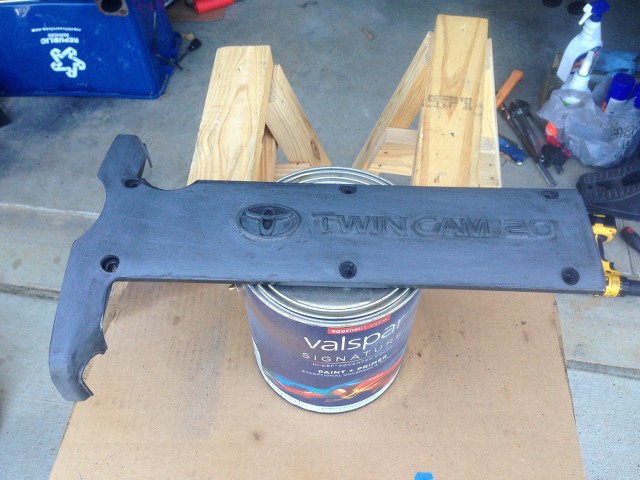
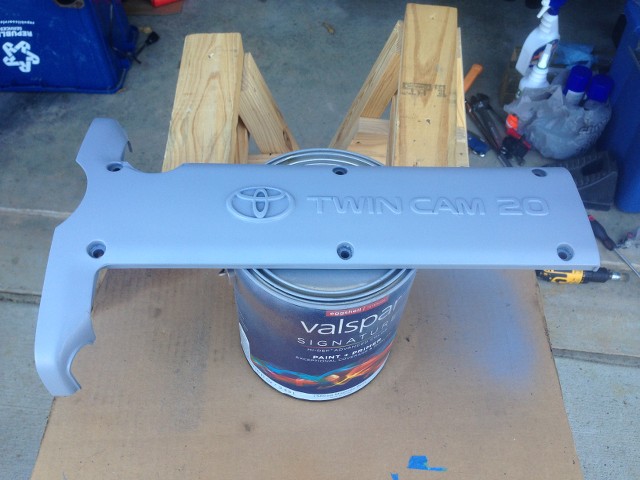
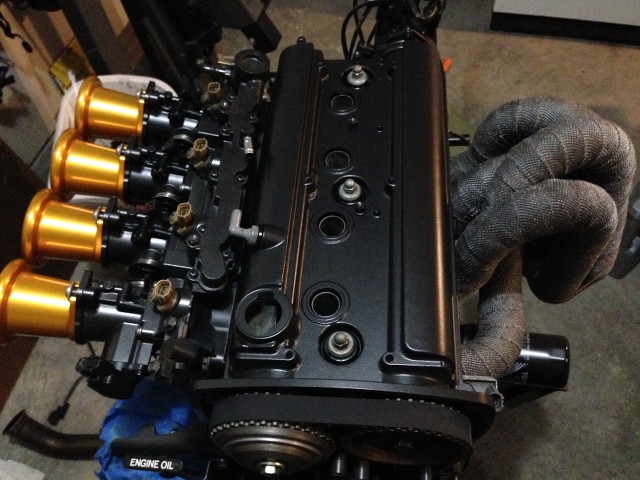
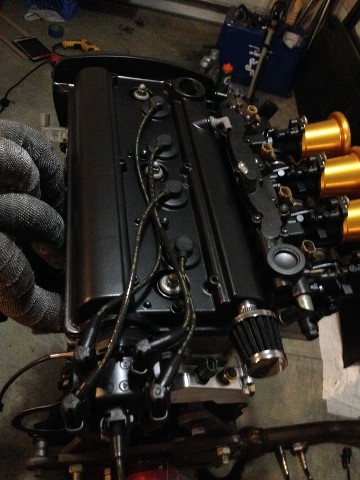
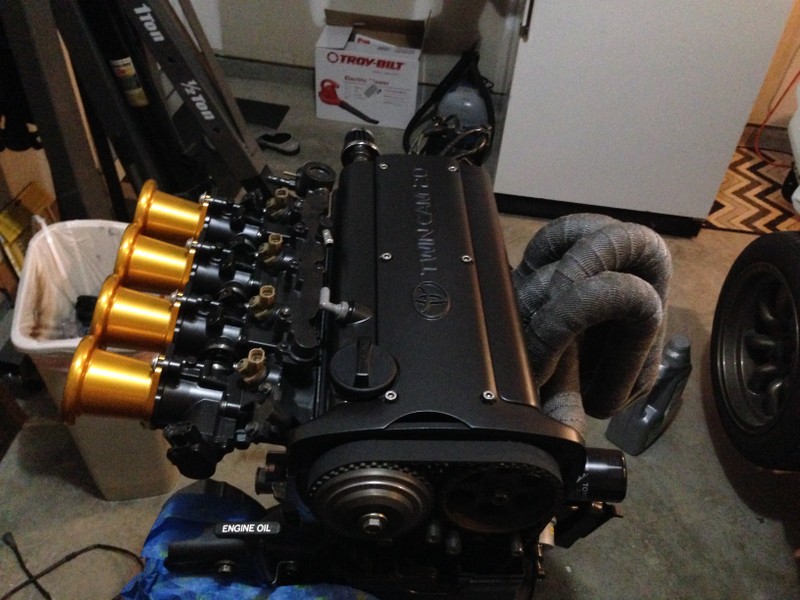
So today my anal retentiveness got the best of me and due to the fact that I couldn't get a color match for the T3 gold on the pulleys and ITBs, I decided to paint the valve cover metallic black again. I also replaced the spark plug tube gaskets and the seal washers for the valve cover.
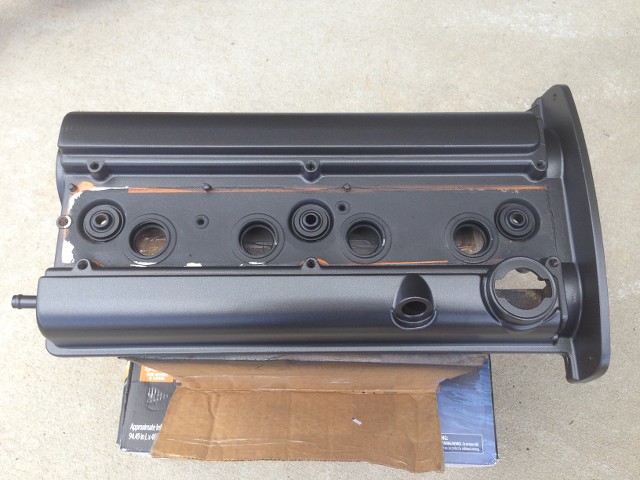
So she's up to this point:
Things are looking good I just hope I can get this thing back together properly haa
Re: My recap and ongoing final stretch of building my Hatch
Posted: Tue May 26, 2015 6:41 pm
by shagymc
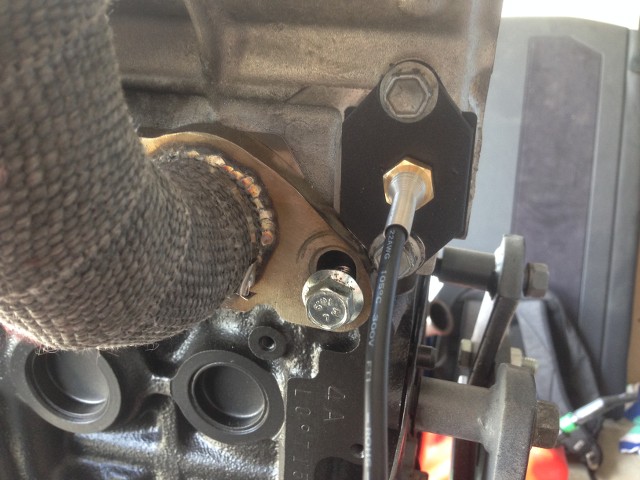
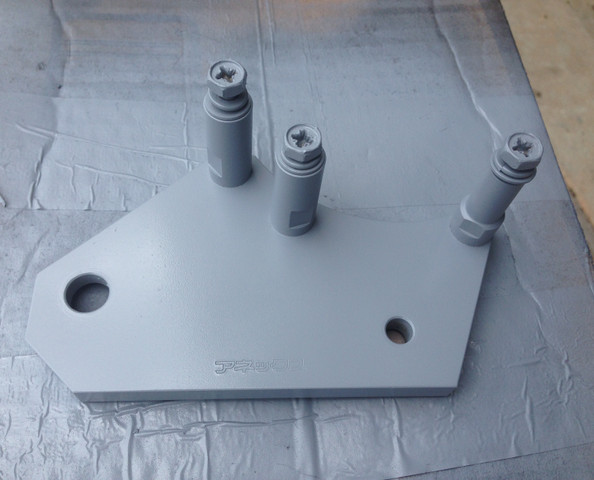
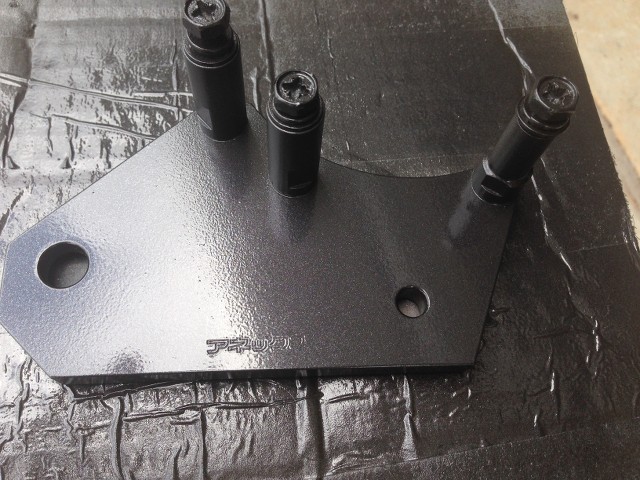
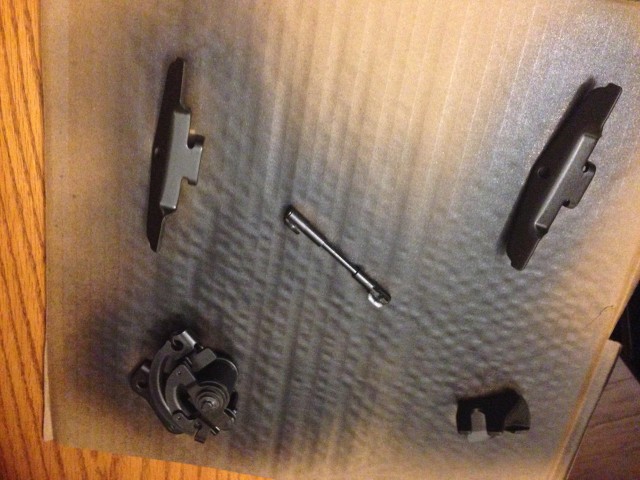
Got some paint laid on the distributor relocation kit and the distributor itself today. Every thing turned out pretty well and the cheap hardware I ordered off of ebay looks great too haa.
Here's the paint on the bracket that mounts to the head:
I also primed and sprayed the peice that attaches to the exhaust cam gear:
And finally the distributor and other brackets for it:
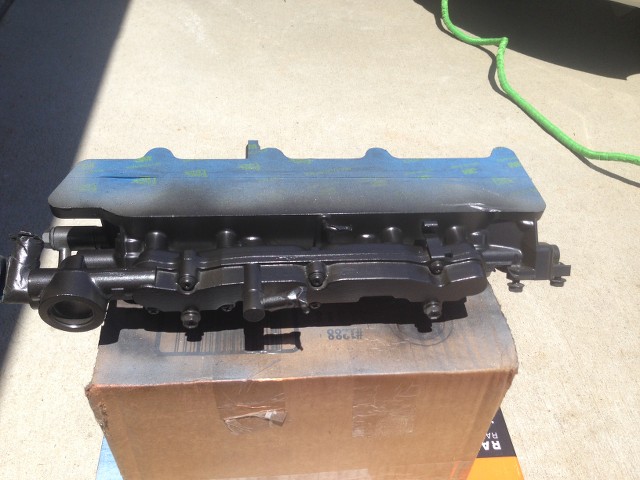
I also mounted the intake manifold:

My SQ engineering water line kit is on its way and then hopefully I'll be putting it back in within the next month.
Re: My recap and ongoing final stretch of building my Hatch
Posted: Tue Jun 02, 2015 6:43 pm
by shagymc
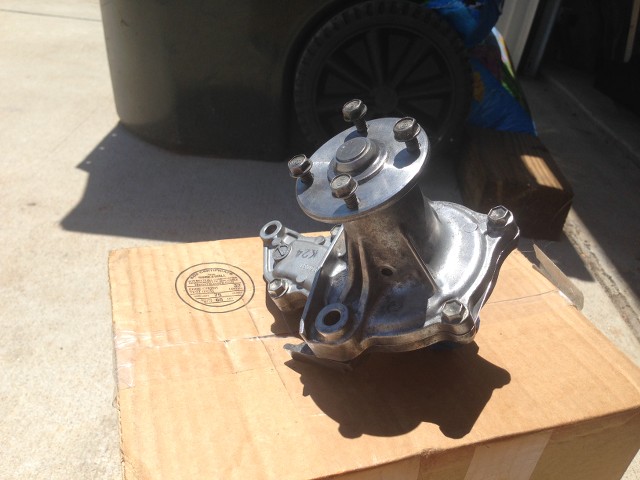
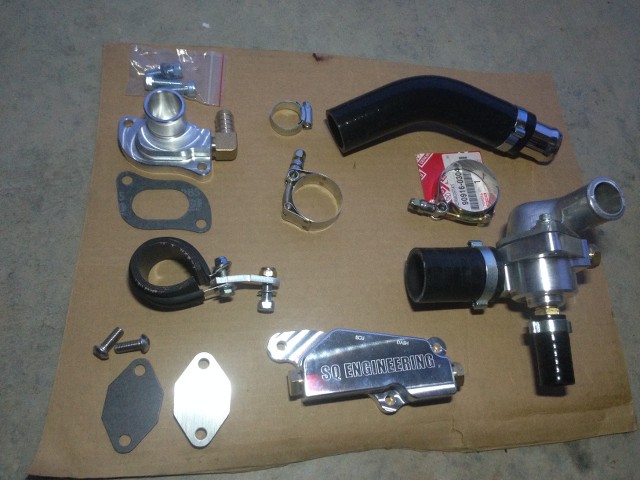
SQ engineering v3 cooling kit came today and this is the break down I have. Straight out of the box the parts looked great. The only thing that I didn't like but was a very minor minor thing was that I had to hop online for the install instructions but even then it is very easy to find them on the site and really all I needed was the picture for the thermostat housing to the water pump and head. The parts look beautiful and the quality is up there with other kits that sell for twice as much.
Since the motor is out I got straight to work on mounting the different pieces. I found that the thermostat to water pump piece was easier to attach to the part that bolts to the intake side of the head before mounting it to the engine:
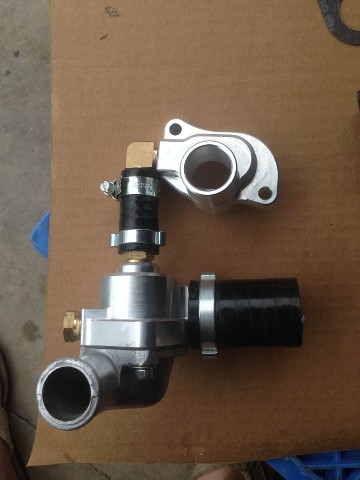
After that was done, it slid on to the water pump inlet and then bolted up to the head.
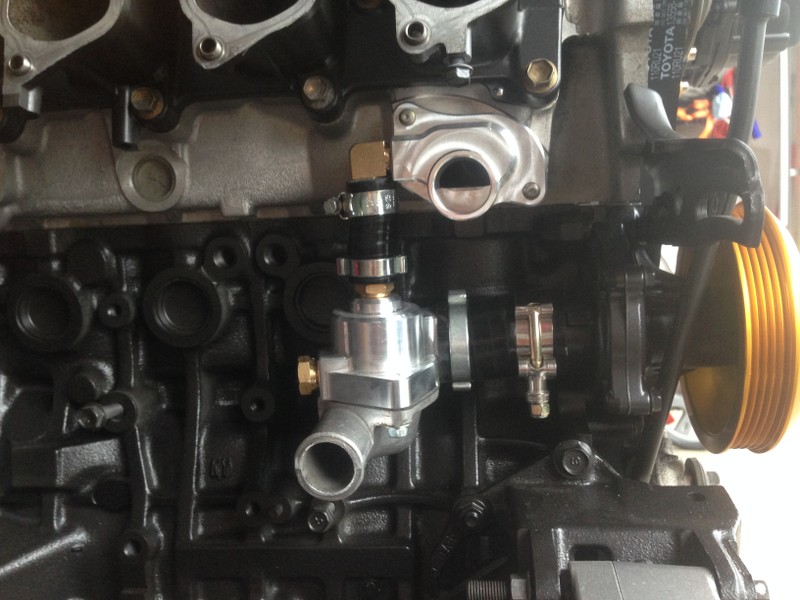
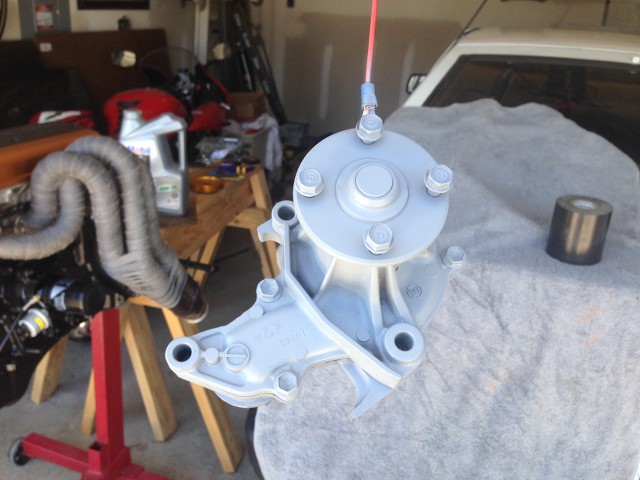
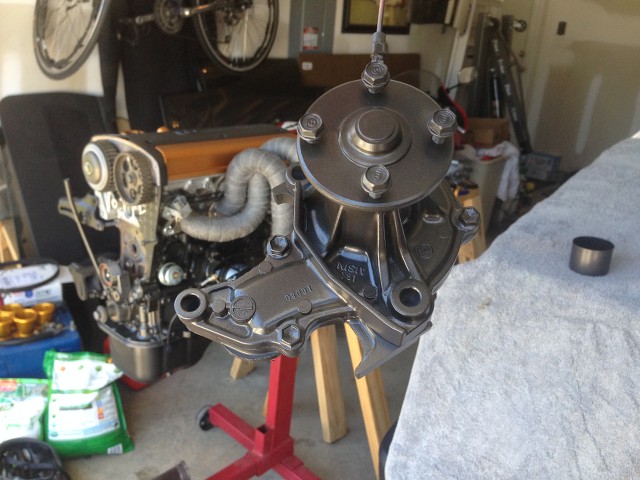
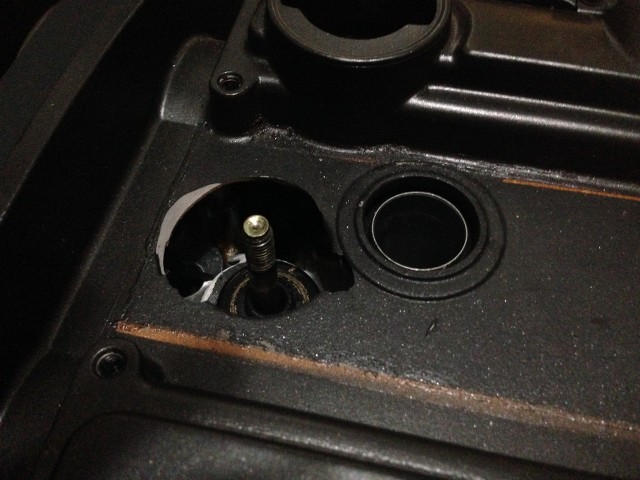
I couldn't get my dash sensor to screw into the M16 hole on the rear plate, so I just went to the store and bought a new one. I think I'm going to move the gauges from the dash but I'm not sure where I'm going to put them. If I mount them in the glove box, I figured I'd still want to see where water temp was at so I bought a new sensor at the store for 12 bucks. Using some teflon tape I screwed in the ECU and dash sensors and then mounted the plate to the back of the motor. No gasket is needed for this since the plate uses an O ring. The new look is way less bulky as my old kit and looks a lot better.
This took maybe a half hour to do and only because I was missing some bolts I had to track down. Since I eliminated the heater core, this kit eliminates the hard pipes I bought from T3 and now is going to make my bay look much cleaner. I will update performance results once I finish getting the rest of the parts and get the motor back in.
Re: My recap and ongoing final stretch of building my Hatch
Posted: Thu Jun 04, 2015 12:14 pm
by RuizXIII
That latest stuff from SQE looks very nice.
Good job on the install
Re: My recap and ongoing final stretch of building my Hatch
Posted: Thu Jun 04, 2015 6:54 pm
by shagymc
Thanks, I'm very impressed by it. I had a chance to open up a few packages I had with parts on order. Mostly stuff from ebay. I got a new fresh privacy cover, a new TRD horn button (due to dropping solder on my other one), new kick panels, and a new glove box.
Finally got my Lexus door strikers put in too. Big thanks to member Morgan for the heads up on these. I had to drill out the screws on the driver side but I think we can agree that these look worlds better.
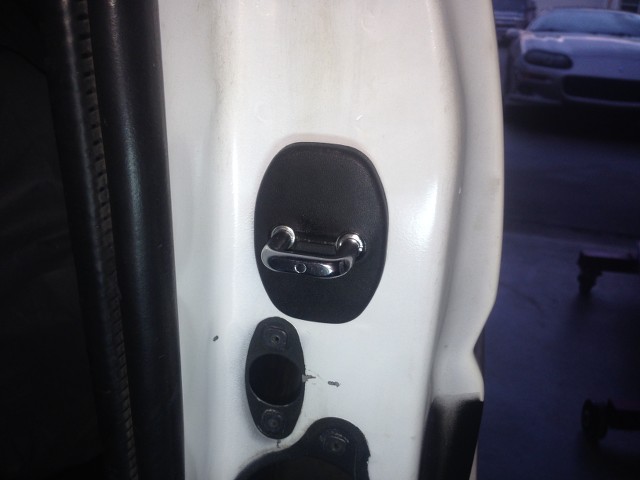
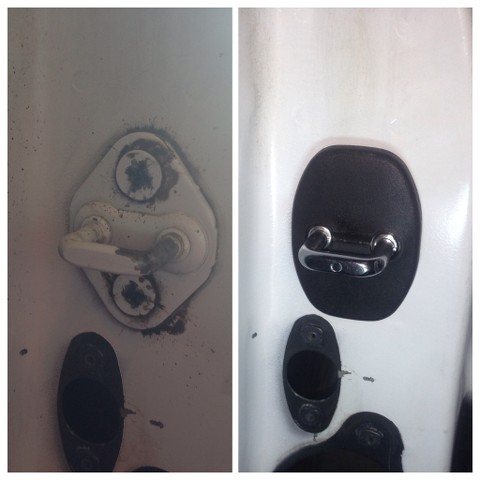
Short update, I know, but I love these pieces.
Re: My recap and ongoing final stretch of building my Hatch
Posted: Fri Jun 05, 2015 9:57 am
by yellowsnow4free
Why did you have to drill out the screws on the driver side?
They do look great installed though

Re: My recap and ongoing final stretch of building my Hatch
Posted: Sat Jun 06, 2015 1:14 pm
by shagymc
I have no idea why they wouldn't come out but i tried everything with no luck getting them out. It was a nightmare.
Re: My recap and ongoing final stretch of building my Hatch
Posted: Mon Jun 08, 2015 9:11 am
by yellowsnow4free
shagymc wrote:I have no idea why they wouldn't come out but i tried everything with no luck getting them out. It was a nightmare.
Weird.
If I decide to do this I'll be sure to spray some WD40 in there beforehand to hopefully avoid more work

Looks good!
Re: My recap and ongoing final stretch of building my Hatch
Posted: Thu Jun 11, 2015 6:33 am
by geomel
Hi Nice build! I want to know where you got the dizzy kit. Thank you!
Re: My recap and ongoing final stretch of building my Hatch
Posted: Thu Jun 11, 2015 12:46 pm
by shagymc
mine came with the motor so I'm not sure of the brand but SQE makes a great looking relocation kit for a decent price.
http://shop.battlegarage-rs.com/collect ... cation-kitCheck them out on Battle Garage or You can order direct from Australia through their site.
Re: My recap and ongoing final stretch of building my Hatch
Posted: Thu Jun 11, 2015 7:45 pm
by shagymc
Re: My recap and ongoing final stretch of building my Hatch
Posted: Sat Jun 13, 2015 9:48 pm
by shagymc
Re: My recap and ongoing final stretch of building my Hatch
Posted: Sun Jun 21, 2015 7:21 pm
by shagymc
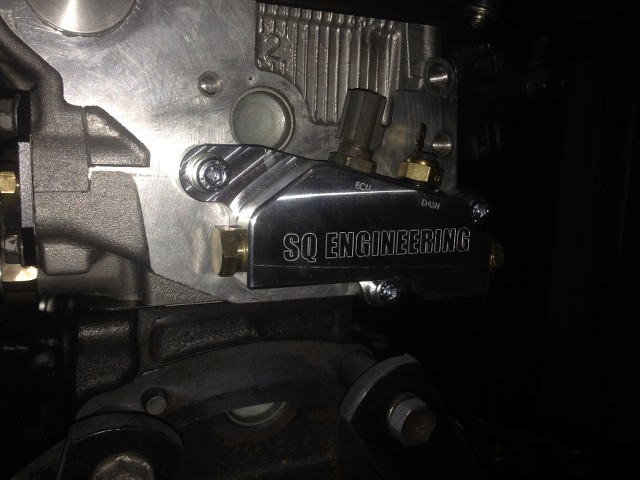
Not a whole lot of progress this week. I got my Cusco motor mounts in from BGRS and some wood for the door panel build. So I got one of the mounts refinished with fresh paint. I just need to get some new hardware for it. I also took the coolant block off plate from SQE and actually spent some time center punching it and then drilling for the coolant temp sensor for the gauge in the dash.
I also did a lot of router and jig saw work which you can't really tell but here's where I am so far. I have the upper insert almost designed except the part that will go around the tow strap handle.
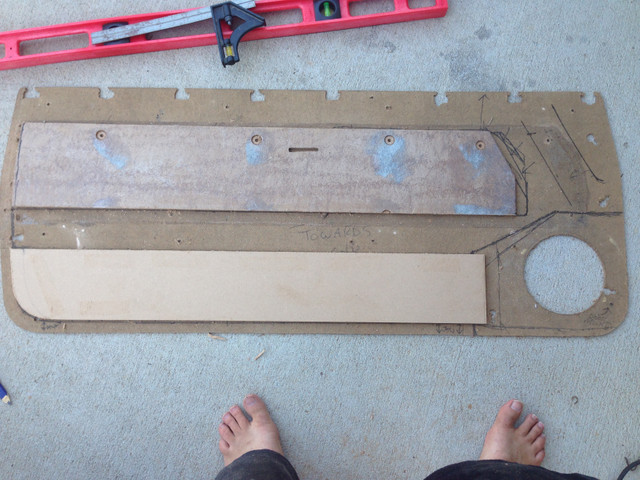
The next step is getting a spacer ring for the speaker and then making the negatives to router the insert holes in the panel. You'll see what I mean later.
Re: My recap and ongoing final stretch of building my Hatch
Posted: Fri Sep 18, 2015 6:45 pm
by shagymc
Been a long summer and with work and the boy, progress has slowed. Here's where I'm at and the current problems I'm being plagued with.....
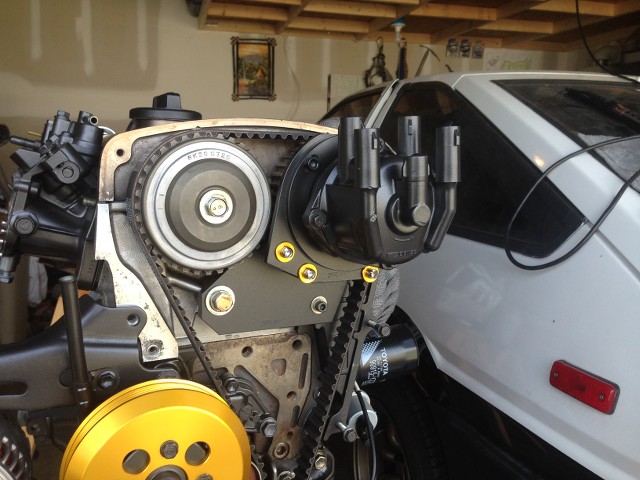
Even with the SQ engineering extended spark wire, it didn't reach so after thinking about it, I scratched the idea and am going the route of mounting the distributor on the back of the motor and re working the firewall. It was surprisingly easy to find a dizzy on ebay in pretty good shape and I bought it for a great price. When it showed I wasted no time getting it mounted.
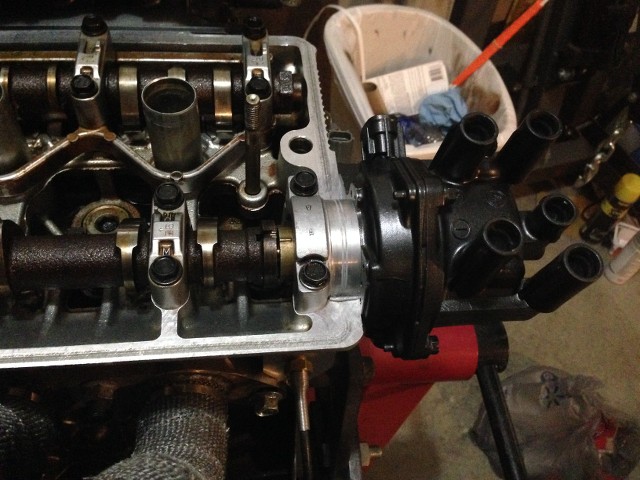
Before mounting it I took the cap off and inspected the rotor and the one on the right is the used one from ebay, the one on the right was the one previously mounted. There looks to be a lot of corrosion or damage to the old one so I'm glad something cleaner and better is going in.

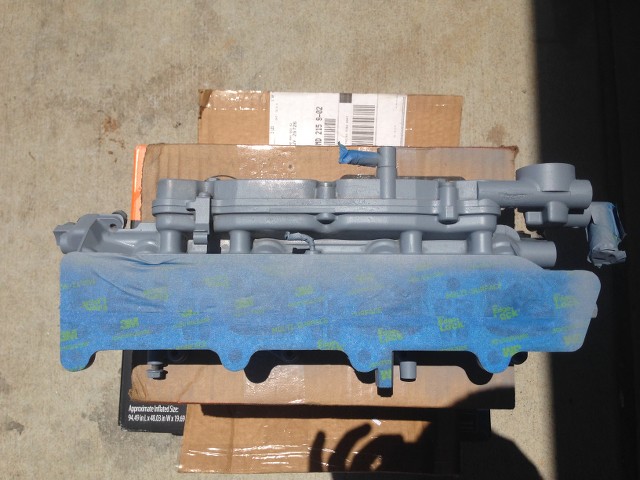
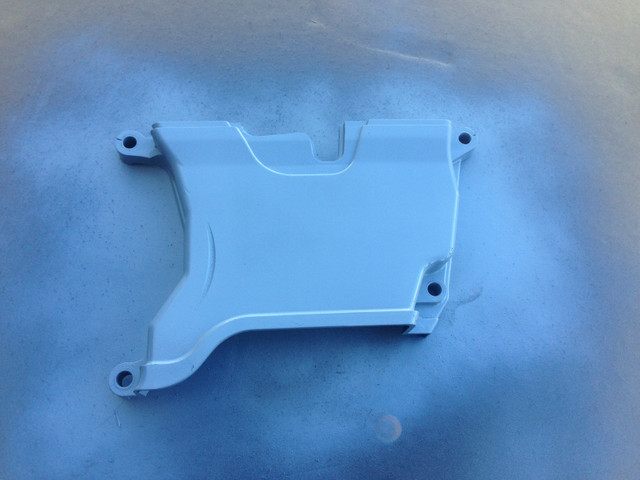
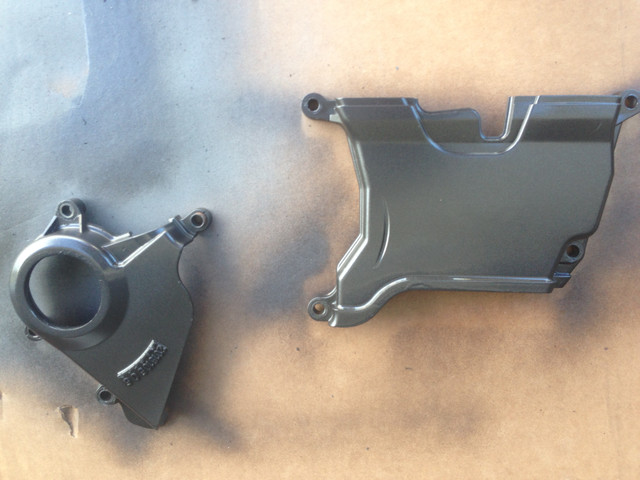
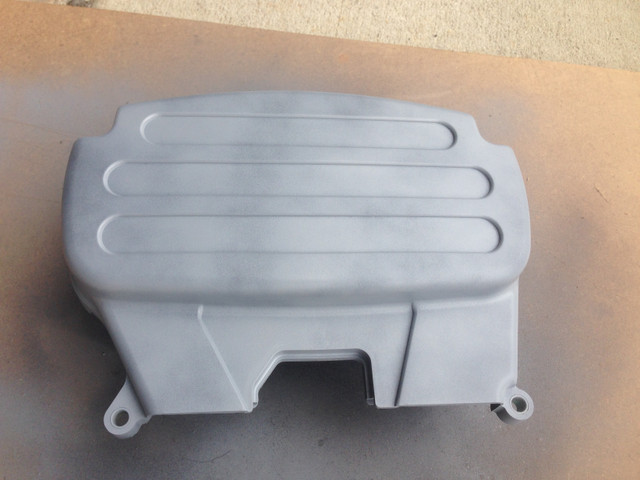
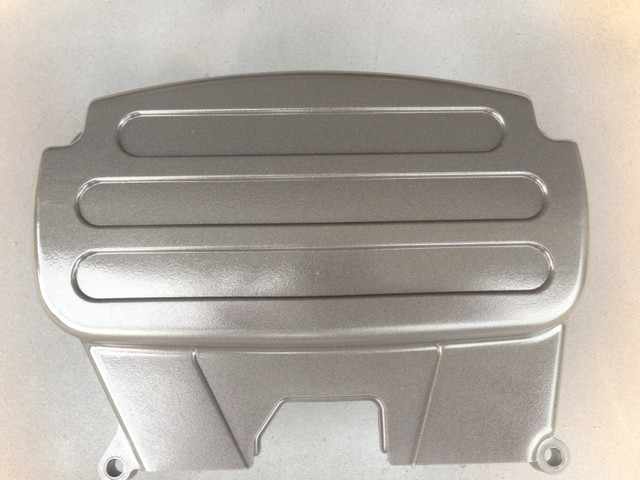
I ordered a new cam cover from SQ for the front so I wouldn't have a giant hole where the dizzy relocation kit came through. I painted it metallic black to match the rest of the motor.
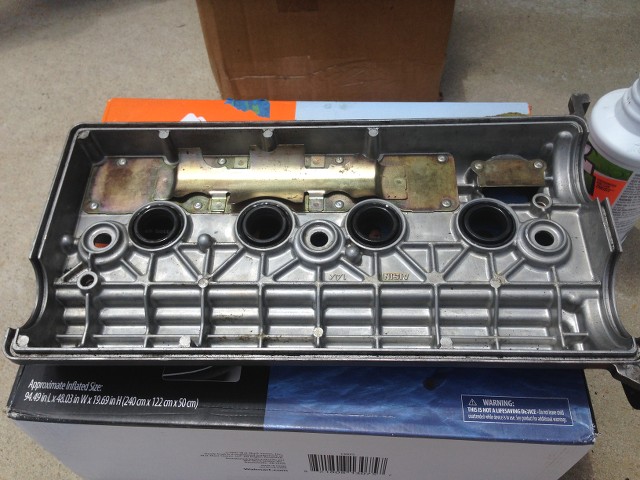
So here's the shitty shitty part, I was tightening the bolts that hold the valve cover on, ready to finish up this part of re assembly when all of a sudden I heard a snap. The torque wrench hadn't indicated I was at the right torque value so I was confused but when I realized what happened I was pissed. The aluminum had snapped around the bolt and now I'm in need of a new valve cover.
So that was pretty upsetting. If any of you have a lead on a valve cover, I'd appreciate it. I'll be looking at getting a new torque wrench as well I guess. The door panel build has taken a bit of a back seat to this but I will probably start back up on it now that work has stopped on the motor.
Re: My recap and ongoing final stretch of building my Hatch
Posted: Sat Sep 26, 2015 5:14 pm
by shagymc
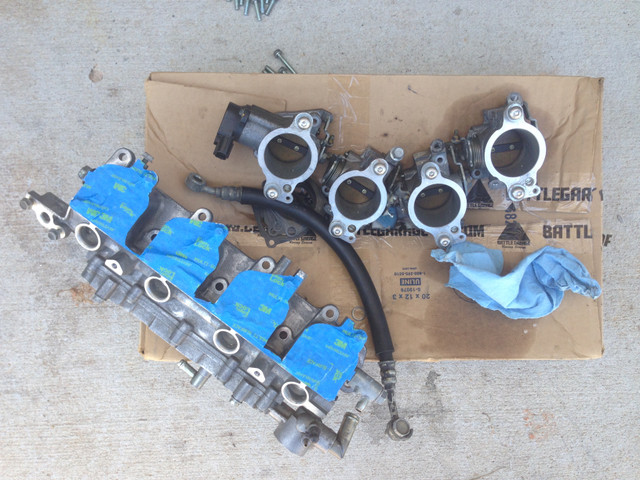
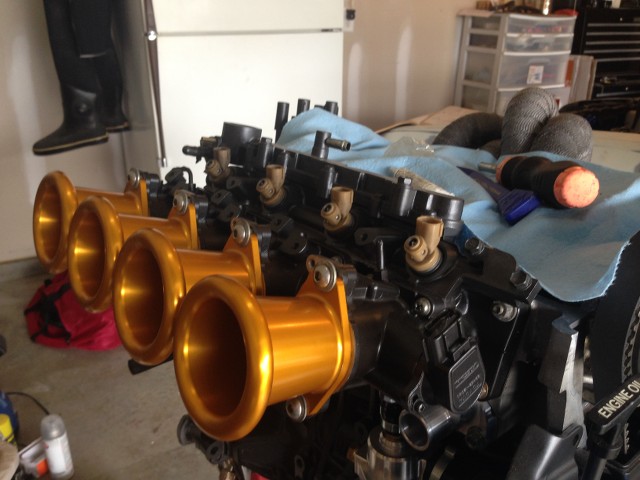
Made a little more progress over the past week. I am in the process of cleaning, sanding, and painting the throttle bodies. It was a lot of work but the overall look will be worth it. Here's a couple mounted and painted.
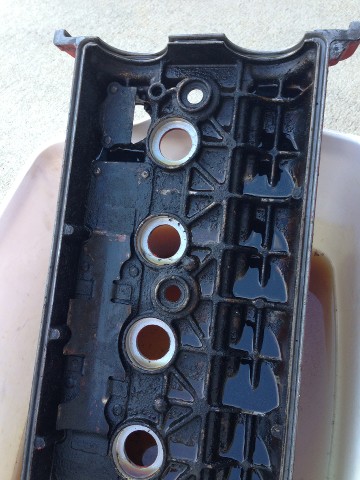
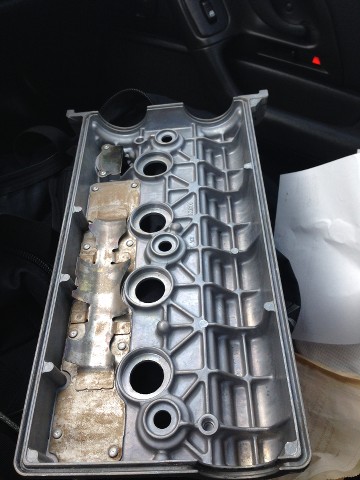
I also bought a replacement valve cover but it's in rough shape. so I'm trying to degrease it. I'm going to take it to a local shop and try to use their parts cleaner for it.
I also got a new clutch slave cylinder because mine was leaking and it was also a great time to finally install the stainless line I bought a while back. I thought the install would be easy enough but of course the fitting between the old rubber hose and the hard line was seized so I'm pretty sure I'll need to replace the hard line now. Not to thrilled about that.
This may work out in my favor though because I'd like to hide the hard lines instead of them running along the fire wall. Whether that means running them through the inside of the car or through the top part of the chassis where the wiper linkages are, we'll see.
Looking forward to seeing the motor complete.
Re: My recap and ongoing final stretch of building my Hatch
Posted: Sun Sep 27, 2015 9:47 am
by Dream86
Awesome build man! Keep at it. I like the attention to detail. What numbers are you shooting for at the crank?
Re: My recap and ongoing final stretch of building my Hatch
Posted: Fri Oct 02, 2015 7:13 pm
by shagymc
Thanks, I don't really have a number in mind just want it to run good.
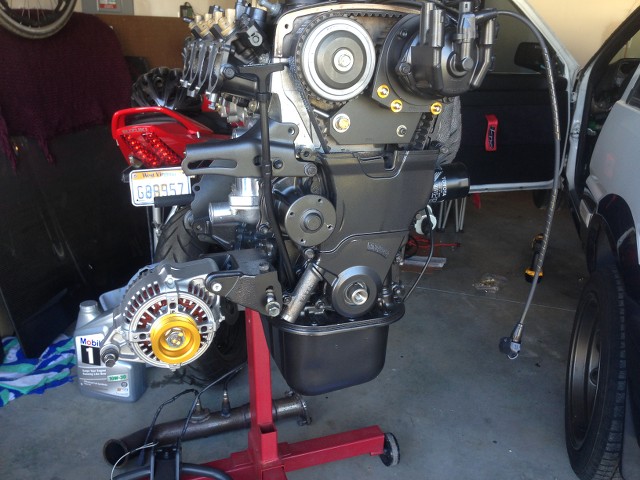
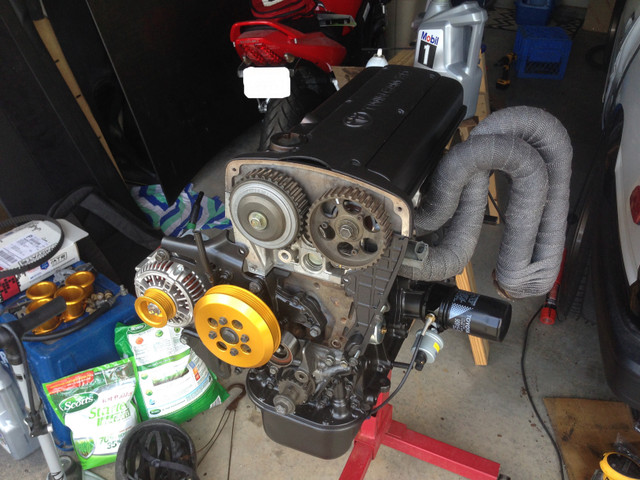
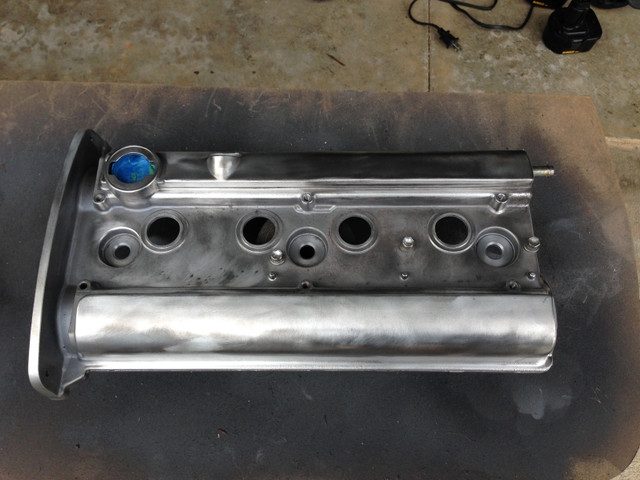
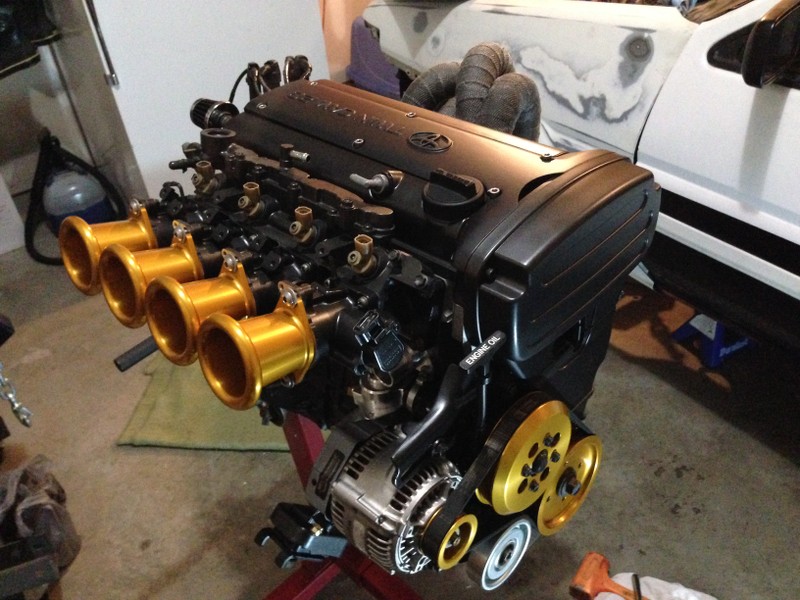
The last week has shown the most progress I've had in a while. I took the valve cover to a local machine shop for a cleaning, I was very pleased with the results. Once home, I wire wheeled the rest of it so the paint would stick and to get rid of what little **** paint was on it. Lots of work but worth the time.
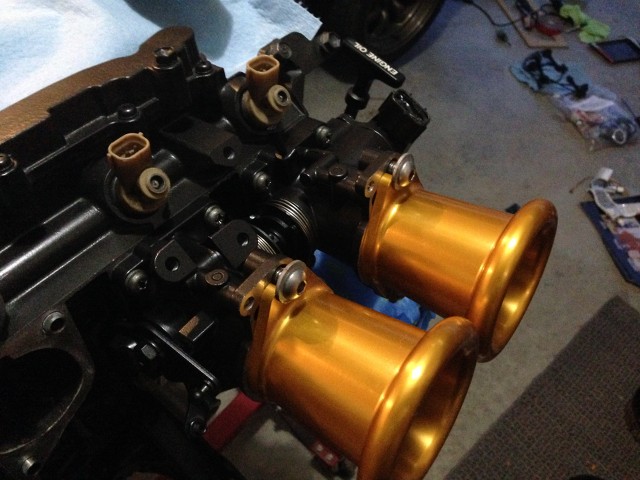
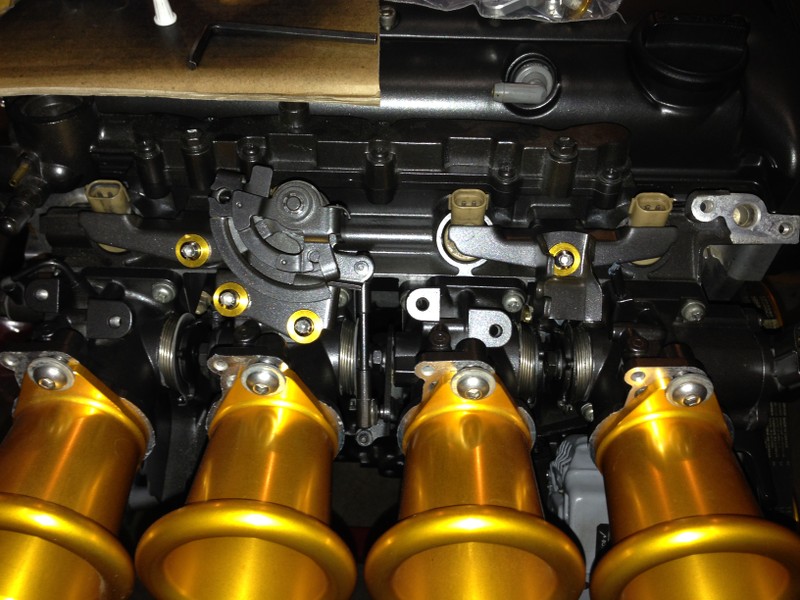
I finished painting the throttle bodies and mounting the T3 trumpets
After the paint cured on the cover I mounted it up and then ran my new wires from T3 to the distributor.
I need new hardware for this, but finally I mounted the wire cover, put the oil fill cap on, and mounted the top cam gear cover. I love the look now. I just hope it'll run as good as it looks.
I still have the injector brackets and throttle linkage pieces to prep and paint. I'd like to get some black hardware for the wire cover and the throttle bodies. I also have to research what, of the vacuum lines, I can delete. I'm hoping to get rid of as much stuff as possible to keep everything minimal and clean in the bay. I also looked into getting the tools needed to run the clutch and brake hard lines. Any feedback on where and what tools to get for it would be nice. I don't plan on spending crazy money unless someone convinces me it's worth it since I only think I'll ever do it for this car but just give me some ideas. That major work will start next week when my family takes a trip out of town.
Re: My recap and ongoing final stretch of building my Hatch
Posted: Sat Oct 03, 2015 7:41 pm
by fuerte
For the vacuum lines it depends on what you plan on keeping. only two that are needed for the car to run is the fuel pressure, MAP, Idle air control valve. I did away with the hard metal lines under the ITBS.
Re: My recap and ongoing final stretch of building my Hatch
Posted: Mon Oct 05, 2015 9:08 am
by shagymc
After taking a second look at what I have, I'm pretty sure most of what can go is gone. I just have to go back and and make sure I reconnect everything like I'm supposed to. I'm trying to learn what everything is actually doing during this part too so that has slowed me down a bit as well. In fact if there's a good reference on how the vacuum system works for the 20 valve, let me know! I'll keep researching though.
So I finished the injector brackets and the throttle linkages and they look pretty great too. Here's the shots:
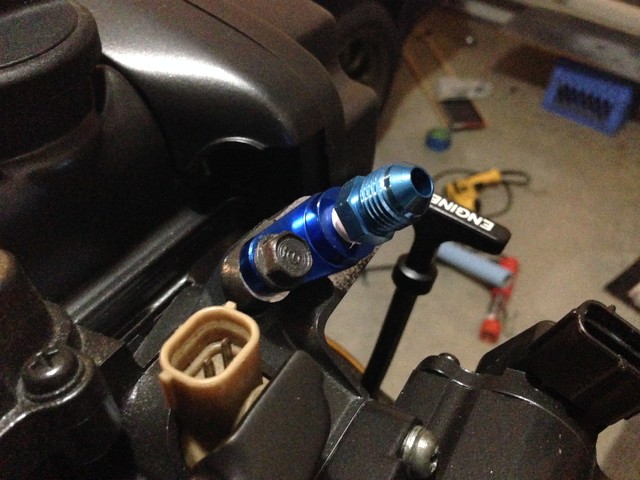
I also started work on the tomei FPR. I just mounted the adapter to the fuel rail and a fitting:
I removed the clutch hard line from the car and I am trying to figure out a plan of attack for that and the brake hard lines as well. I'm going boosterless, so I need to figure out if I still need the valve that distributes the pressure evenly to all the brakes (I'm pretty sure I still do) so that I can start removing those lines and do it all in one shot. I've heard I need to change the bore size though. I still have a lot of research left on that too.
Re: My recap and ongoing final stretch of building my Hatch
Posted: Mon Oct 05, 2015 8:48 pm
by fuerte
https://drive.google.com/file/d/0B4_Ogn ... sp=sharing it is easier to show where everything is at but this is a simple diagram of everything
Re: My recap and ongoing final stretch of building my Hatch
Posted: Sat Oct 17, 2015 6:30 pm
by shagymc
So the vacuum lines I'm keeping are the FPR, ISCV, and the MAP sensor. everything else is capped. I'm currently waiting on some copper nickel fuel line I ordered to show up. I also ordered a 37 degree flaring tool to make the fuel lines. I removed the canister and old fuel filter and plan on doing an inline fuel filter instead. Just researching and planning what goes into redoing the hardlines for the fuel and brake systems is a pain but it doesn't seem that hard. I've drained the brake fluid and removed the master cylinder and brake booster. Once all parts show up, I am going to start re doing the hard lines and running the new ones. My idea is to mount the fuel canister behind the glove box so the bay is clean but I want to find a newer one so that I know it actually works. The last thing I want is a gas smell in the car. I'm also moving the proportioning valve for the brakes into the car as well and then running all new hard lines for it. I know that this will be a pretty hefty project but I think the end goal of a clean shaved bay will be worth the work. I'll post more pictures soon.
Thanks Fuerte for the feedback and diagram!
Re: My recap and ongoing final stretch of building my Hatch
Posted: Mon Nov 09, 2015 11:19 pm
by shagymc
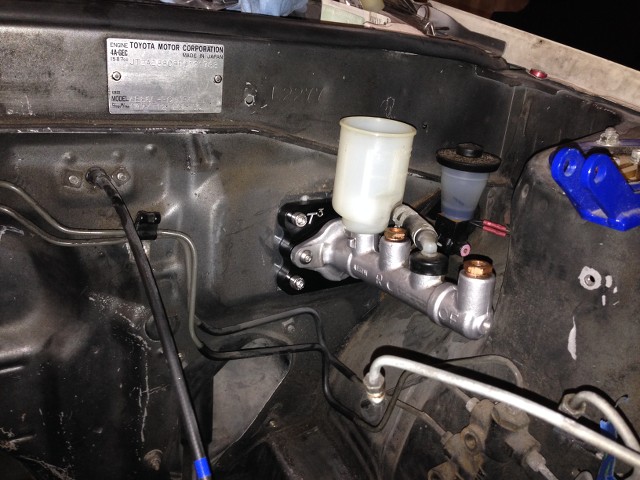
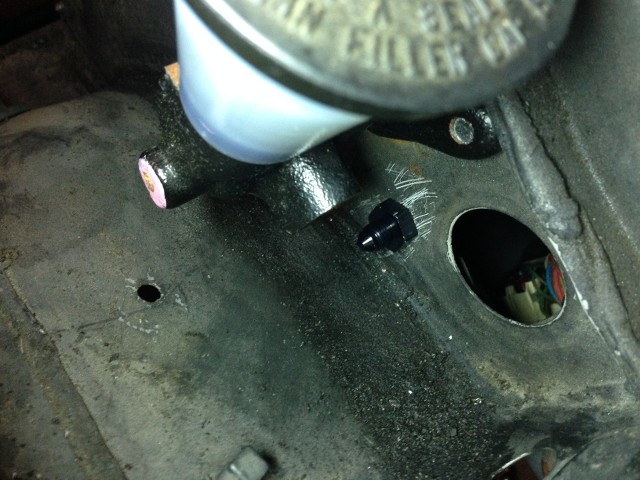
One of my target goals for my build is a clean shaved bay and I've started tackling what I think will be the hardest part of that: running my own clutch and brake lines. I had no idea what I was doing or what I needed so I took a lot of time researching and coming up with somewhat of a plan. It started with deleting the booster. I bought the T3 brake booster delete panel and I hyped myself up for something difficult to do but found it fairly simple to install. Here it temporarily is installed to see where my hard lines will need to go.
The next thing I did was label all the hard lines on the proportioning valve and then I cut and removed the hard lines and pulled the valve from the bay
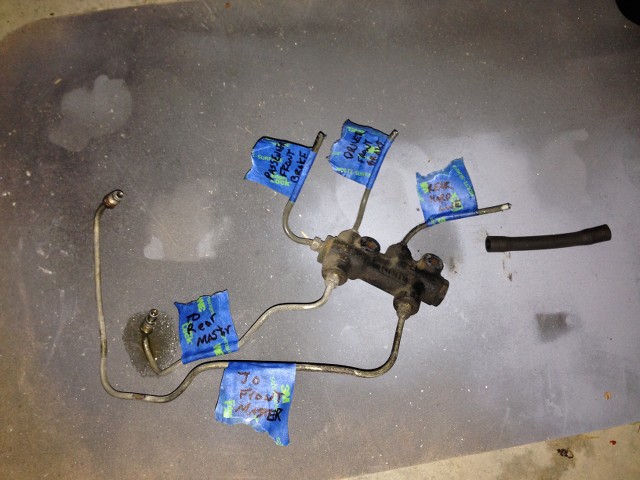
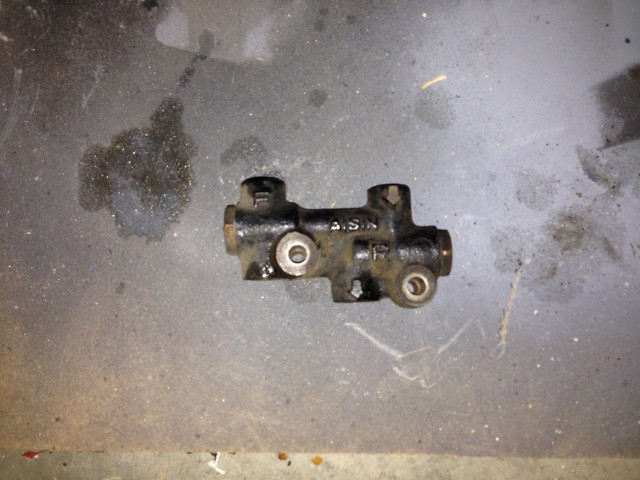
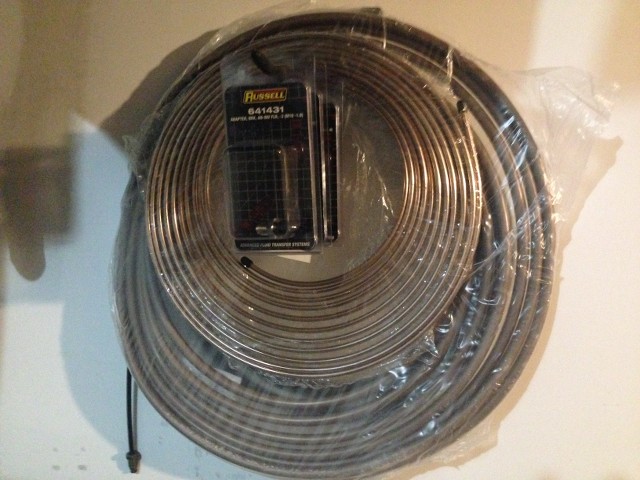
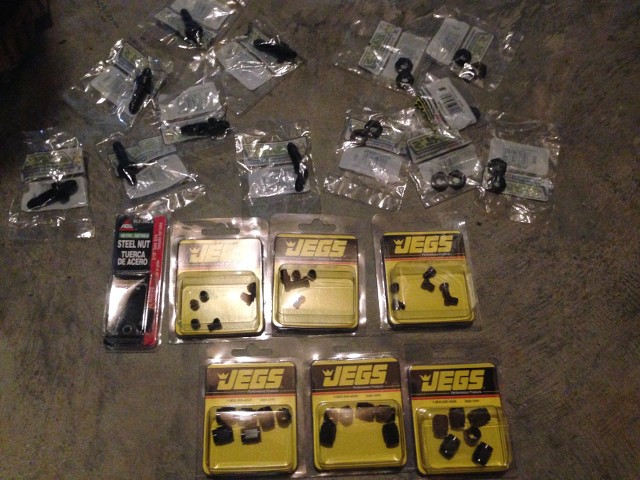
I'll be cleaning that up a bit and finding it a new home, hidden somewhere. After some initial planning, I ordered some material for the brake and clutch lines. -3 AN Bulkhead fittings, -3 AN tube sleeves and tube nuts, A few metric to AN adapters and some 3/8 and 3/16" copper nickel hard line. Also, not pictured are the tools I bought; pipe cutter, 37 degree double flaring tool, 45 degree single flaring tool, and a pipe bender.
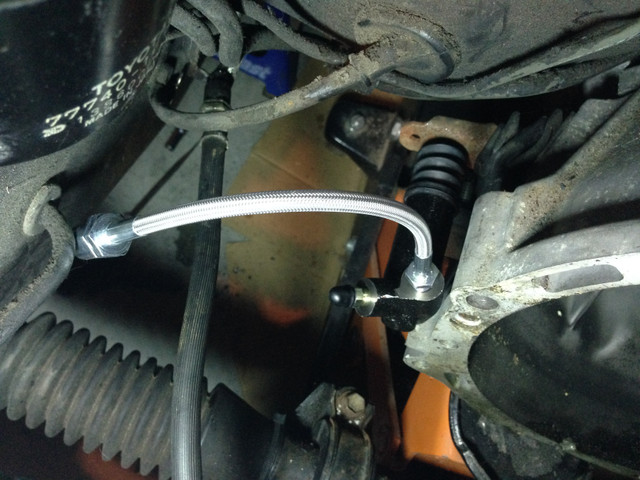
Tonight I was able to mount to bulkhead fittings for the clutch line. I picked a spot not to inconvenient and would still keep everything looking nice in the bay. The slave has the T3 stainless line and then a -3 AN to metric adapter. that adapter will go to a -3 AN female to female adapter and then screw to the bulkhead fitting.
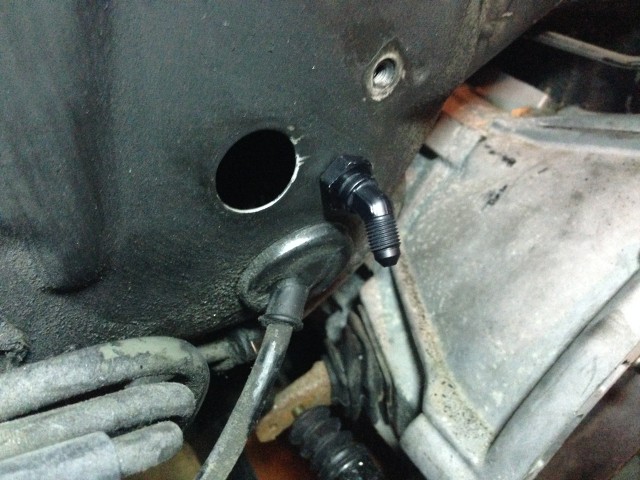
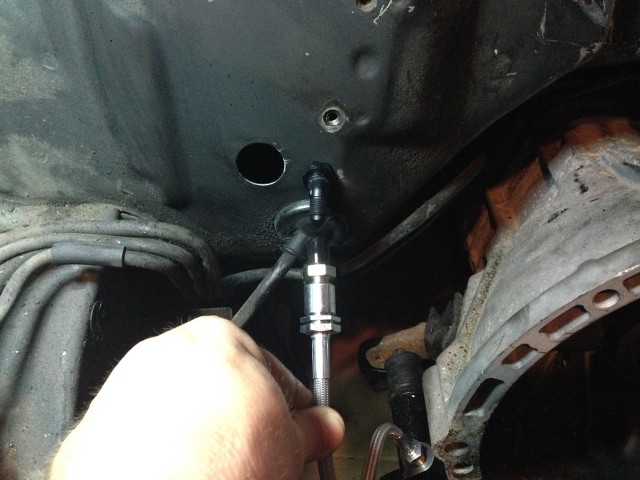
After the slave side was done, I mounted another bulkhead fitting near the master.
I started messing with some hadline and even double flared one end but then I called it a night. I expect this process to take some time but the end result will be worth all the time and hard work. Even if the wife doesn't understand
Re: My recap and ongoing final stretch of building my Hatch
Posted: Wed Nov 11, 2015 2:26 pm
by jdm86gtz
I mounted the bias valve setup inside the car on mine, using a JDM setup that has a separate T piece for the front and a pressure reducing valve for the rear.
I routed the front hoses out through the 2 wiring grommets and joined the rear into the hard pipe by the handbrake.