Page 2 of 6
Re: My recap and ongoing final stretch of building my Hatch
Posted: Mon Aug 18, 2014 8:59 pm
by shagymc
Re: My recap and ongoing final stretch of building my Hatch
Posted: Tue Aug 19, 2014 6:39 am
by Hindi
I really like the attention to detail!
I've found fixing and restoring small bits around my 86 are some of the most enjoyable times I've spent working on it.
I'm anxious to see how your door cards turn out, I've been planning something similar but with abs plastic.
Great work!
Re: My recap and ongoing final stretch of building my Hatch
Posted: Tue Aug 19, 2014 10:35 am
by shagymc
Thanks, it's very slow tedious work, that's for sure. It is great to see it coming together though. I have a circle jig for my router coming so I can start cutting the speaker rings and molding it together and I have no idea what I'm going to do with the tweeters either.
Re: My recap and ongoing final stretch of building my Hatch
Posted: Tue Aug 19, 2014 3:23 pm
by grappletech
If you don't mind me asking what shade of SEM paint did you use for the sunroof switch panel?
Re: My recap and ongoing final stretch of building my Hatch
Posted: Tue Aug 19, 2014 4:50 pm
by shagymc
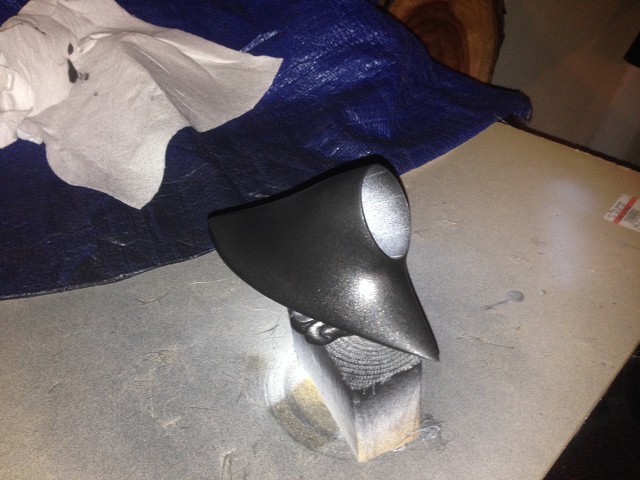
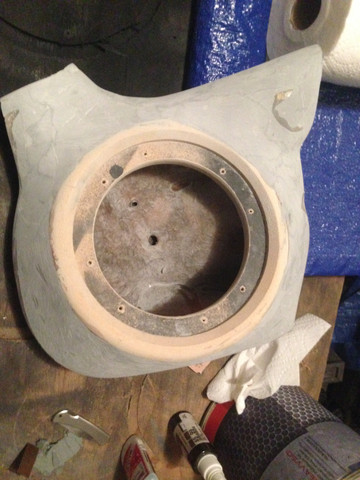
SEM is gloss black for plastic and vinyl. Today I got my circle cutting router jig which Id been waiting on to make the speaker rings I need for the woofers. I still don't know where I am going to put them but at least I have something to work with now. I started by cutting out 4 rings the outside diameter I needed.
I put a small chamfer on the inside of the top ring, and then nailed the two rings together and put a round edge on the outer edge. This is my finished product. So now I have something to work with.

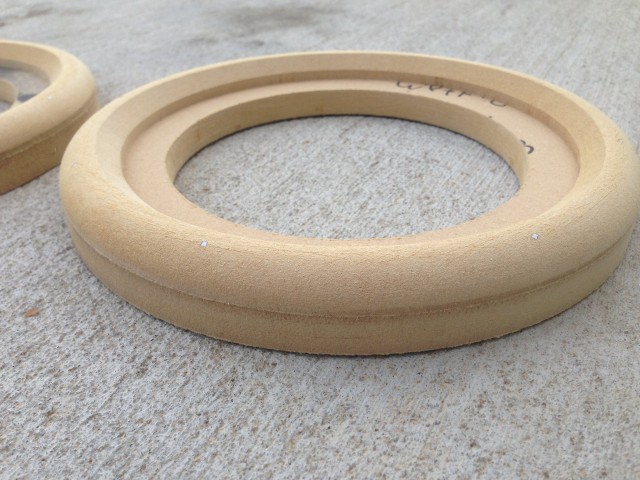
Looking at either kick panels or door for these, not sure though yet.
Re: My recap and ongoing final stretch of building my Hatch
Posted: Wed Aug 20, 2014 10:12 am
by RuizXIII
Excellent wood work. That looks great.
The stuff you sprayed really turned up fresh. Awesome.
Re: My recap and ongoing final stretch of building my Hatch
Posted: Thu Aug 28, 2014 7:55 pm
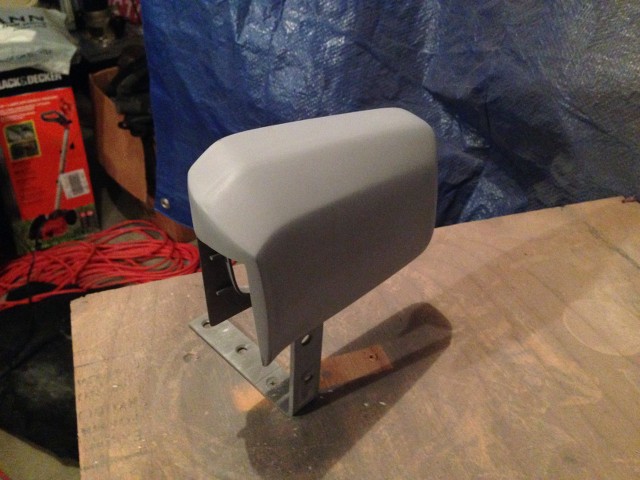
by shagymc
Re: My recap and ongoing final stretch of building my Hatch
Posted: Sat Aug 30, 2014 7:45 pm
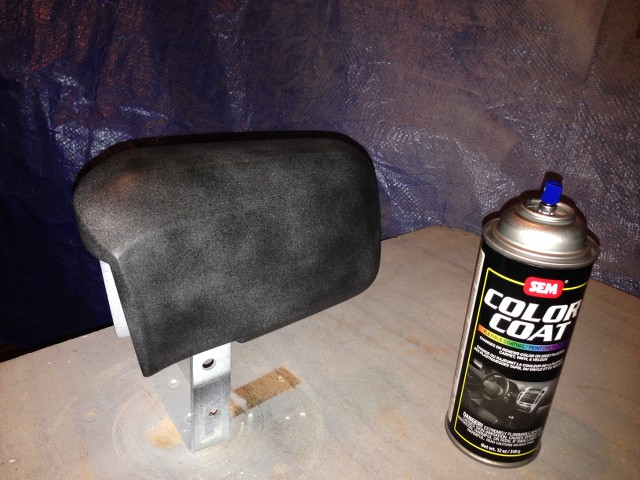
by shagymc
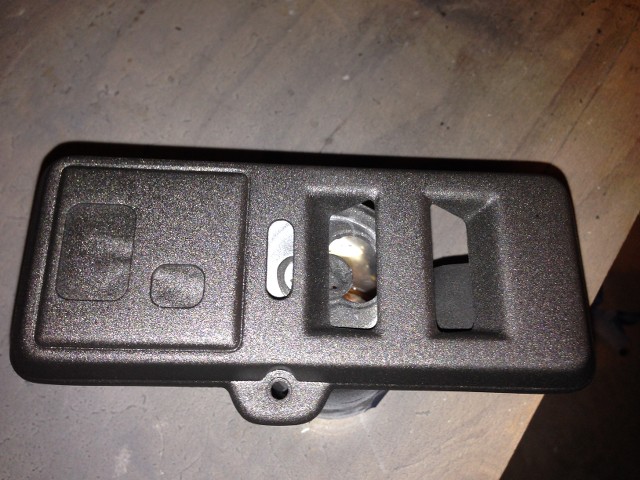
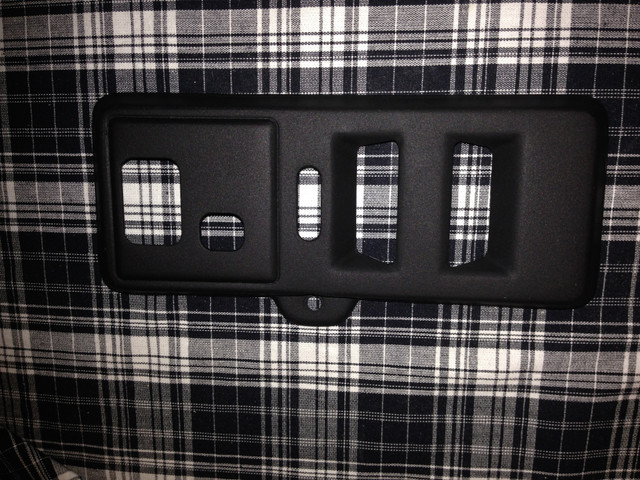
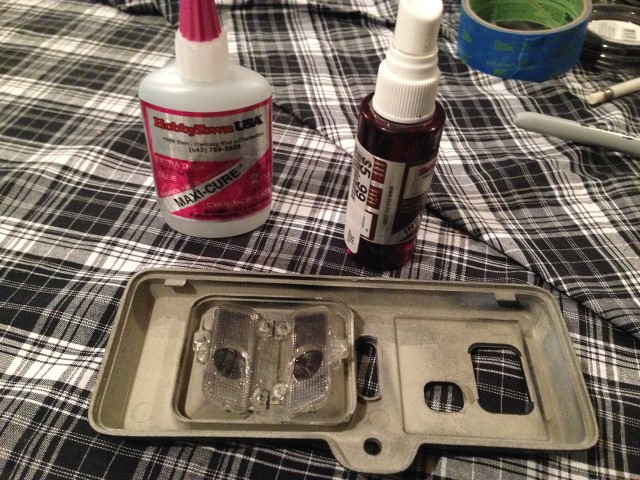
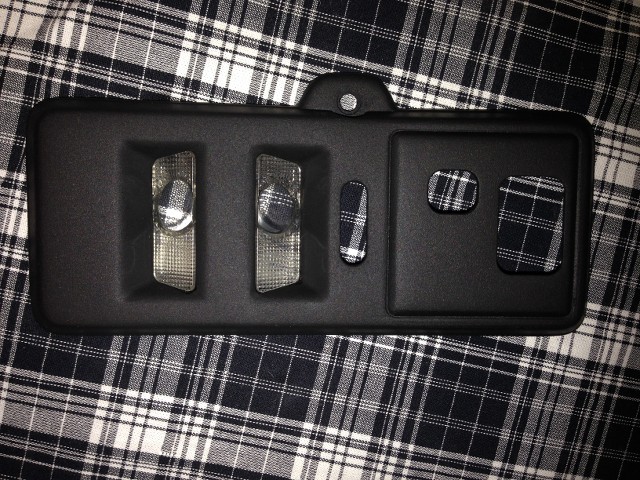
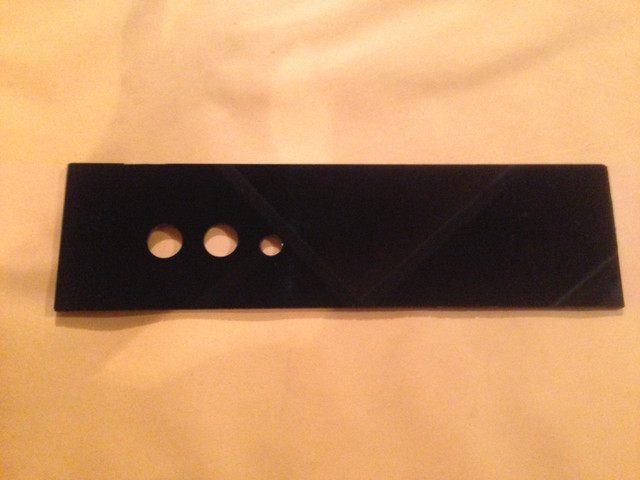
Made the switch panel:
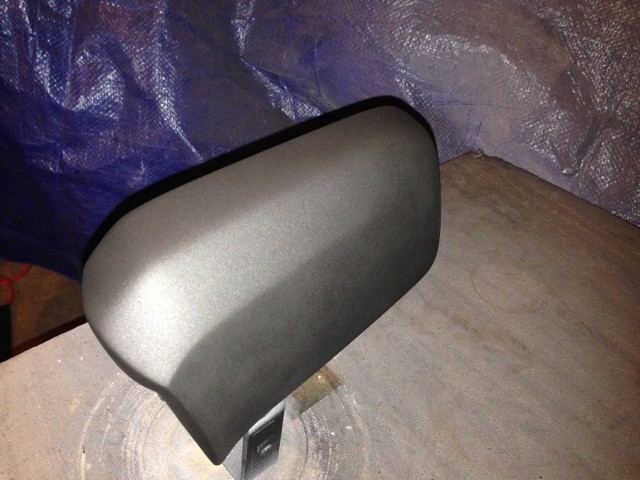
With a little glue for the switch panel, here's the finished product
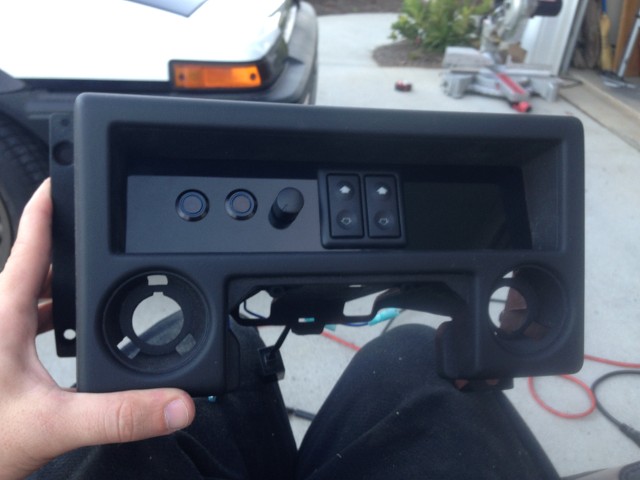
Really stoked on this, I'm thinking I want to put an emblem or decal next to the window switches to fill the small gap there. Any suggestions?
Re: My recap and ongoing final stretch of building my Hatch
Posted: Mon Sep 01, 2014 9:05 am
by bahamianfisher
Amazing , this build has my full attention . I love the attention to detail !

Re: My recap and ongoing final stretch of building my Hatch
Posted: Mon Sep 01, 2014 2:40 pm
by shagymc
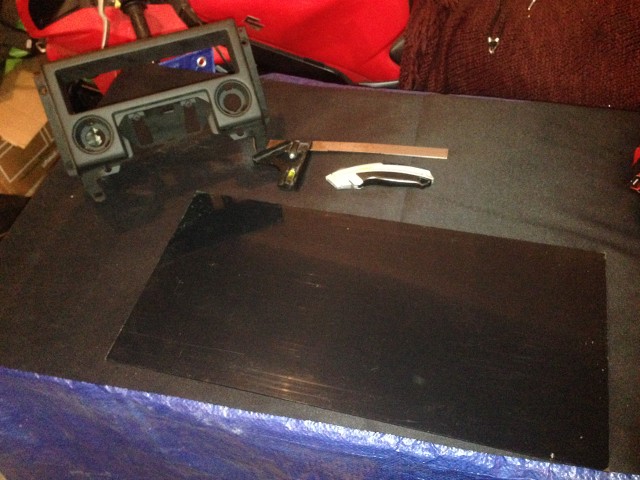
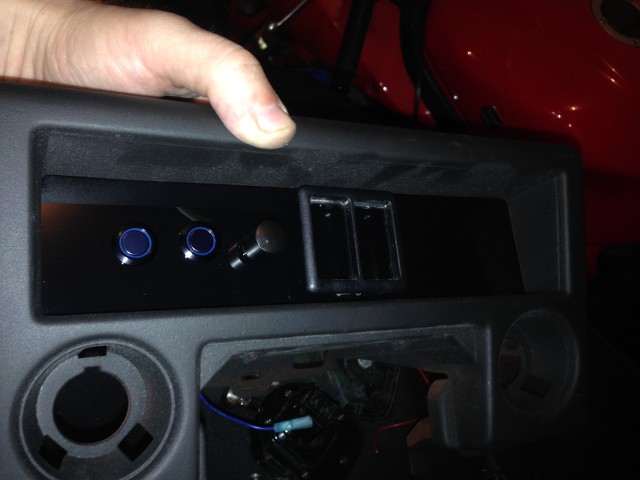
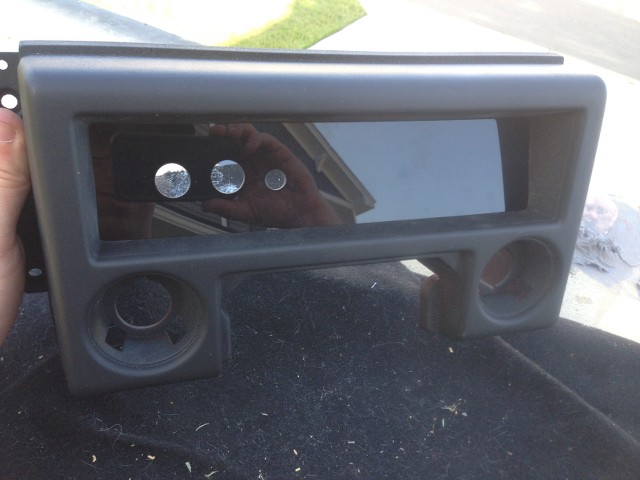
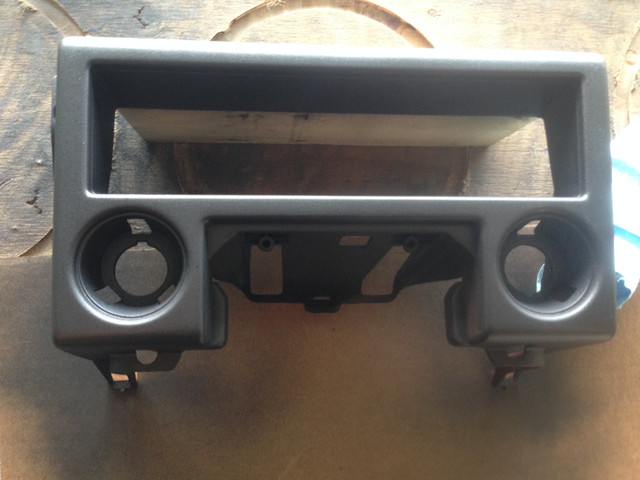
So today I finished the dash bezel with some fresh paint and reassembly. I didn't take many pictures but Here's the bezel painted:
Dash bezel reassembled with the cig lighter and ashtray in:
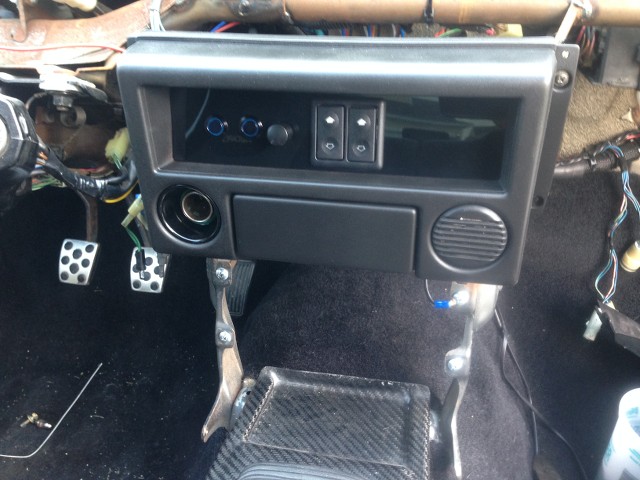
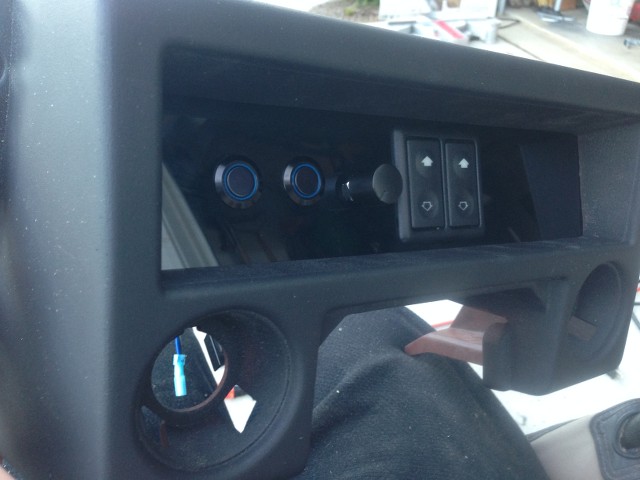
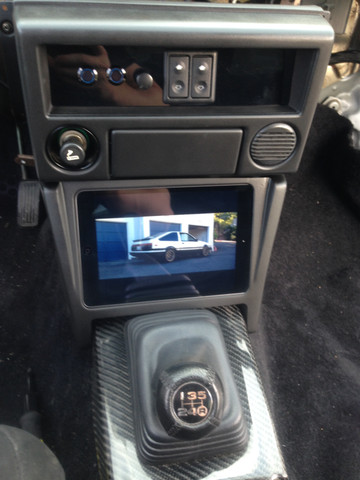
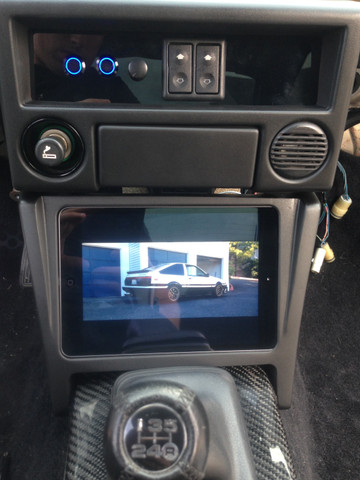
Complete with the iPad dash installed:

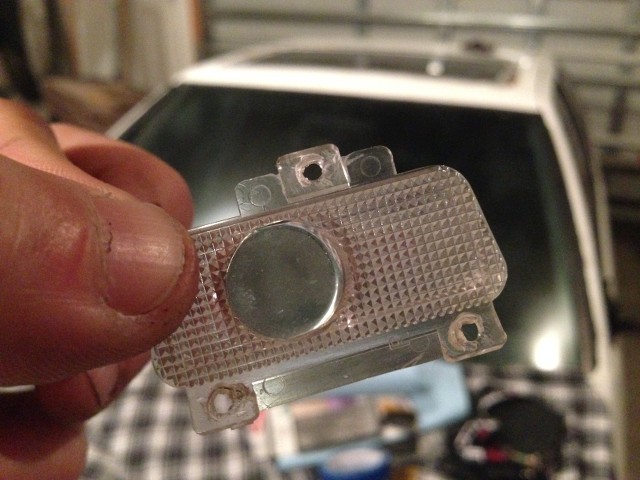
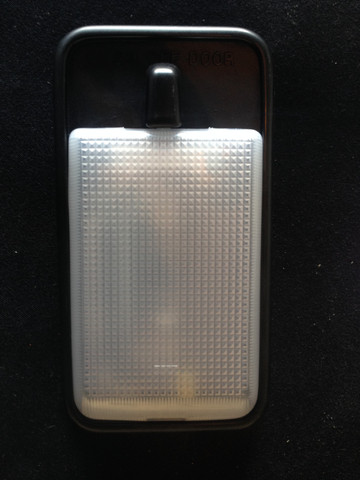
The door pop switch rings light up with the parking lights and look like this:
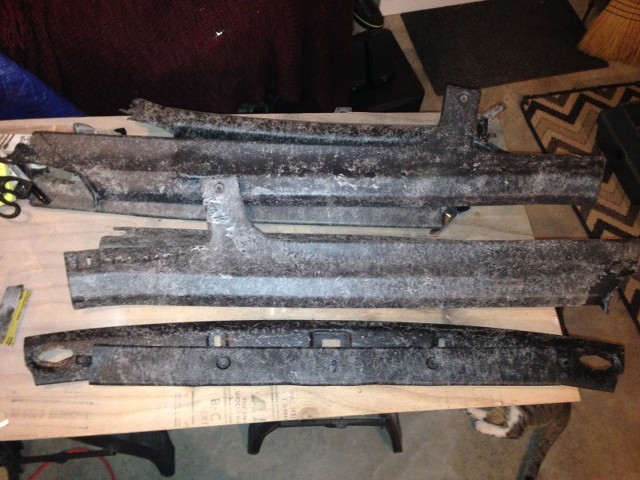
I also got another trim piece sueded but I need more fabric to get the rest of the car done. Loving this look
Re: My recap and ongoing final stretch of building my Hatch
Posted: Sun Sep 07, 2014 7:16 pm
by shagymc
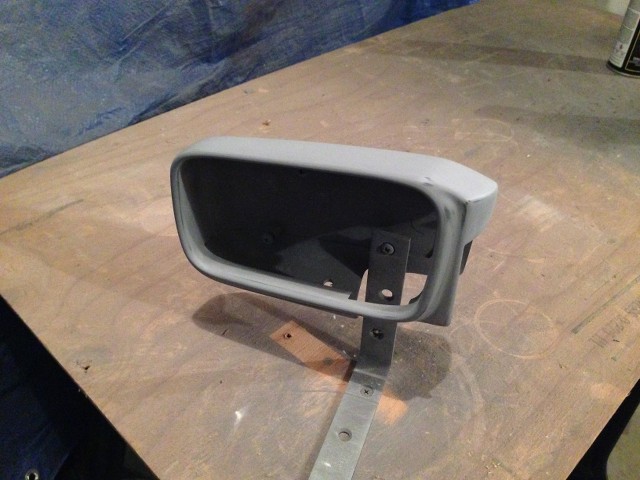
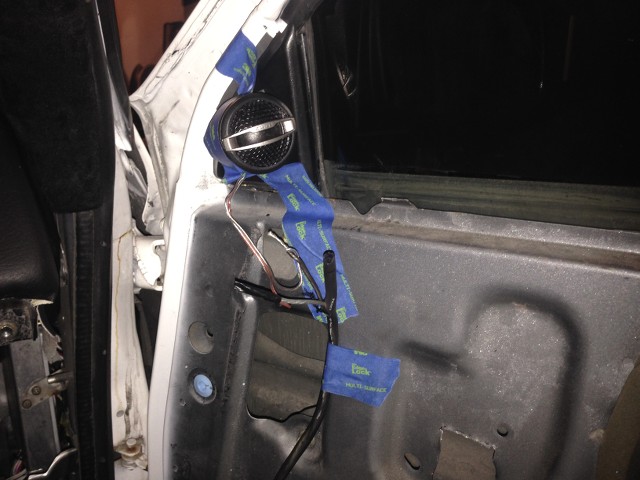
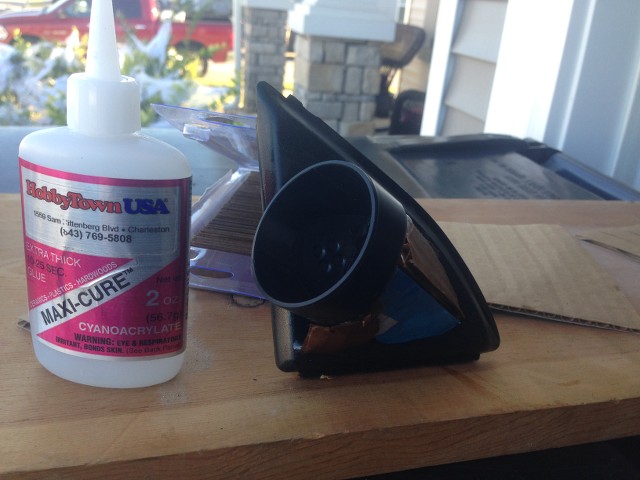
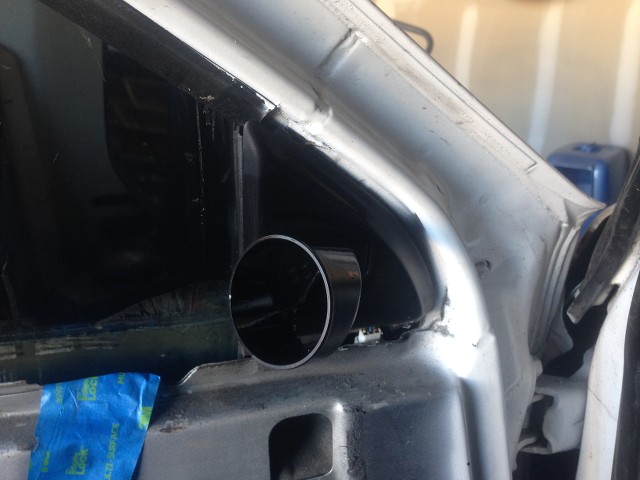
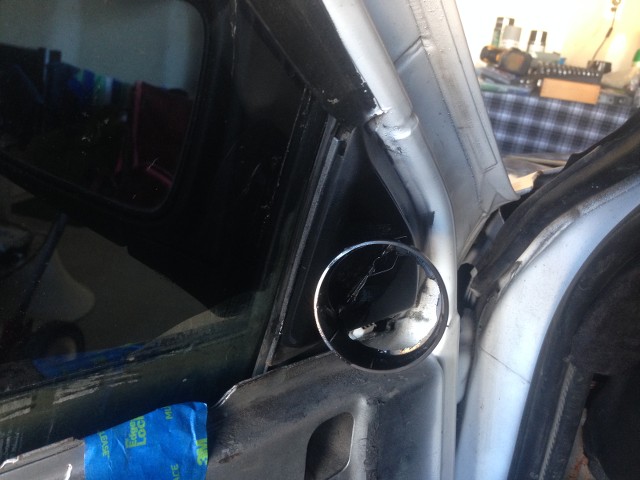
Finished Mirrors:

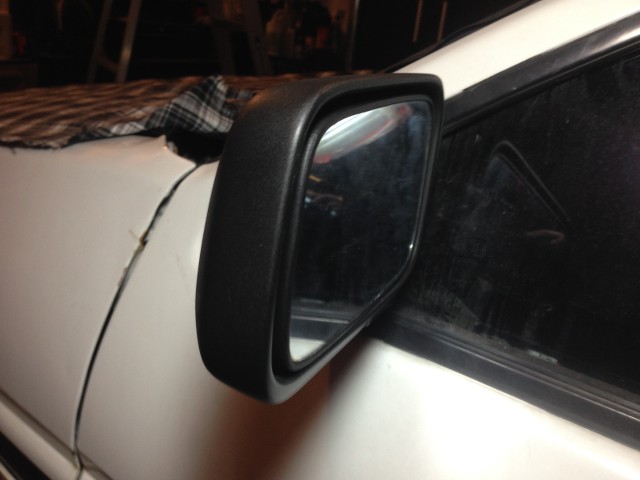
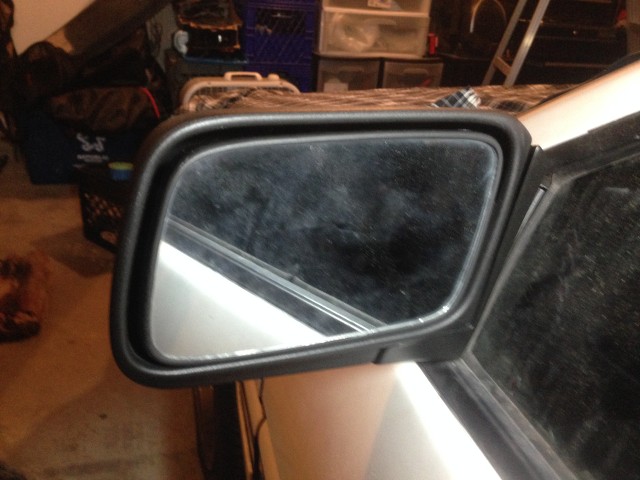
Sorry the last 3 are blurry, it was night time in the garage. I may take better pictures tomorrow after work. So the mirror was tested and works great, I'm really happy with how these turned out too. I think the next big thing is going to be trying to cover the dash in new vinyl. It's kind of scary to think about has. We'll see what happens.
Re: My recap and ongoing final stretch of building my Hatch
Posted: Sun Sep 07, 2014 8:28 pm
by .TRD.TRUENO.
You are a DIY genius! Must be awesome to step back and feel proud at your accomplishment. Keep up the hard work!
Re: My recap and ongoing final stretch of building my Hatch
Posted: Mon Sep 08, 2014 7:47 pm
by shagymc
Thanks! It is rewarding but it takes time. I was just lucky to have learned a lot of things in my car audio background working with amazing people. The dash is going to be a mother f*cker though, i know it
Re: My recap and ongoing final stretch of building my Hatch
Posted: Sun Sep 14, 2014 8:18 am
by shagymc
Deleted to consolidate my thread
Re: My recap and ongoing final stretch of building my Hatch
Posted: Mon Sep 15, 2014 10:13 pm
by shagymc
Deleted to consolidate thread
Re: My recap and ongoing final stretch of building my Hatch
Posted: Mon Sep 29, 2014 7:57 pm
by shagymc
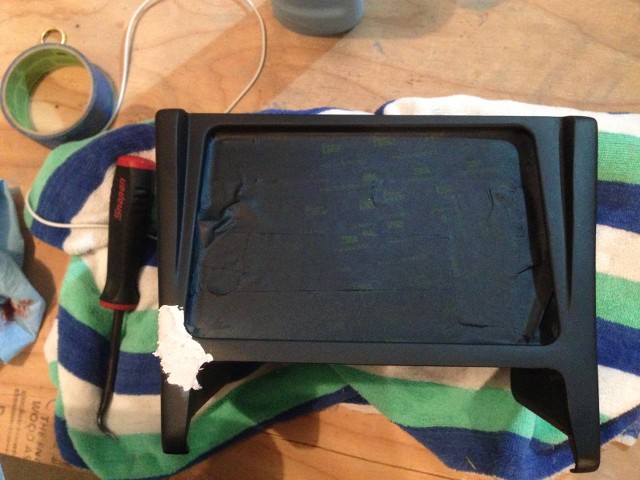
Last week I started on building the kick panels though for my speakers and I also finished up the back to my nintendo remote. I guess I'll start with the tease of the driver kick and then show the finished remote.
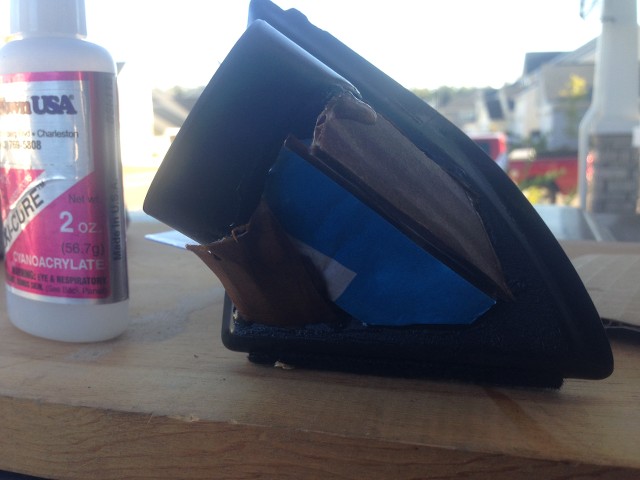
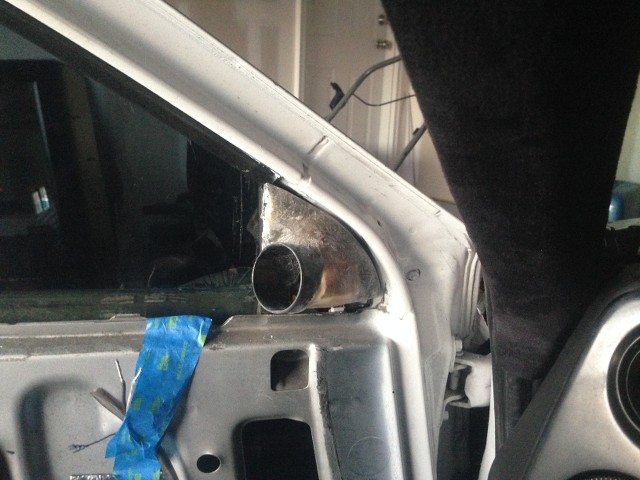
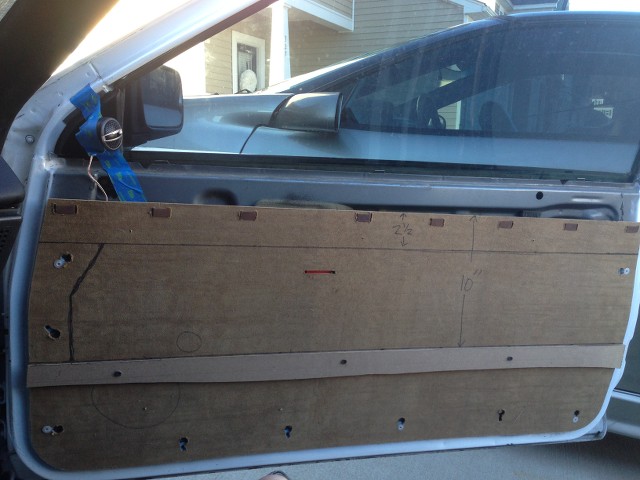
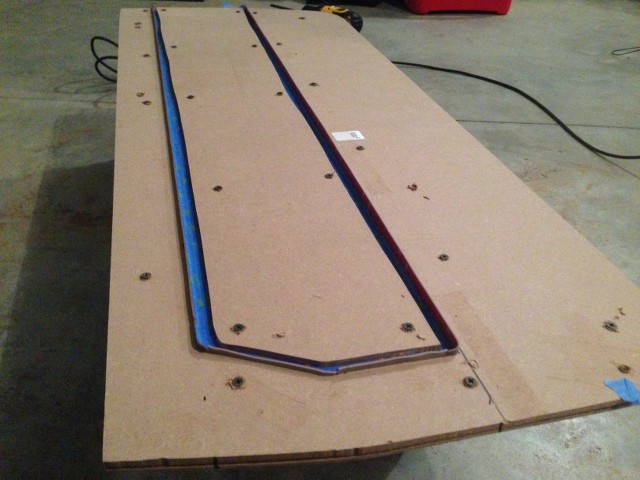
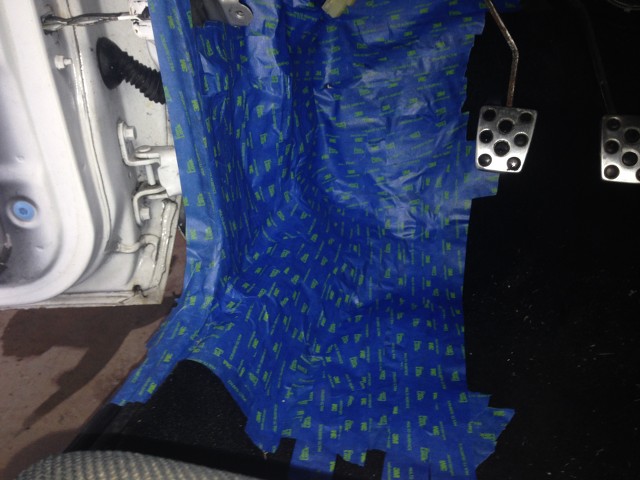
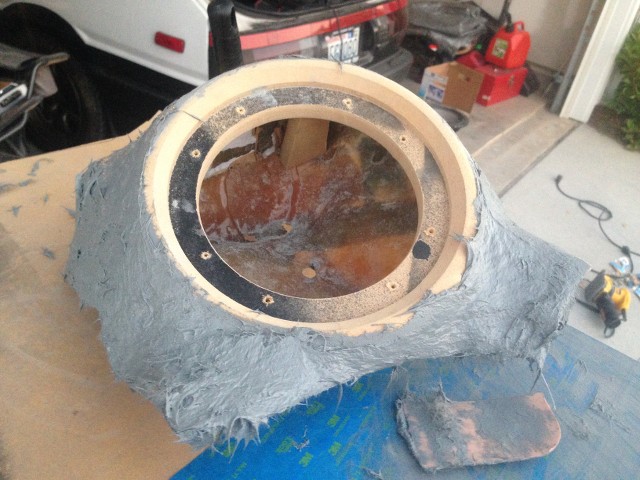
For the set of components I have I was having a hard time finding a good place to put the woofers. When I placed the rings I cut for them on the door, they just looked out of place and the door looked obnoxious so I scratched the idea of putting anything there. The next logical place was the kick panels. The drivers kick is going to be the worst as far as speaker placement due to the clutch and the fuse panel not leaving a lot of room. I'm nowhere near the end but here's the start:
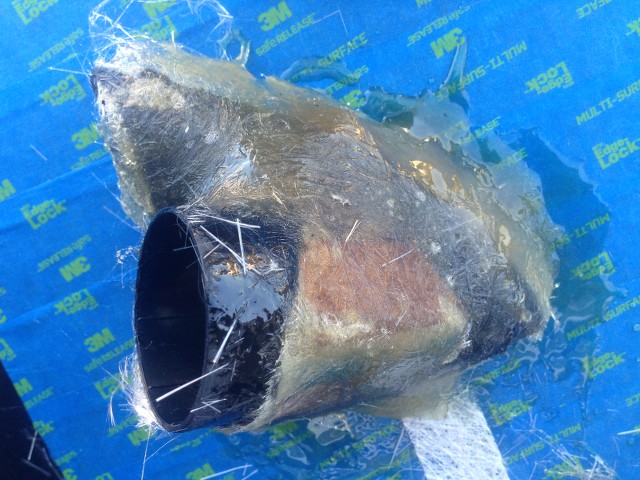
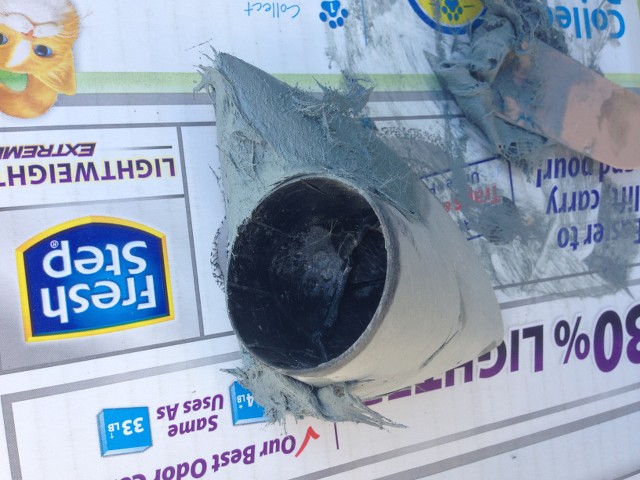
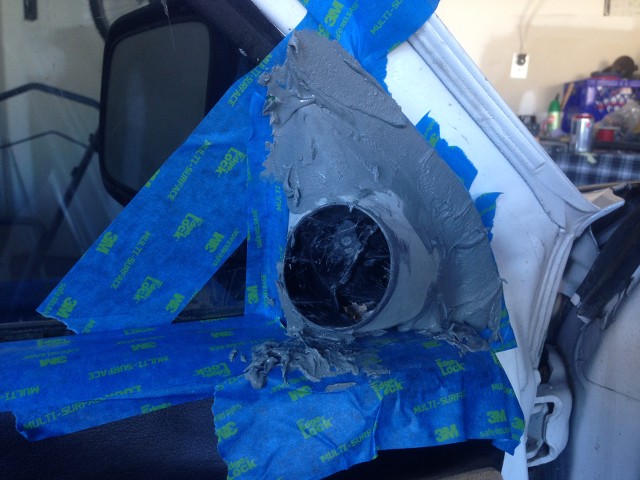
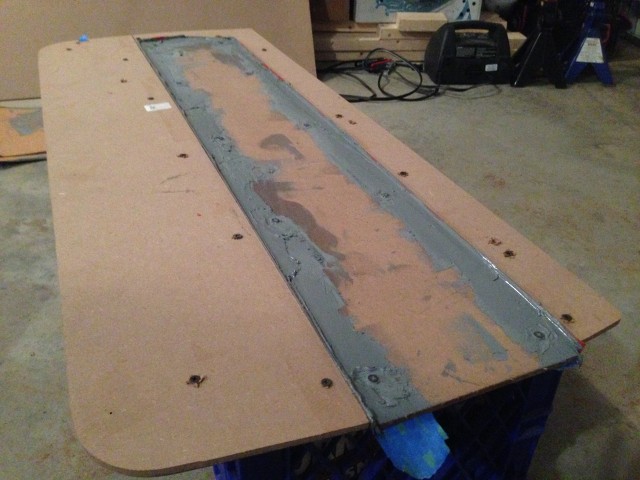
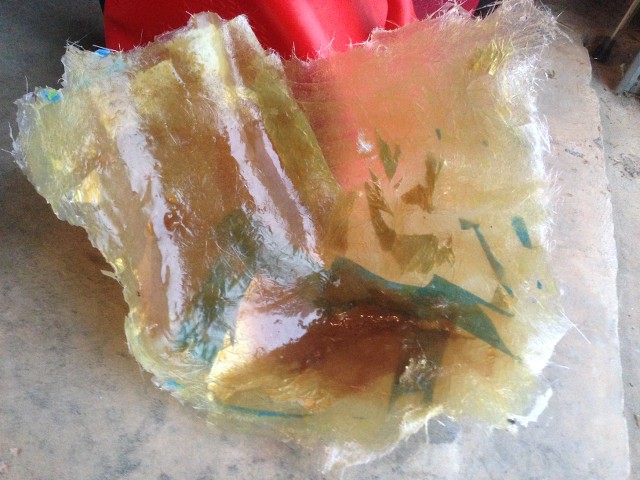
I had to pull a mold of the kick so I laid down some tape and then basically set up a 'Dexter-kill-room' for the rest of the car so no resin would drip where I didn't want it too.

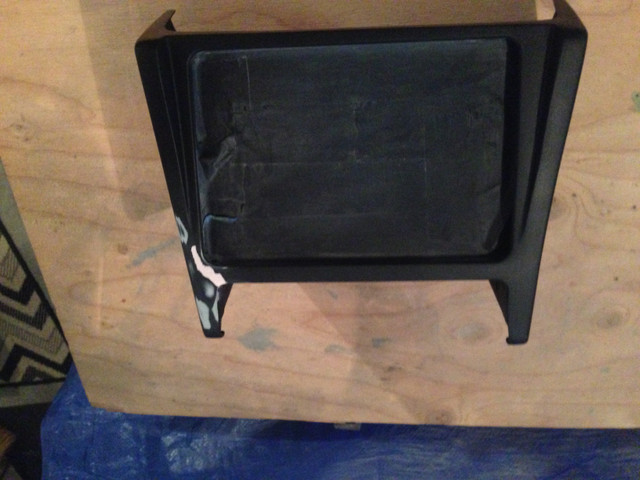
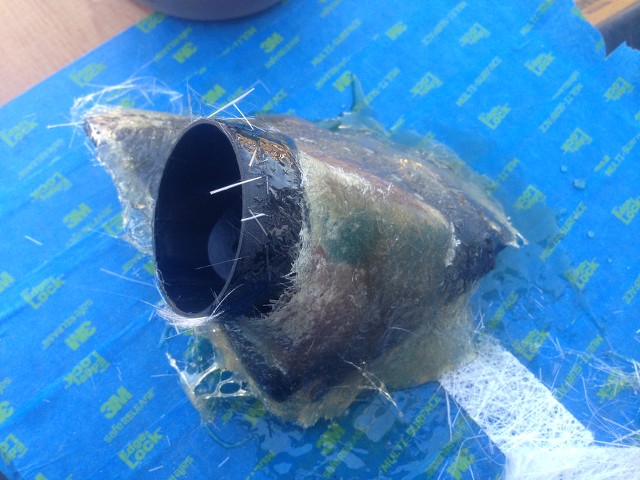
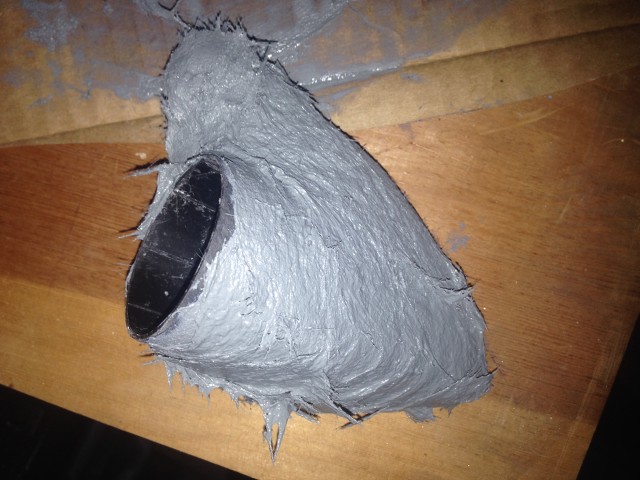
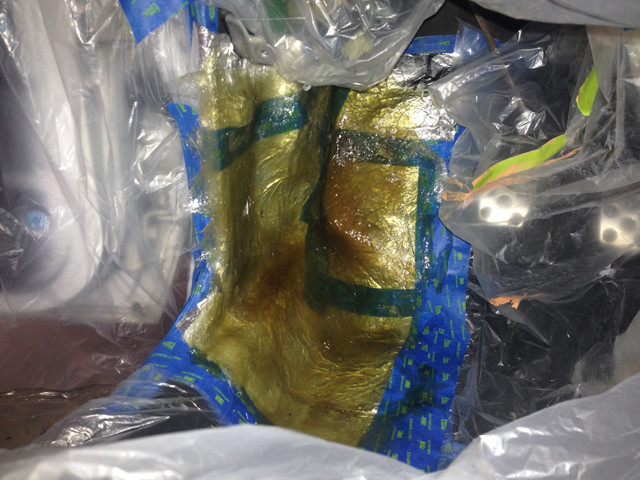
The shiny stuff is aluminum foil. I didn't want to wax all the tape so the glass would release so I covered the tape in aluminum foil. It works great. I put about 16 oz. of resin on this side with about 3 layers of matt fiberglass. Nothing crazy. If I need to thicken it up more I can do that later.
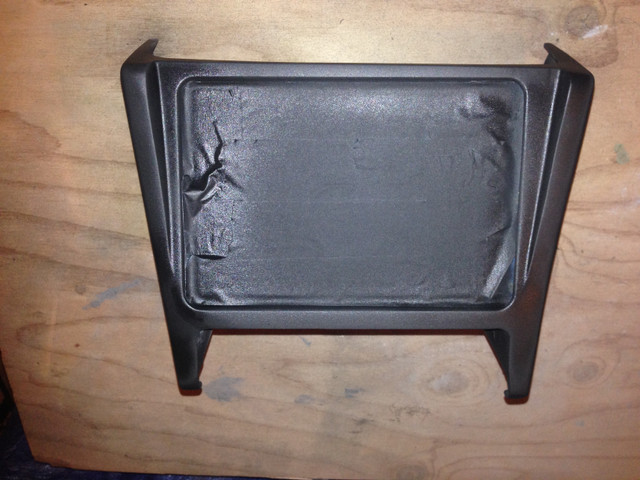
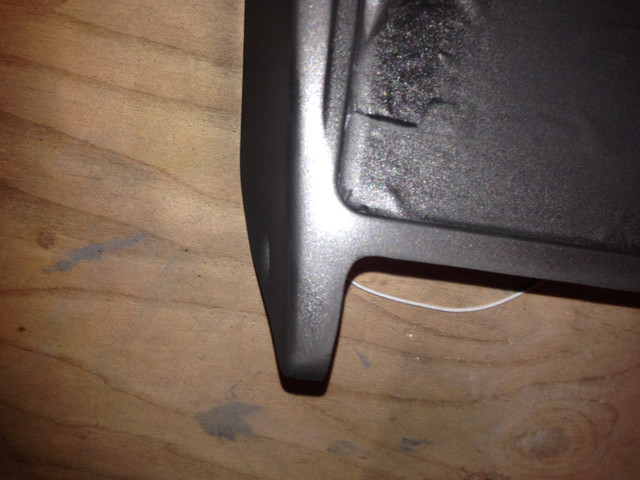
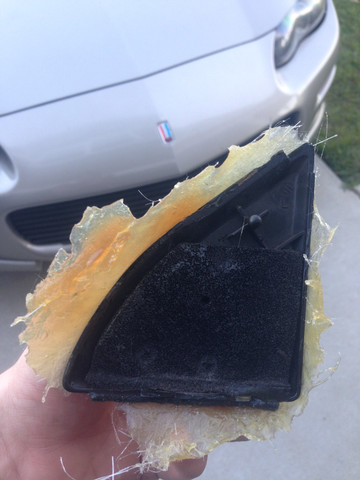
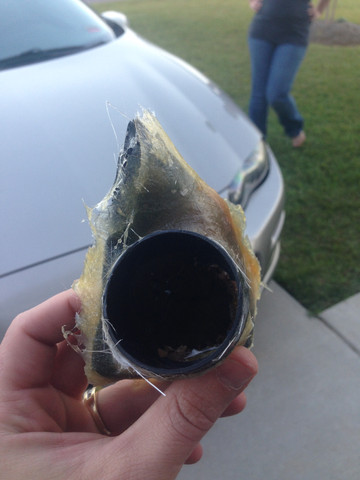
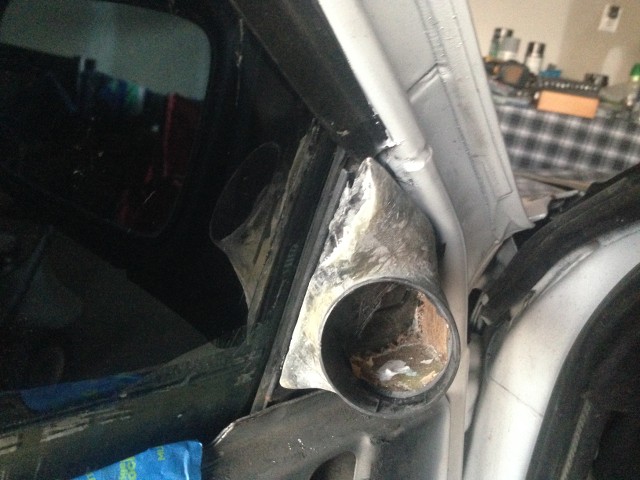
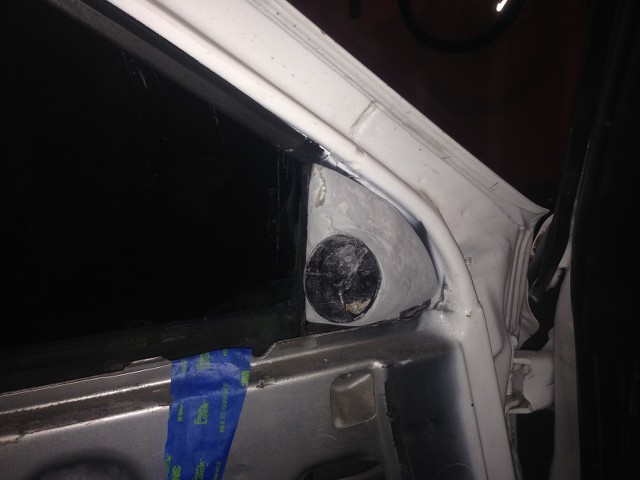
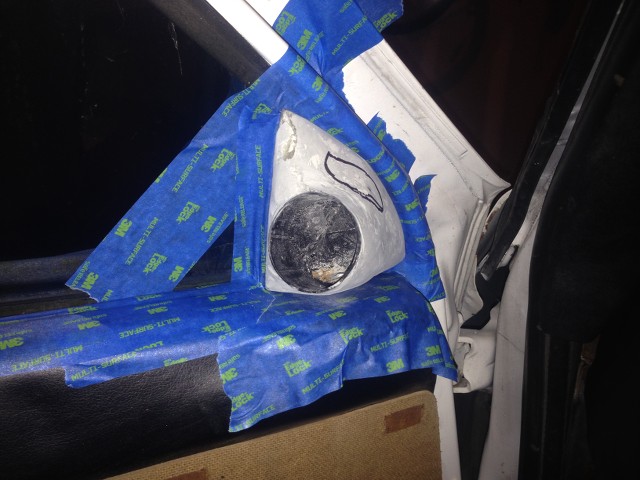
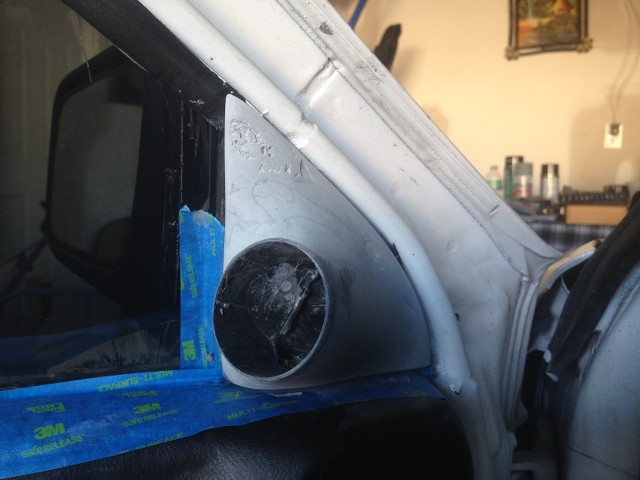
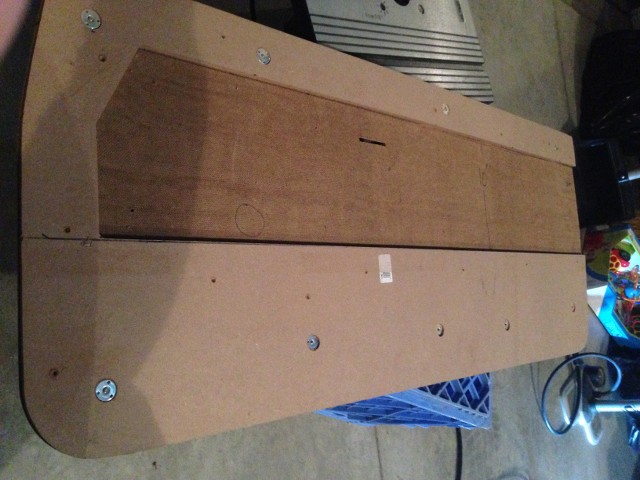
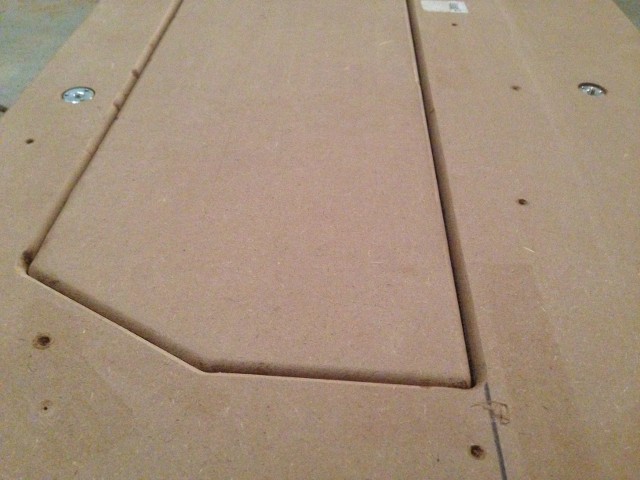
I trimmed it up and then test fit it in the car with the ring. I played around with speaker placement and I still don't know what I like yet.
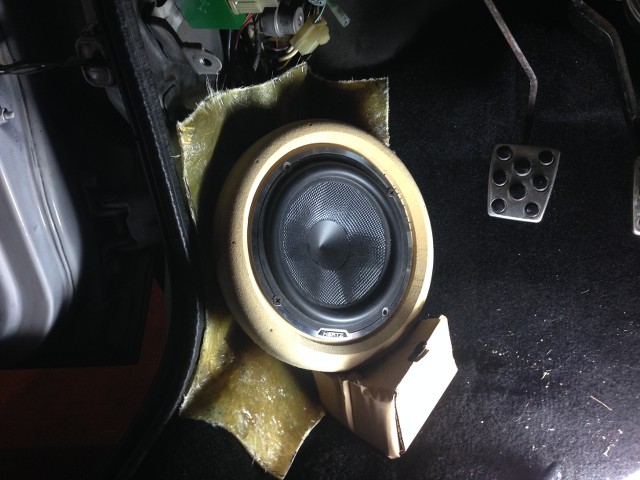
I think I'm going to hook an amp up just to play with different speaker positions to see how it sounds.
Re: My recap and ongoing final stretch of building my Hatch
Posted: Sun Oct 12, 2014 12:52 am
by shagymc
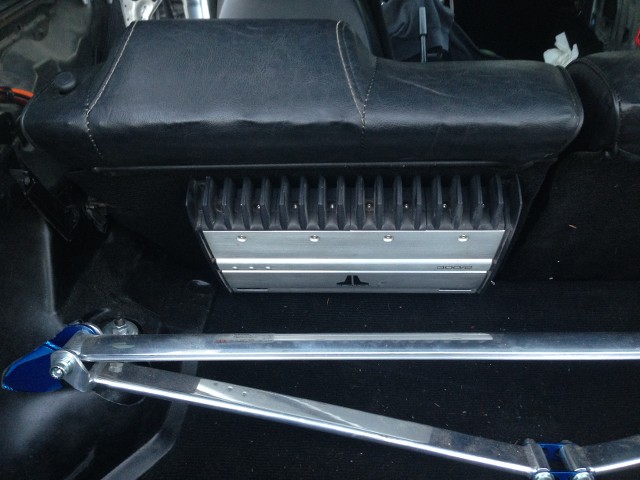
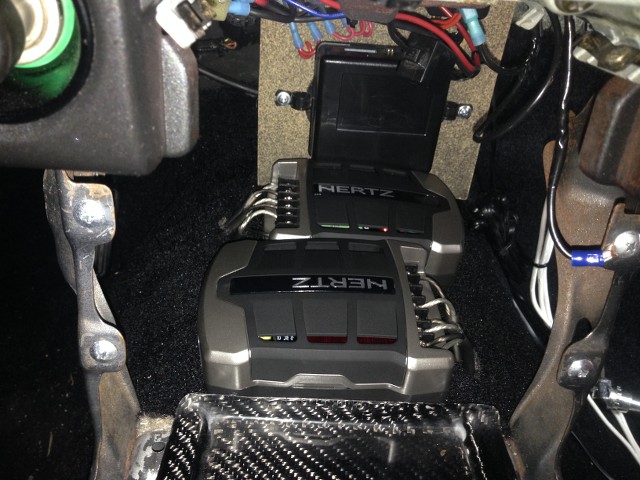
It's been a little bit but I recently started hooking up my amp. I was having trouble deciding where to put the amp and also where and how I'm going to build the sub box. The only place that seemed reasonable was the back of the seat with the strut bar. Here's what it looks like:
I also got the speaker wires ran to the crossovers which I mounted behind the iPad dash. They fit great there and allow easy access in case of trouble later:
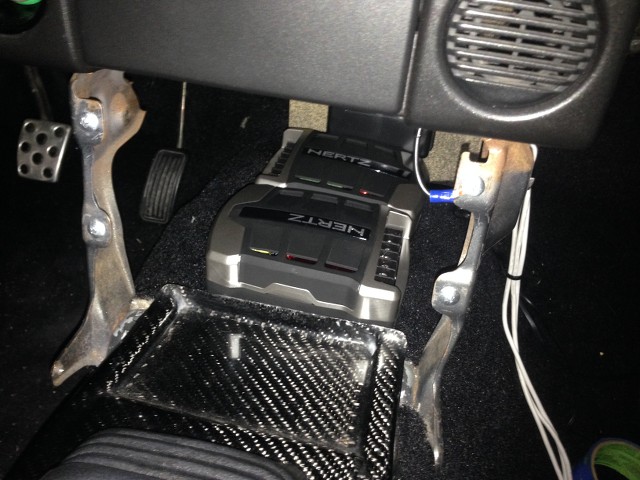
Now that these are wired up and can temporarily hook up the speakers and figure out where exactly I'm going to mount them. I'm hoping to make more progress on the kick panels in the next few days.
Re: My recap and ongoing final stretch of building my Hatch
Posted: Thu Oct 23, 2014 9:40 pm
by shagymc
Re: My recap and ongoing final stretch of building my Hatch
Posted: Sun Oct 26, 2014 9:35 pm
by shagymc
Re: My recap and ongoing final stretch of building my Hatch
Posted: Mon Oct 27, 2014 12:29 pm
by EvoSolley
^^ Wow great job, the finish product looks stock. Looking forward to more updates!
Re: My recap and ongoing final stretch of building my Hatch
Posted: Mon Oct 27, 2014 6:15 pm
by shagymc
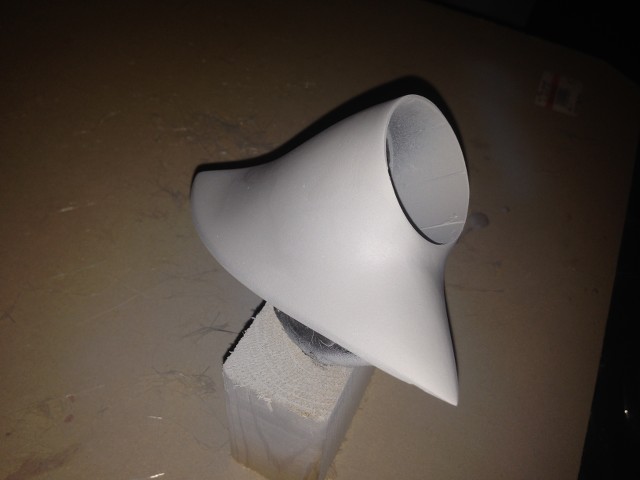
So the driver tweeter pod is finished and it turned out great. It fits really well in that location.
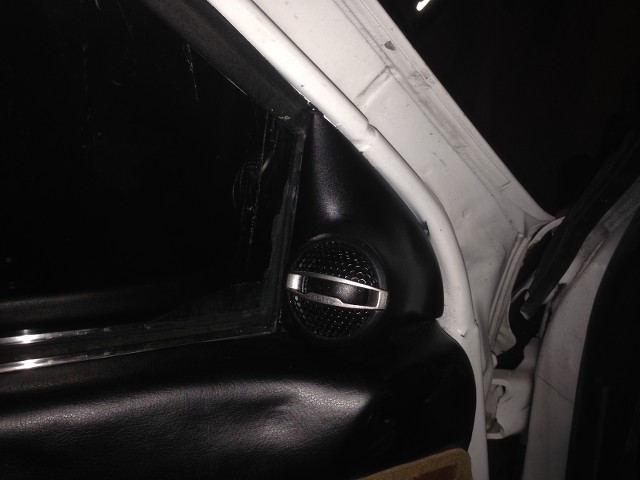
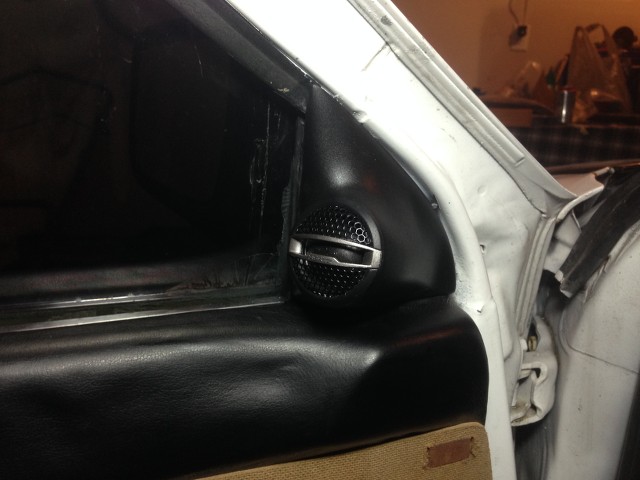
Also made some cuts and added a bunch of filler to the kick panel. This thing is ridiculous!

I plugged them up to see what type of sound i was going to get and it sounds great. I'm pretty pumped to get this part complete!
Thanks for the kind words Evo!
Re: My recap and ongoing final stretch of building my Hatch
Posted: Mon Nov 10, 2014 9:23 pm
by shagymc
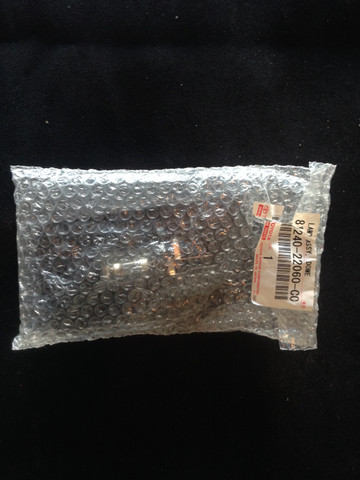
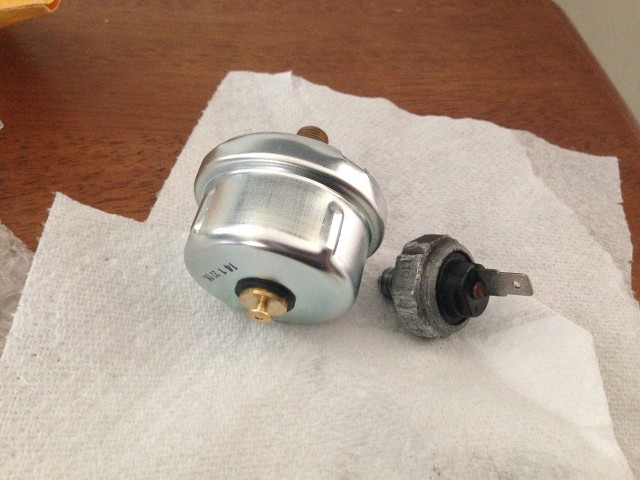
So I can finally drive my car again. Received the oil pressure sensor from Torparts and it works great. I guess the sensor that was there was for an oil pressure light but doesn't work with the meter on the 86 cluster. The new sensor is on the left and the stock 20v one is on the right:
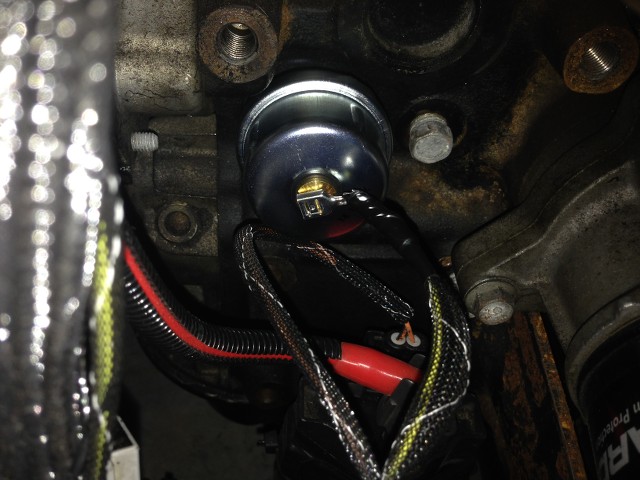
Hooked up:
I also was able to finish up the kick panel on the driver side. I won't bore you with how I made it but here's the progress pictures up to final fit and finish.
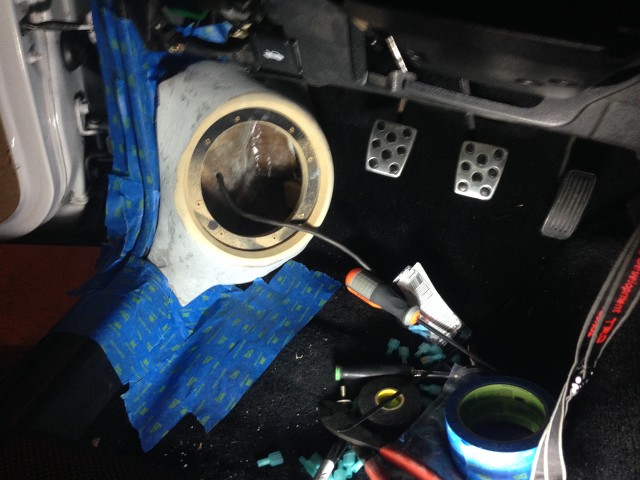
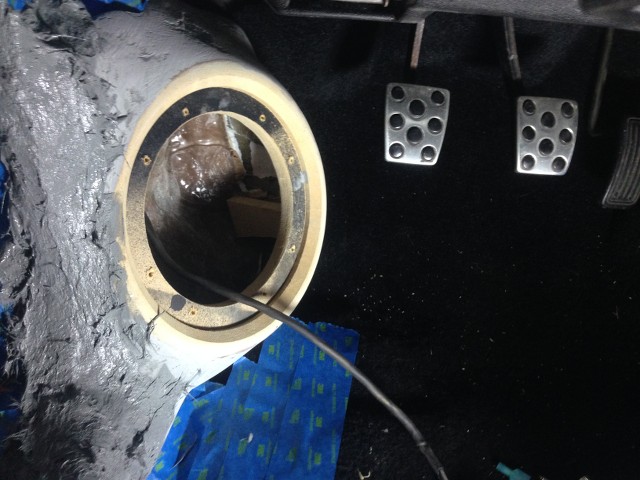
Finished product:

Now I just have to finish the other side....
Re: My recap and ongoing final stretch of building my Hatch
Posted: Tue Jan 13, 2015 8:42 am
by shagymc
Re: My recap and ongoing final stretch of building my Hatch
Posted: Tue Jan 13, 2015 11:12 am
by shagymc
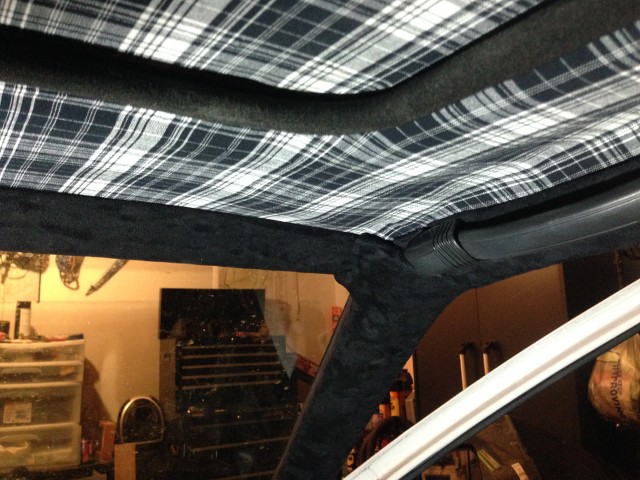
Still have to re do the top
Re: My recap and ongoing final stretch of building my Hatch
Posted: Sat Jan 17, 2015 1:38 am
by shagymc
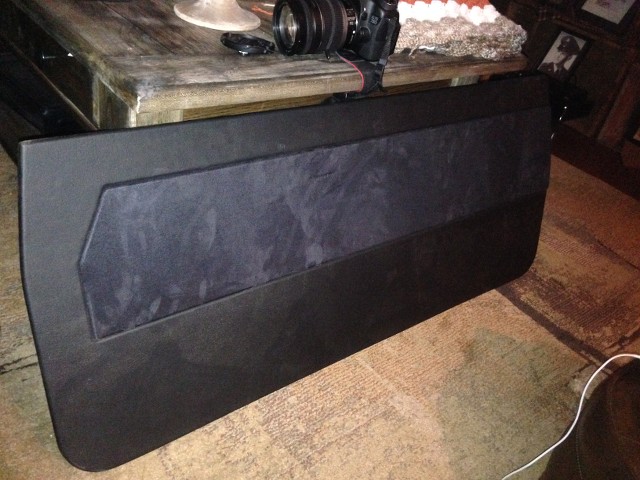
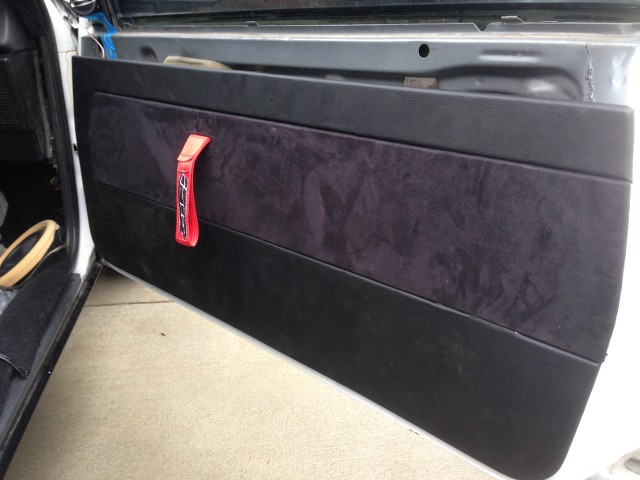
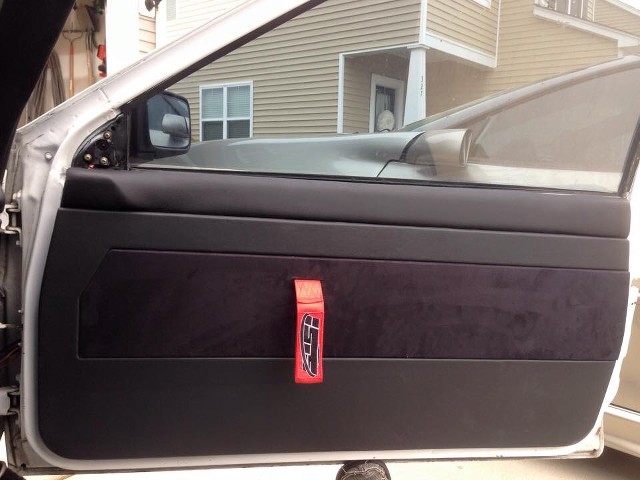
And passenger side complete. The door panel is done but I have to figure out a way to mount it to the door. The top slides over the window lip fairly easily but the bottom panel clips won't stay clipped in. I'm looking into options. I need to pick up some more screws and fabric for the driver panel still.
Re: My recap and ongoing final stretch of building my Hatch
Posted: Sat Jan 17, 2015 3:23 pm
by jdm86gtz
Really like the interior mods.
Re: My recap and ongoing final stretch of building my Hatch
Posted: Mon Jan 19, 2015 7:53 pm
by shagymc
Thanks Jdm.
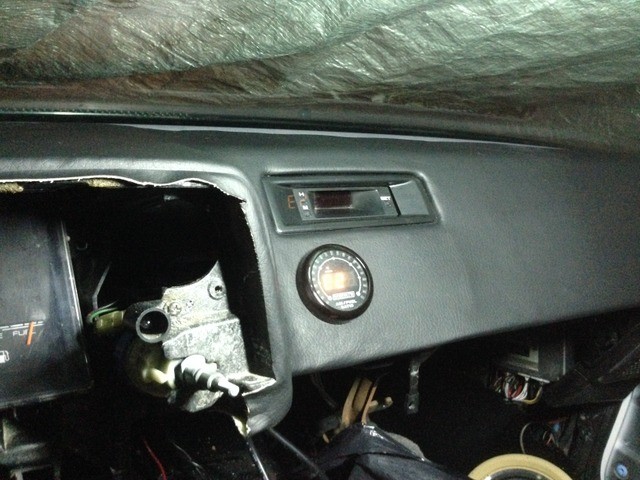
Nothing major today, I got my wideband Air/fuel gauge mounted in the dash. I think when I get the other two this set up will work out nicely. It fills the blank spot that used to be the old vents.
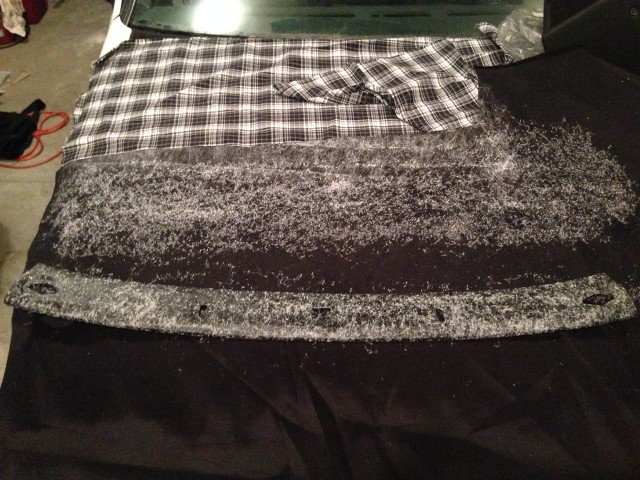
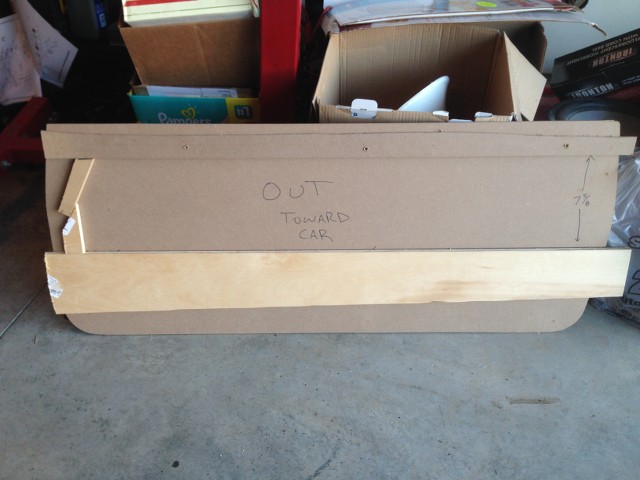
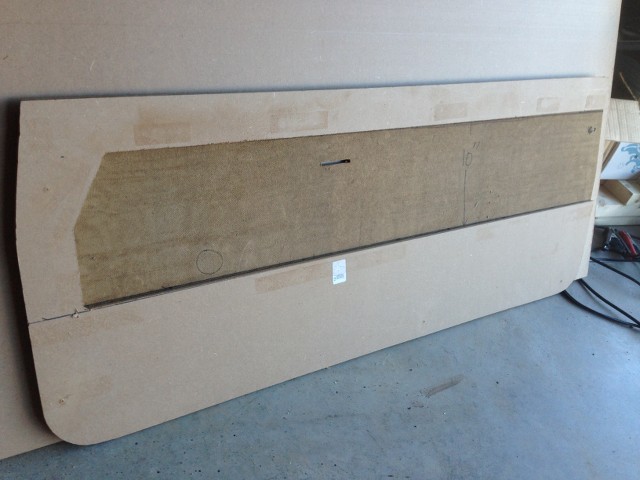
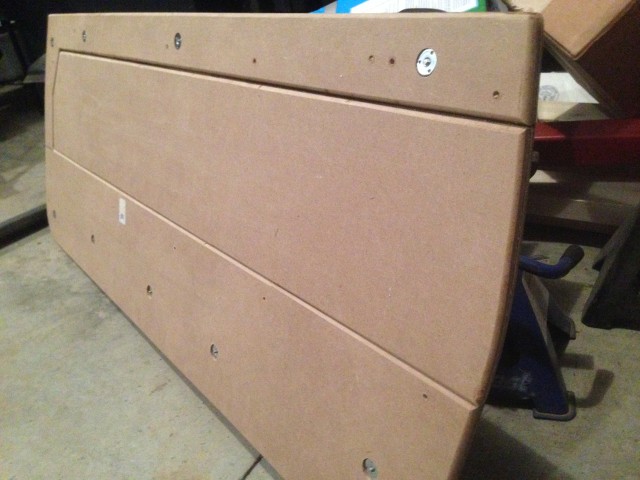
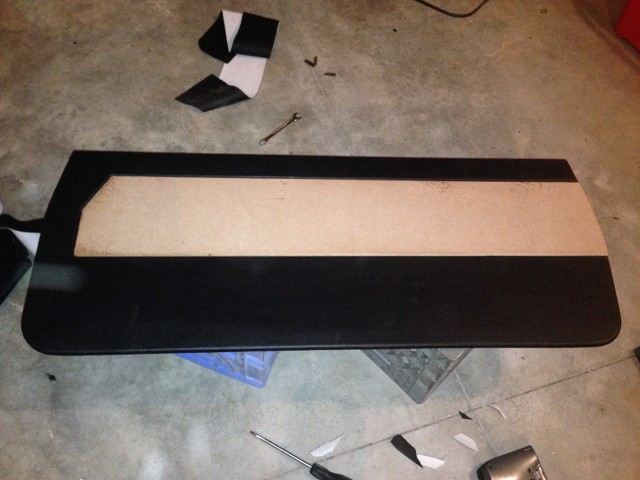
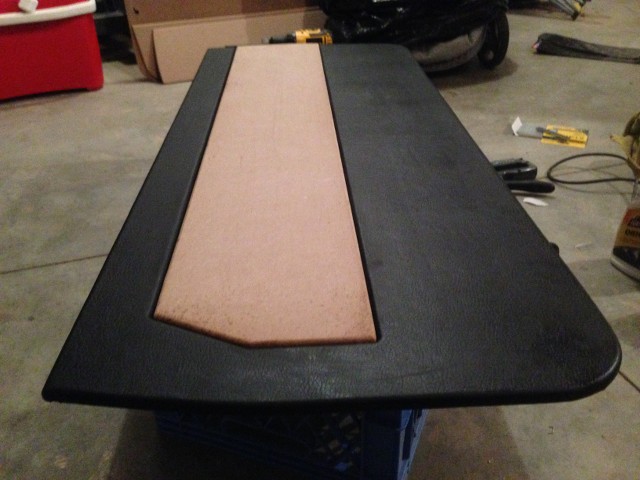
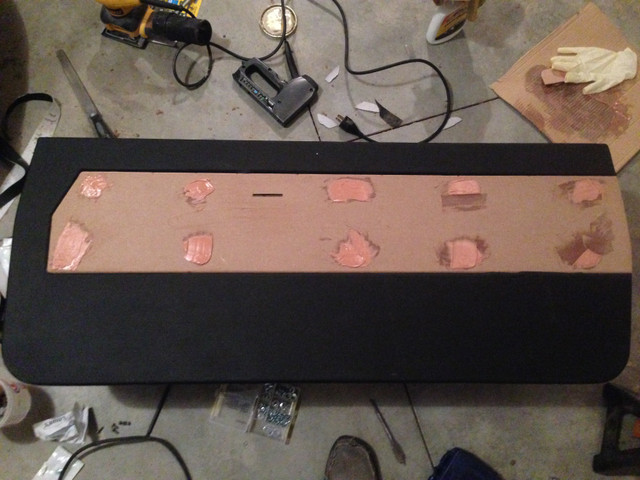
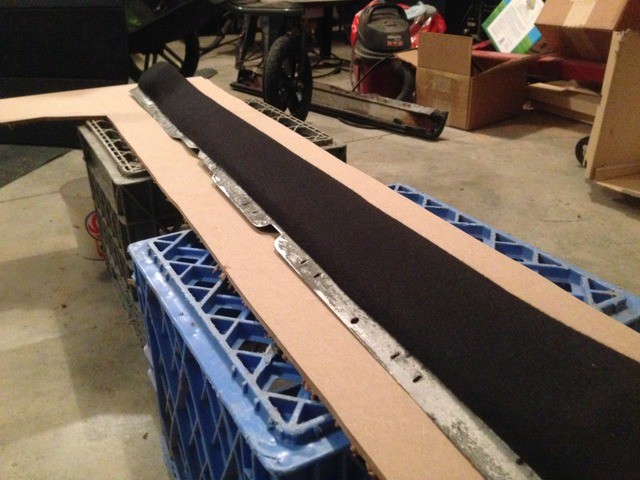
I also have a couple more build shots of the door panels. The first is the top of the panel I reupholstered. I put headliner material down first to give it a softer, padded feel.
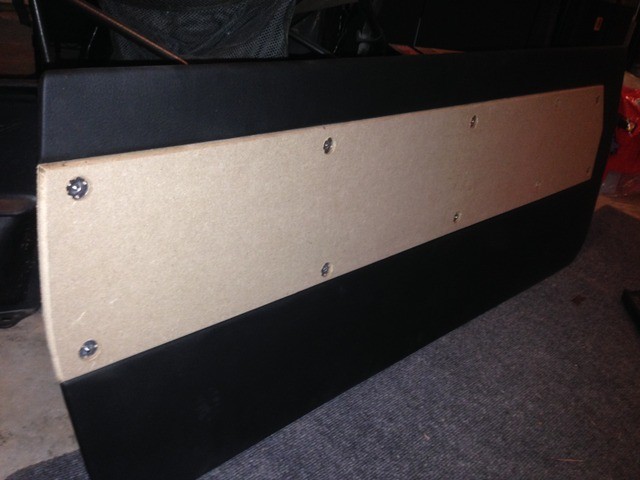
This one is of the fitment of the insert and the original card, nice and tight.

The last thing I finished up tonight was wrapping the outer part of the driver door panel in vinyl. The insert is screwed down and mounted so that the glue will set on the vinyl how I want it to overnight.
Should be able to get the other gauges next check. I really like the innovative motorsports line of gauges and they're priced great too!
Re: My recap and ongoing final stretch of building my Hatch
Posted: Thu Jan 22, 2015 10:23 am
by yellowsnow4free
Wow shagymc, awesome build!
The restoration of all the little bits on your car is really inspiring

A couple questions for you:
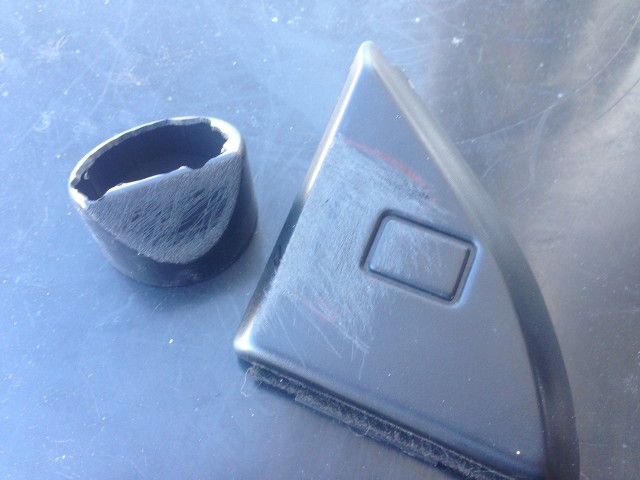
1) On the mirrors, does the glass pop out? I noticed in the pics it seems to be removed in a couple places. If so, any tips on doing this without breaking the glass?
2) Regarding using a drill to twist wires together, any chance you can explain this a little more with pics or a video? It looks great, and super OEM like you said, but I can't quite wrap my brain around doing it

Thanks and keep up the great work!

Re: My recap and ongoing final stretch of building my Hatch
Posted: Thu Jan 22, 2015 4:07 pm
by shagymc
The mirrors do just pop out however they are pretty fragile. I suggest kind of bending a corner and just slowly working the plastic off of it around the mirror.
This is the best video I've seen of how to twist the wires:
https://www.youtube.com/watch?v=uTJhrTTl-EEYou are going to want to tie off one end of the wires to something. I usually screw a screw in a little bit on the bench and then tie the strands to it. Just like the video shows, you'll then put the other two ends into the drill and tighten down. As you tighten, you'll have to move forward as the wire length shrinks. You'll also want to keep the wires taught as you do this to keep the twist even throughout.
Try it out with some scrap wire first! Hope this helps and thanks for the feedback. Hopefully I'll have them figured out by this weekend.
Re: My recap and ongoing final stretch of building my Hatch
Posted: Fri Jan 23, 2015 5:02 am
by EvoSolley
Love this build!
Things seem to be moving along quite nicely. I LOVE the door cards, very sleek and professional looking. I saw you were having some problems keeping the cards flush on the door in some places. This is a very general suggestion (if you haven't fixed it yet), but maybe you can incorporate some Neodymium Magnets (Very strong earth magnets) to hold the cards on and in place. You can get them round a thin to minimize gaps between the door card and door. I recently built a bookcase door and used a couple of them to keep the door closed and sit flush. Again I don't know exactly how they would work for your application, but figured suggesting wouldn't hurt. Hope you figure it out and keep the updates coming!