OST-026: "My White Hatch"

User avatar
oldeskewltoy
Club4AG MASTER
Posts: 2183
Joined: Wed Jan 09, 2013 4:44 pm
Location: Portland, Oregon

OST-026: "My White Hatch"

Postby oldeskewltoy » Wed Mar 26, 2014 8:41 am

Image


Hmmmm, seems like no one in the PacNW has any smallport heads they want to sell???? Really??? :( http://hachiroku.net/forums/showthread.php?t=35564

Anyone in SoCal have a spare smallport head or two they'd like to cash in on??


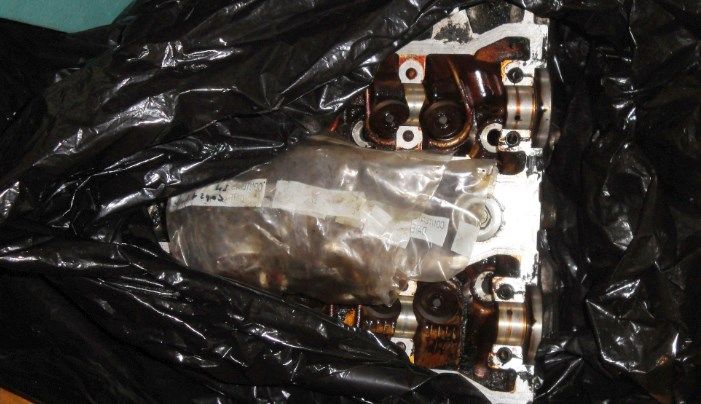
ANYWAY....... so this one came out of deep dark storage....

Image


In the mean time, I thought I'd carry this post from OST-025 into this thread...

from another forum and thread wrote:OST, you should do a thread detailing the steps and exact tools/methods you use to port the heads! It'd be an invaluable DIY tool for those of us who are aspiring to port things as well.
same forum... wrote:As much as I'd love for this to happen, I gotta imagine it's about the same as asking a Magician to reveal his secrets.

Still, for the dyi type there's plenty of tutorials out there to learn from.


I believe I've shared most of the basic tools before... flex shaft Dremel (I'm into my 5th :roll: ) sanding drums... high speed metal cutters, and select grinding stones. I believe I've also shared the procedure, and materials for getting the chambers just right too - I seem to remember Max, from Illegal Garage asking a number of heads ago

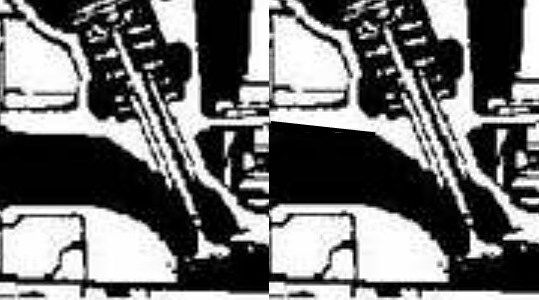
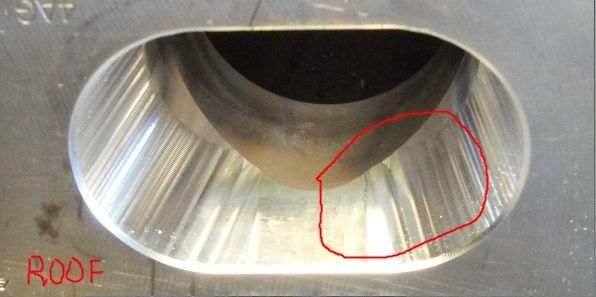
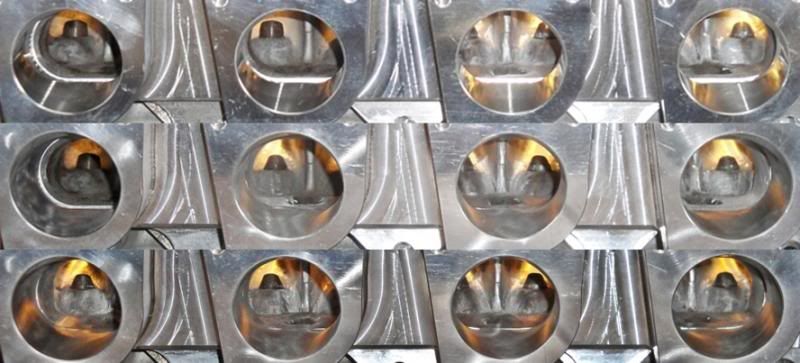
It is quite a bit more than the tools, it is the persons ability to properly manipulate the tools for the desired results, look back to OST-017, that began as another persons attempt @ porting... http://i79.photobucket.com/albums/j143/oldeskewltoy/MOmo/port3viewingstraightonbeforeporting.jpg

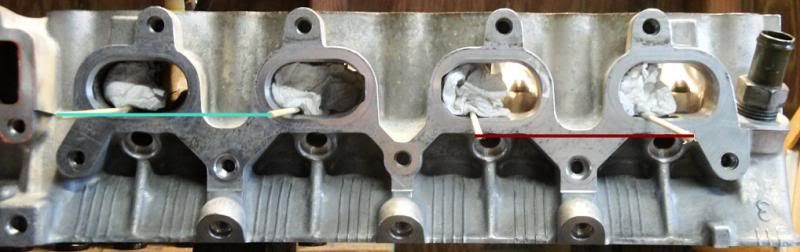
Besides being able to manipulate the tools, I also have a substantial amount of knowledge I've gained from extraordinary sources (cough... Loynings...) that allows me to know the difference between porting, and cylinder head lightening
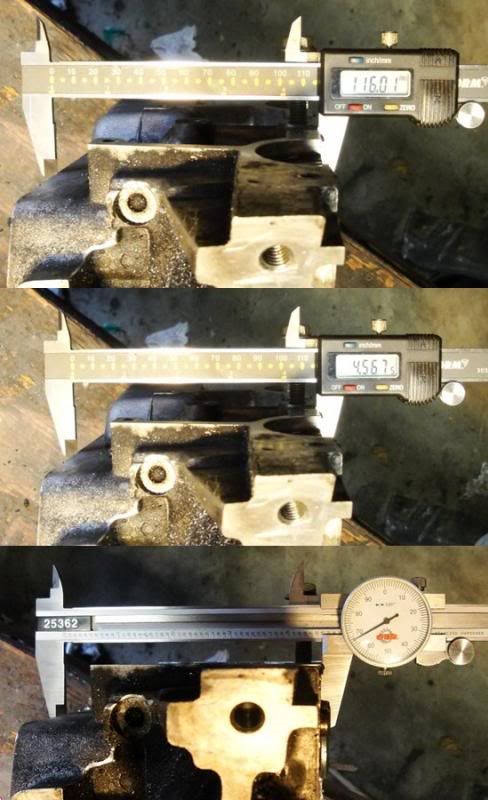
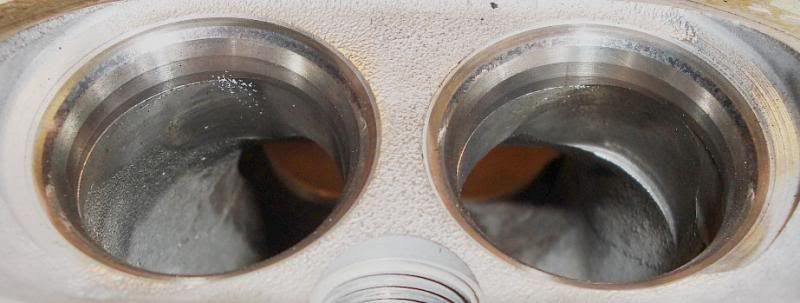
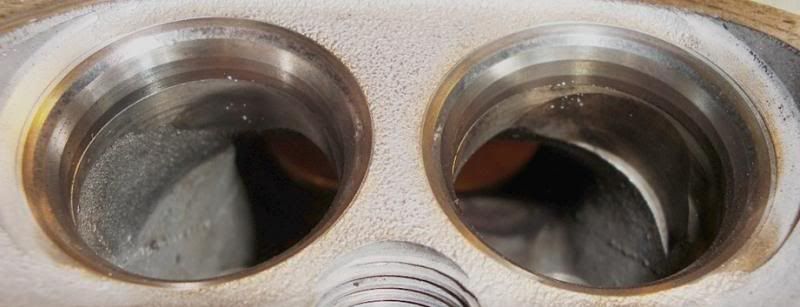
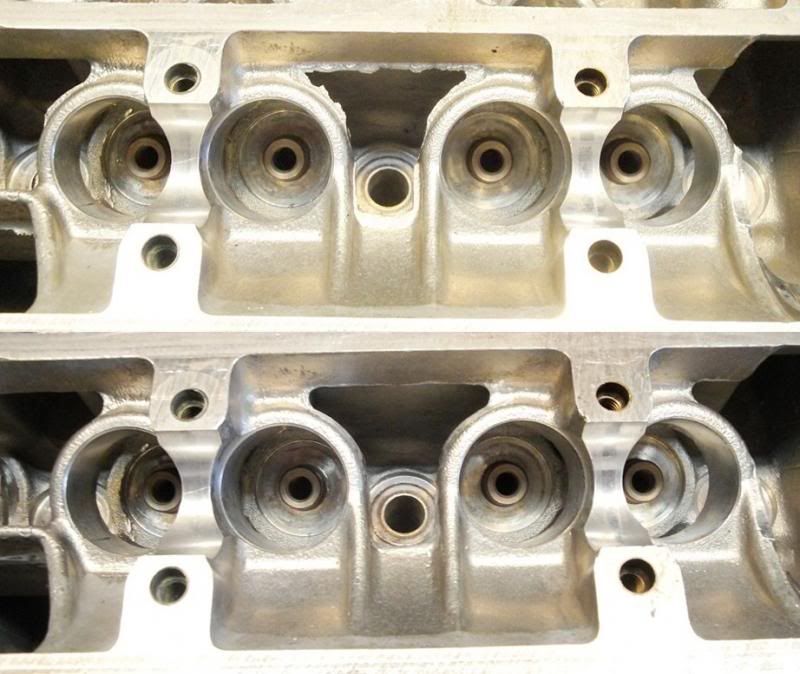
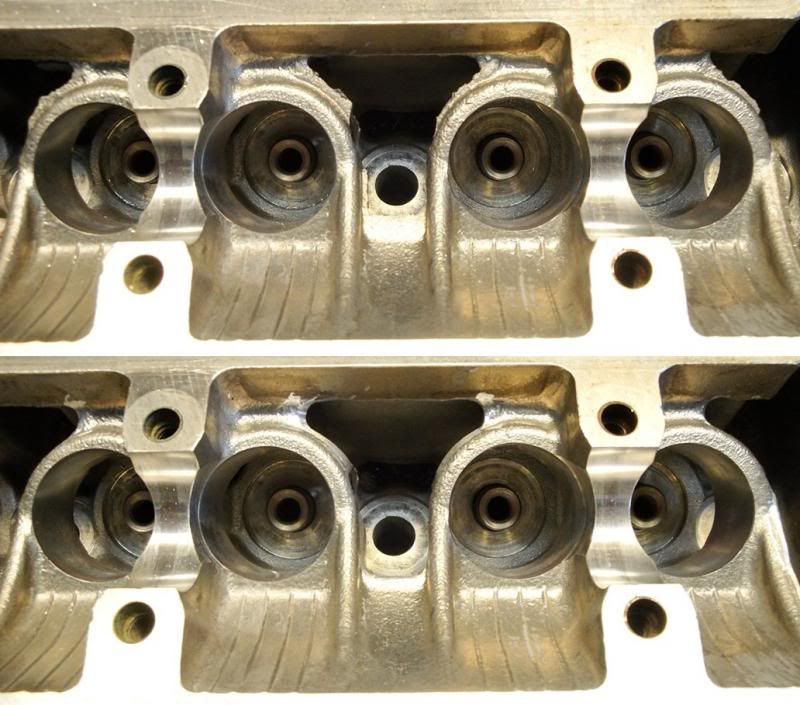
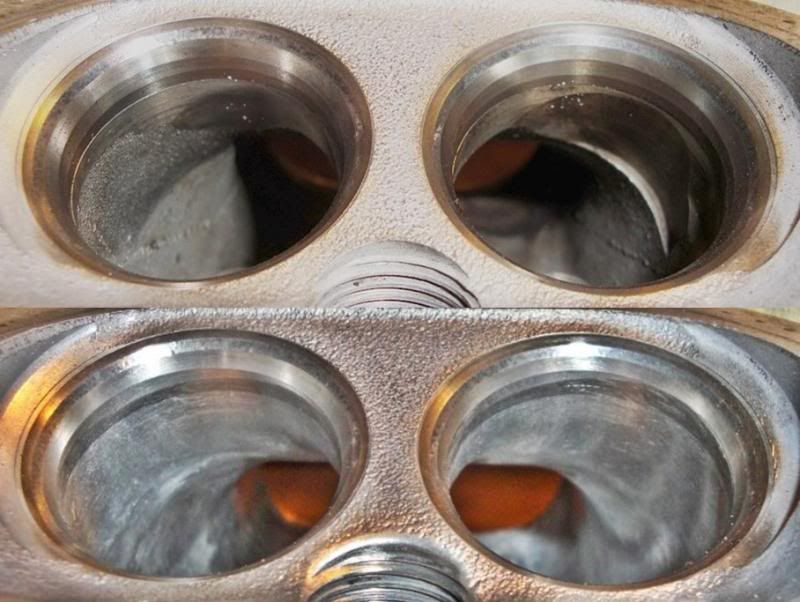
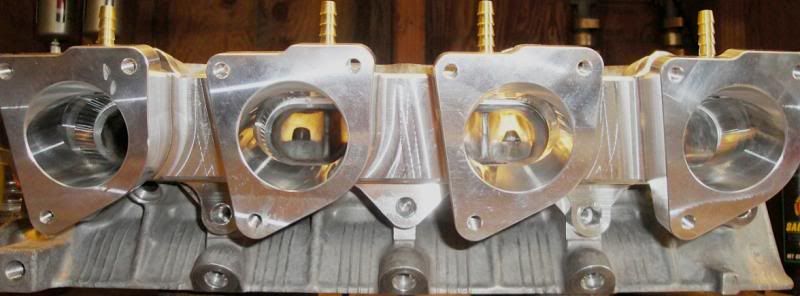
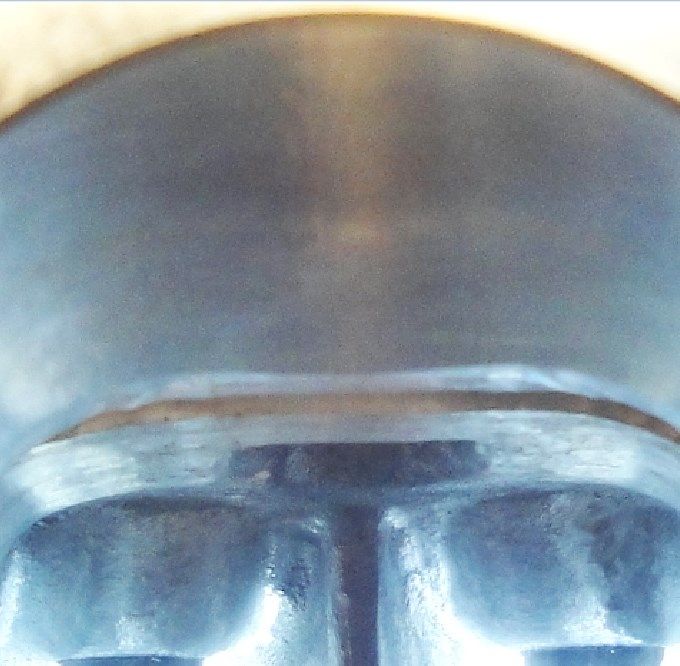
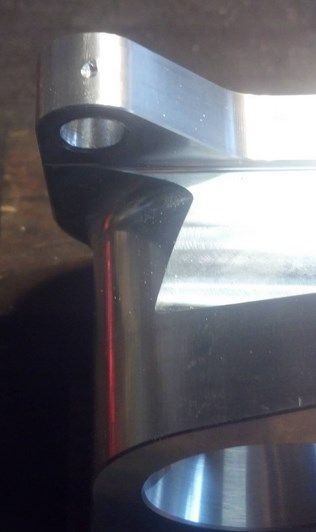
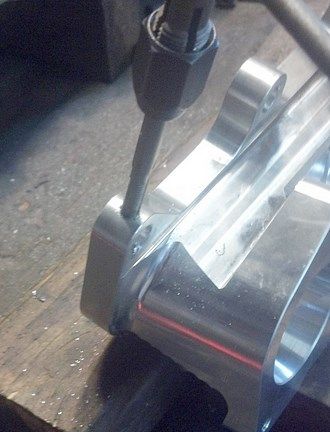
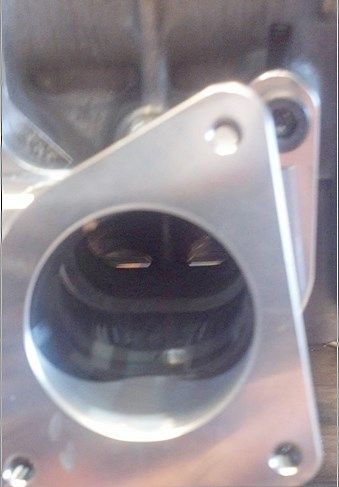
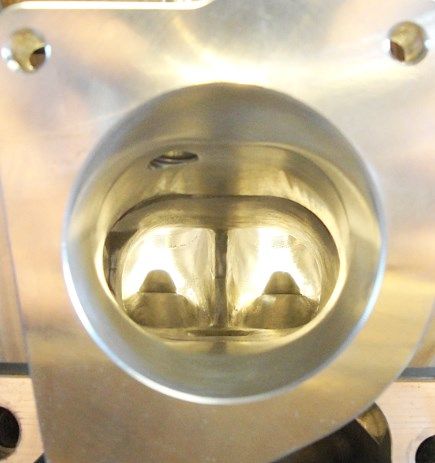
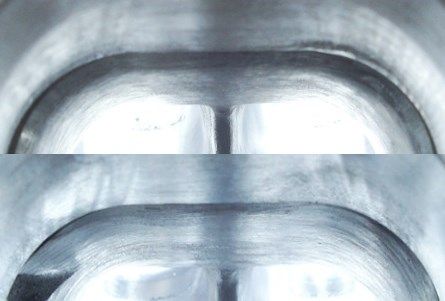
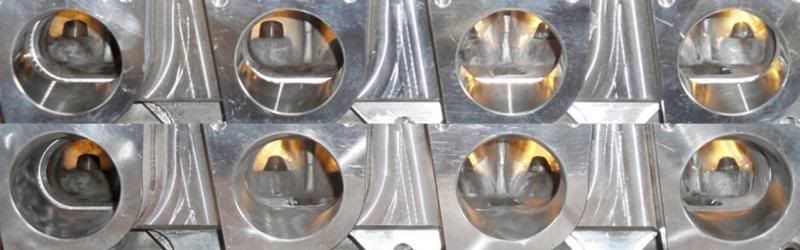
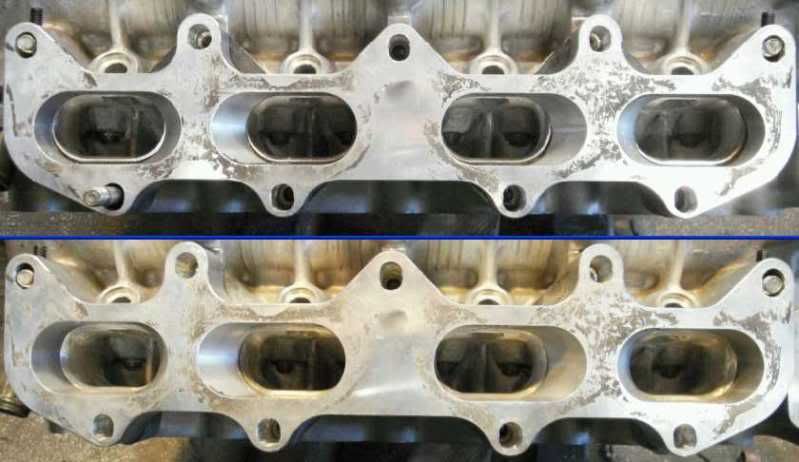
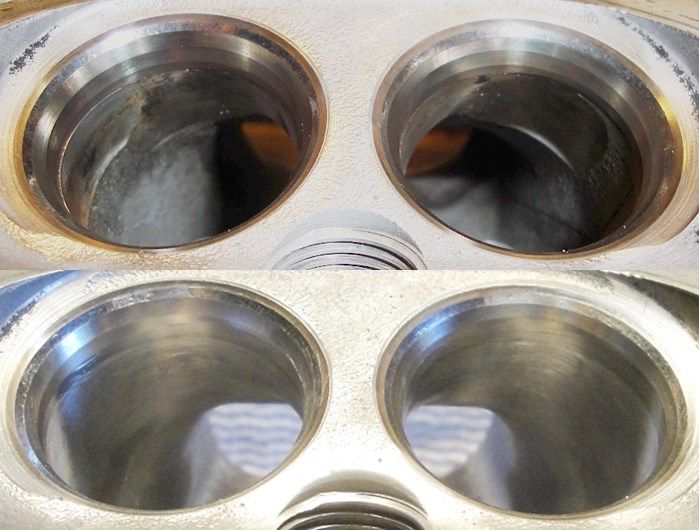
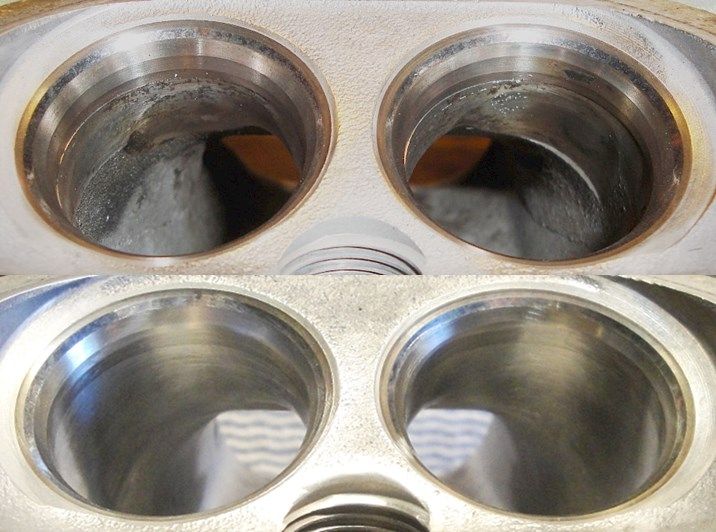
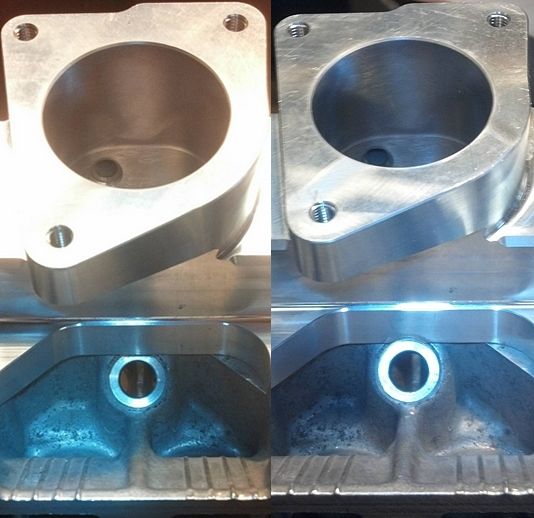
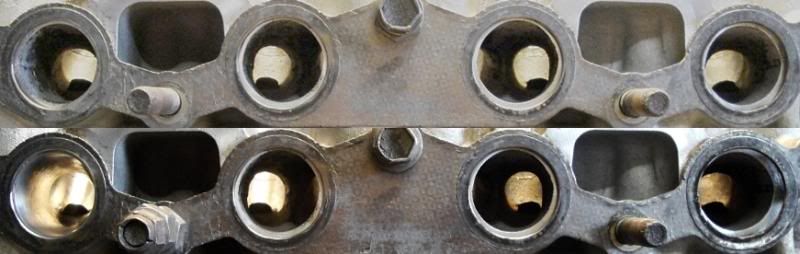
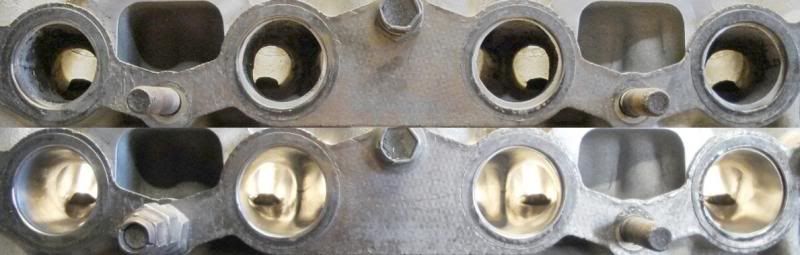
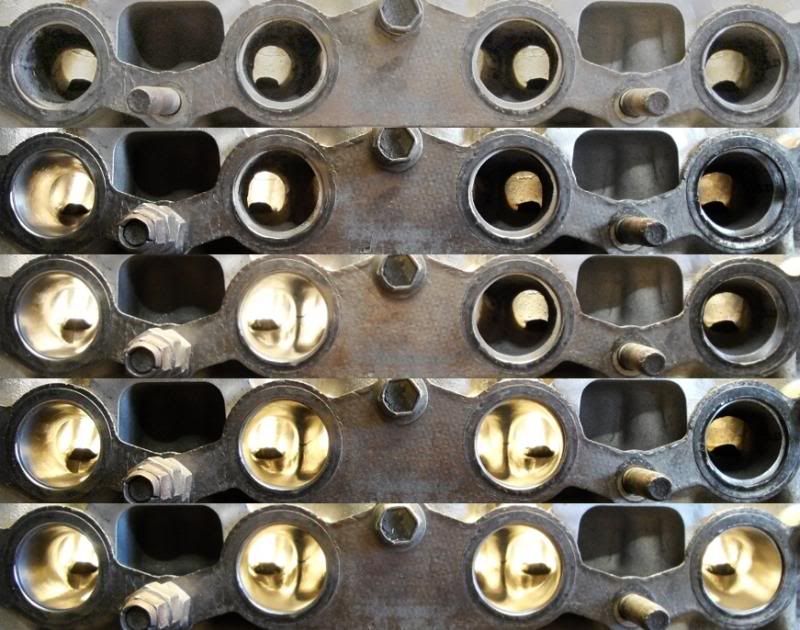
 :lol:


A few more pics...

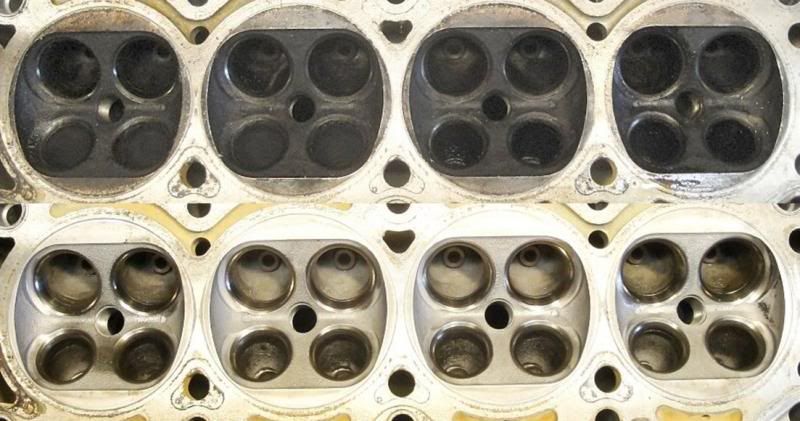
prior to dis-assembly....
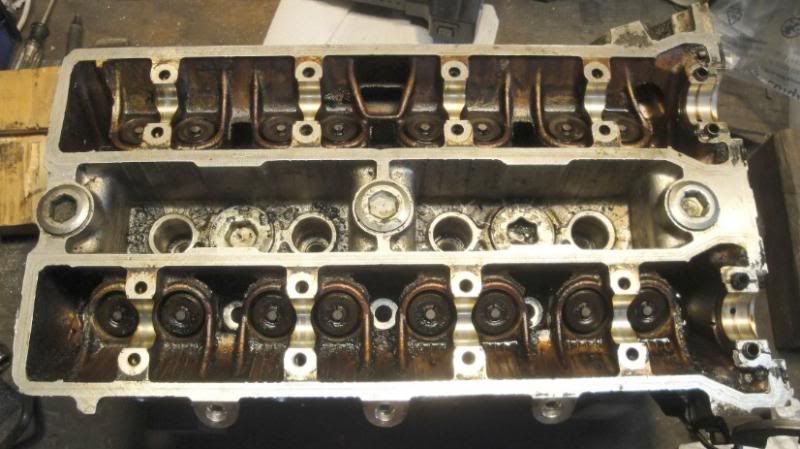
Image


and after....

Image


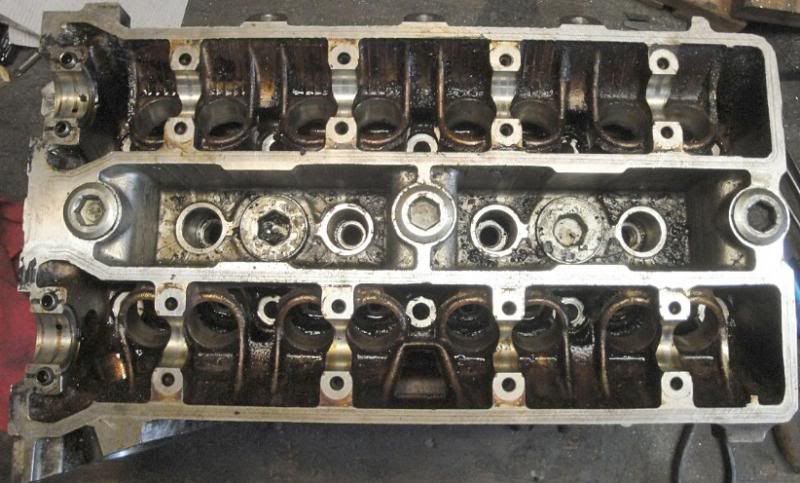
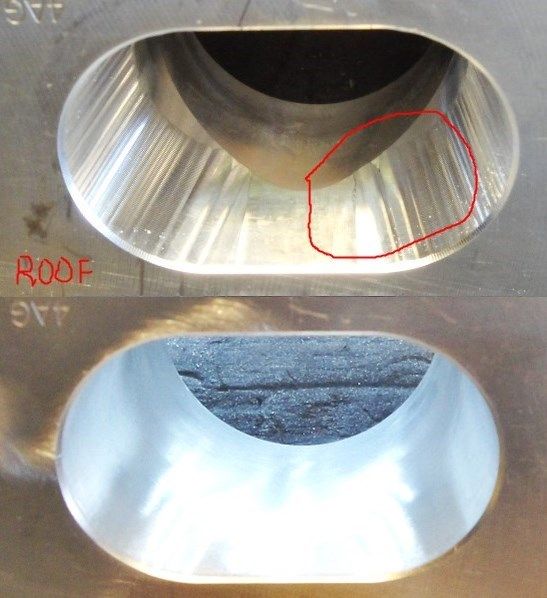
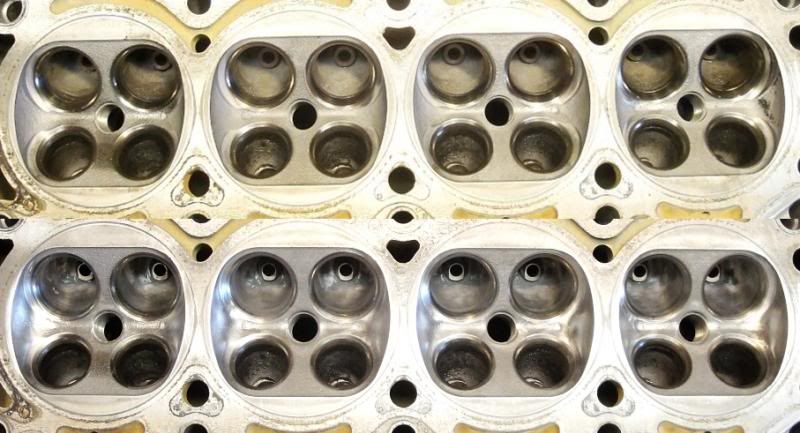
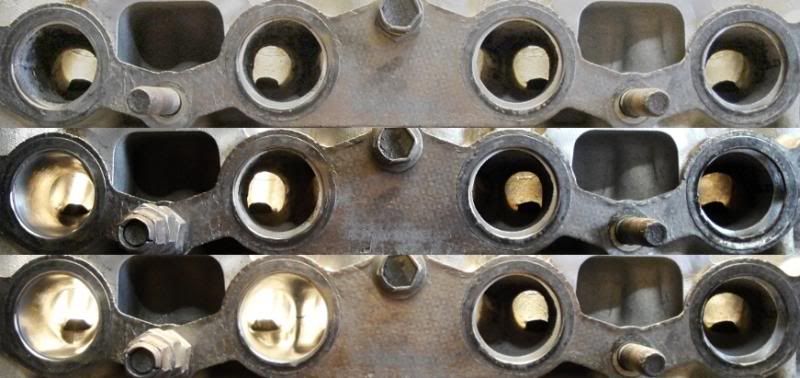
Still kinda nasty.... but the cam journals show no gouging... :thumbsup:
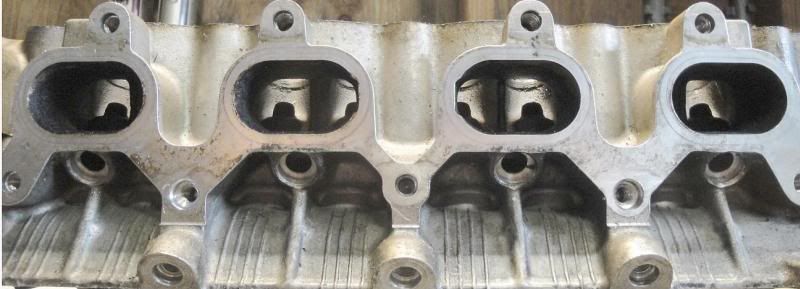
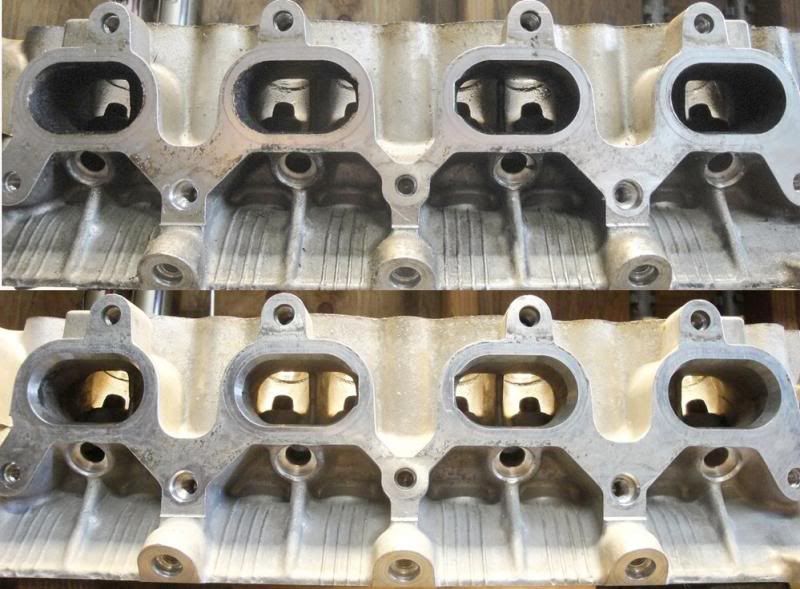
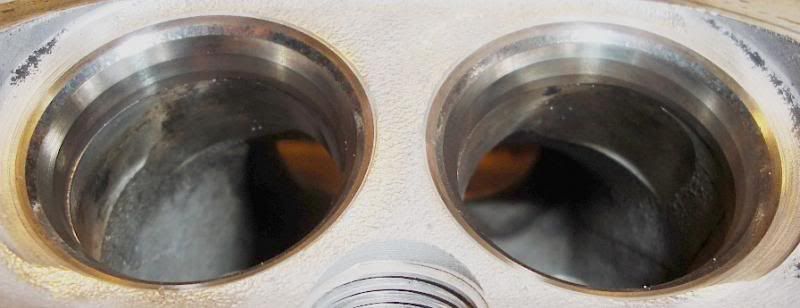
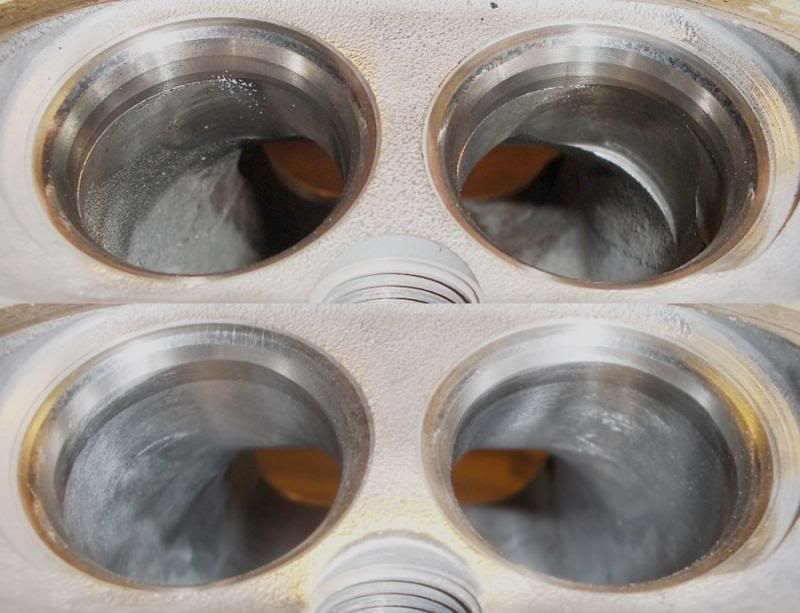
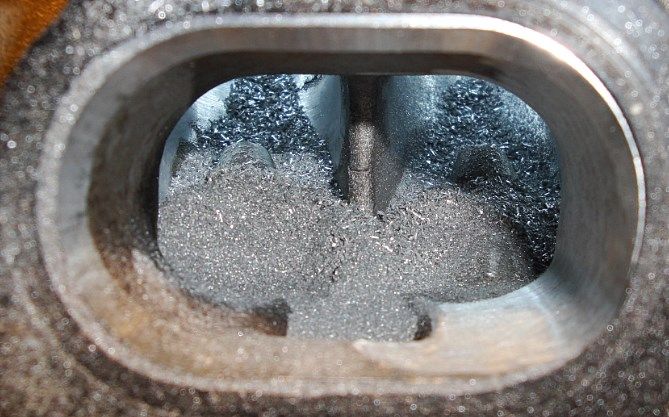
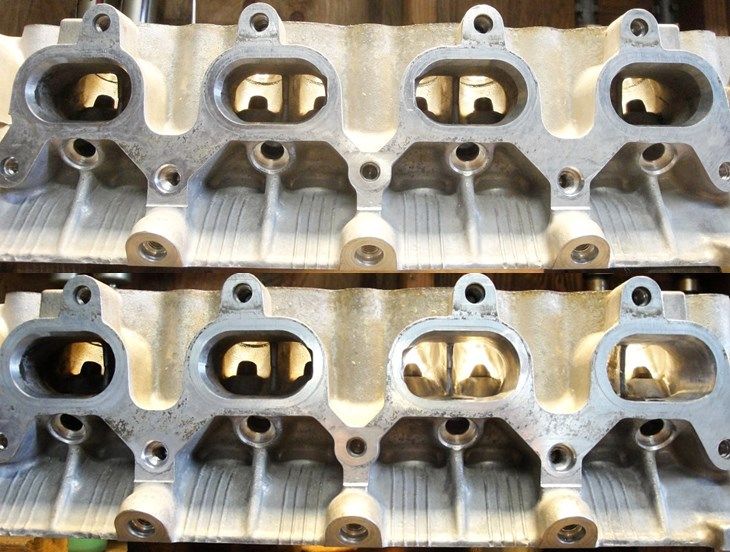
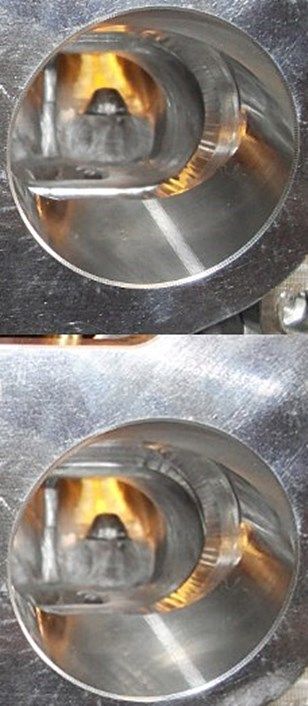
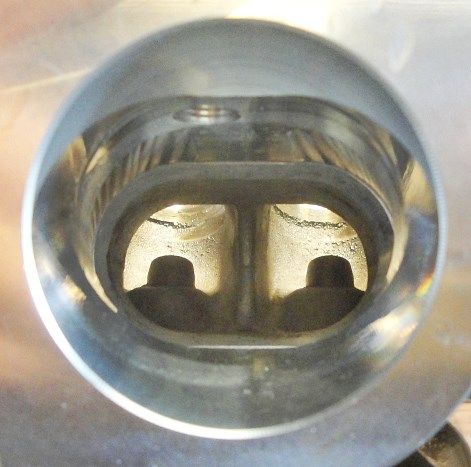
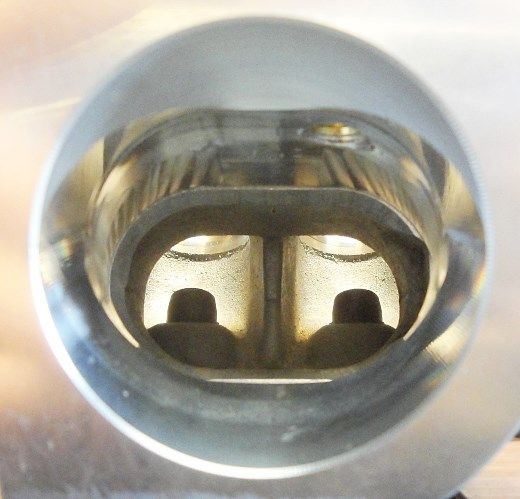
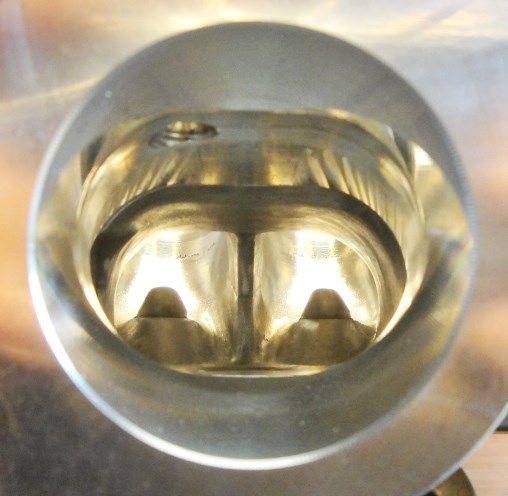
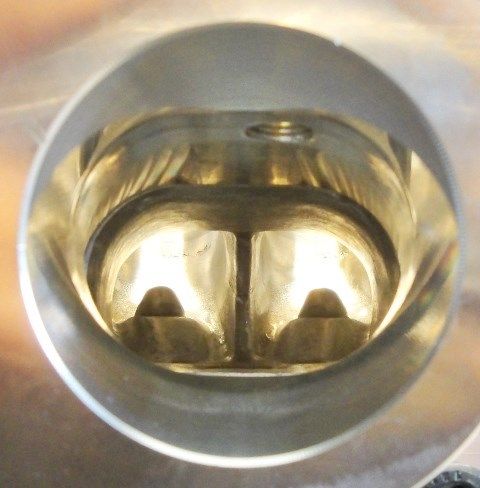
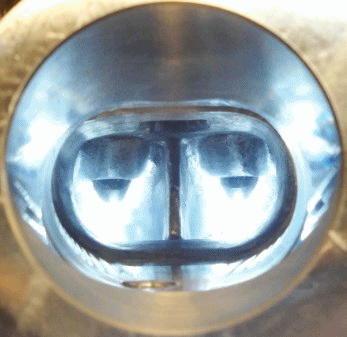
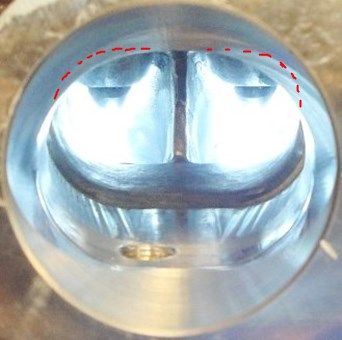
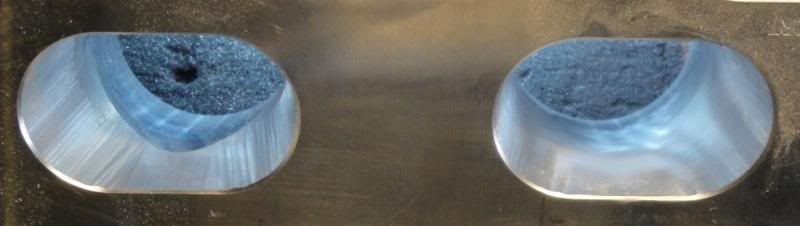
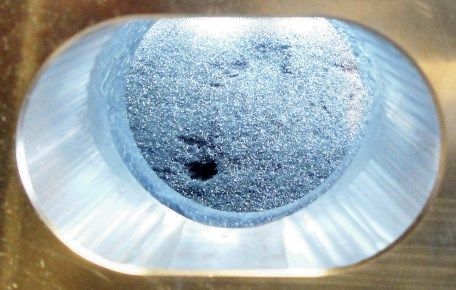
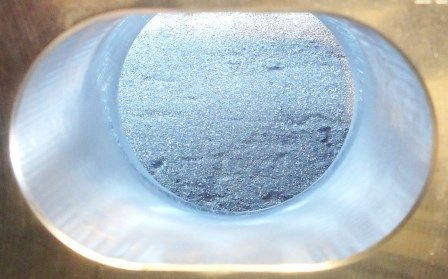
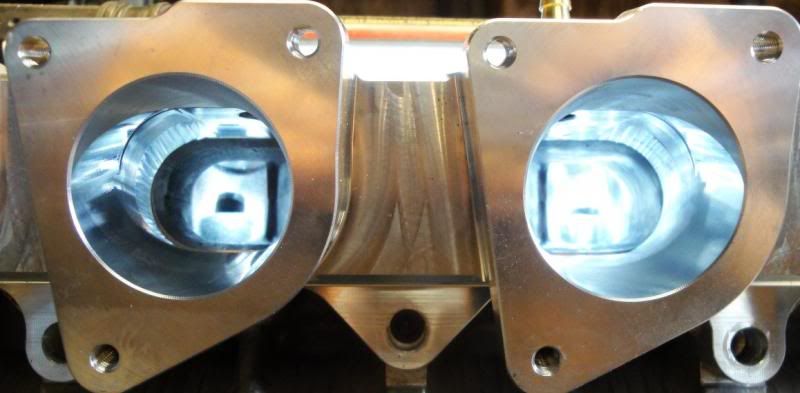
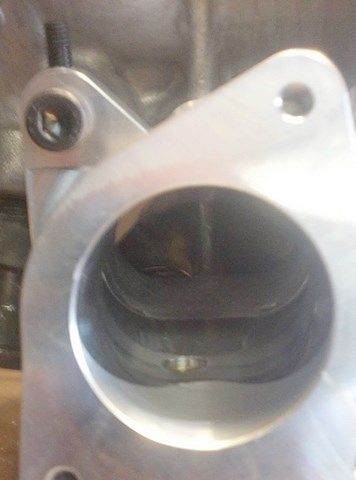
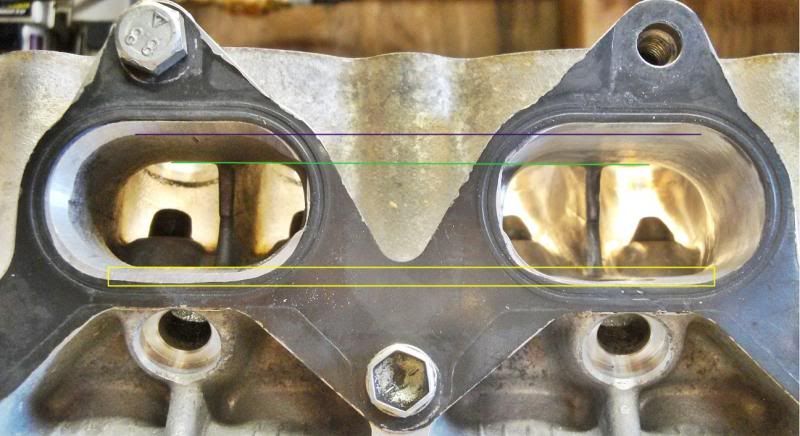
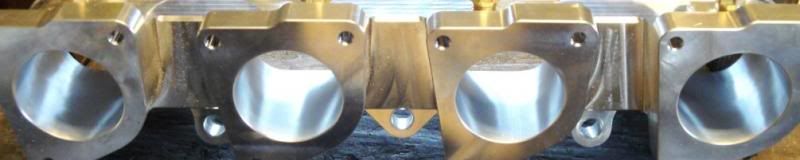
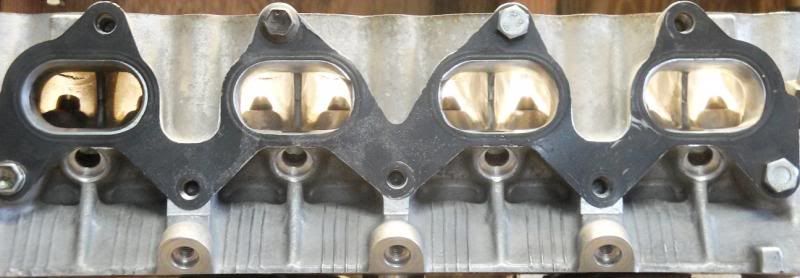
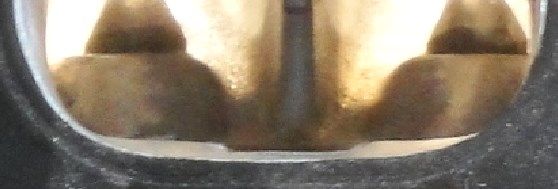
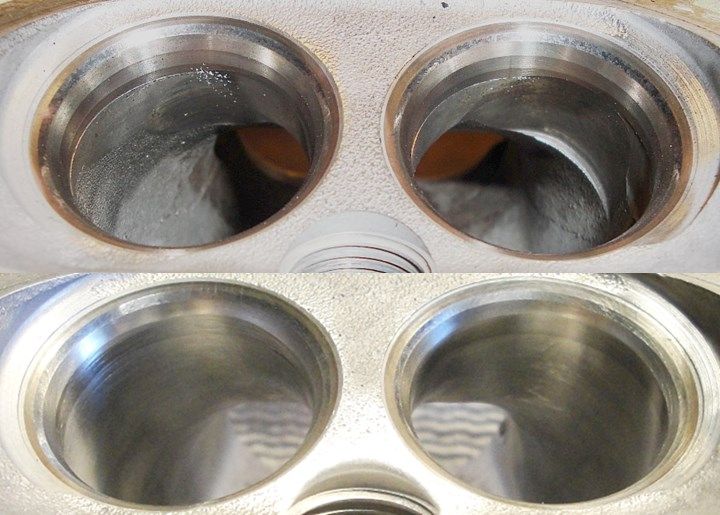
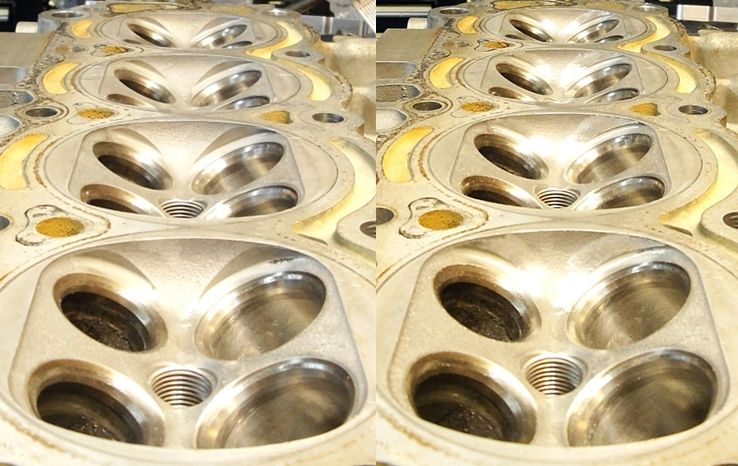
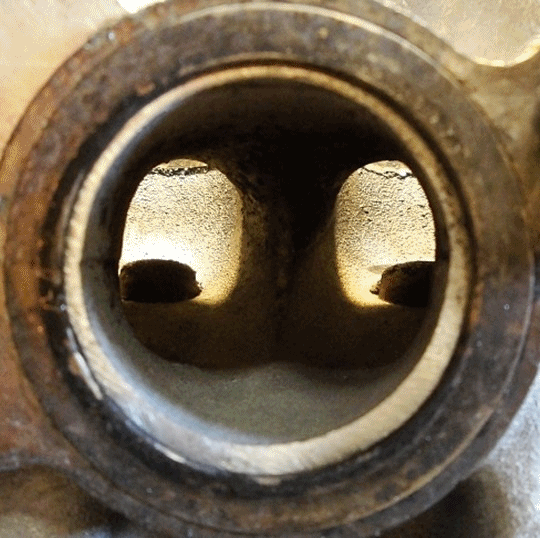

an intake view...

Image


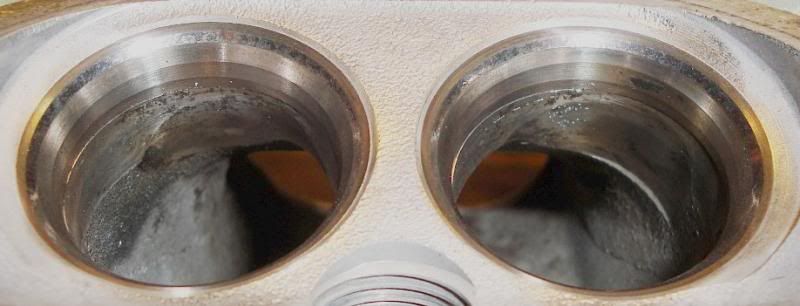
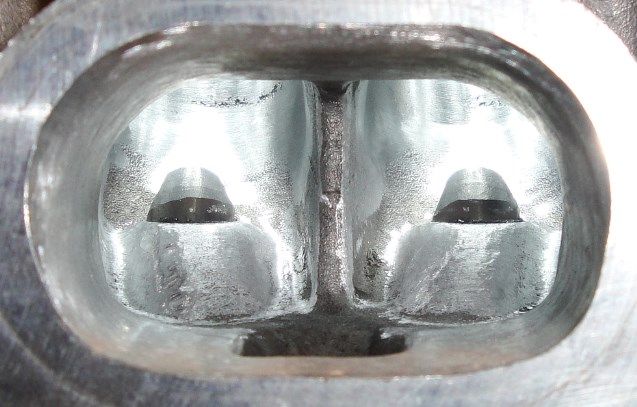
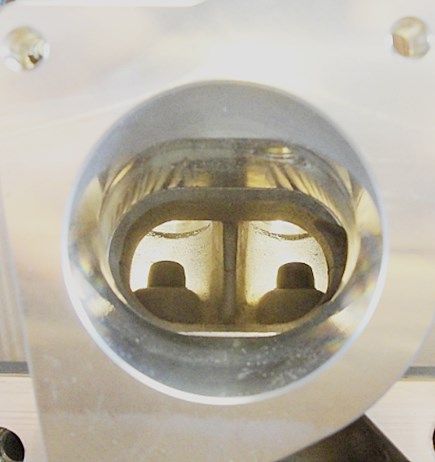
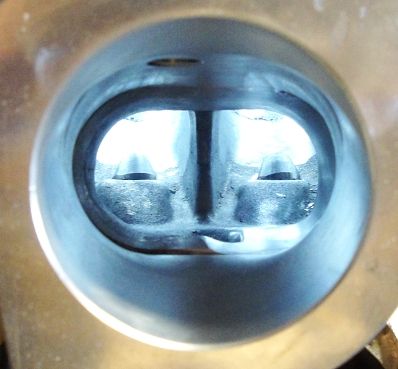
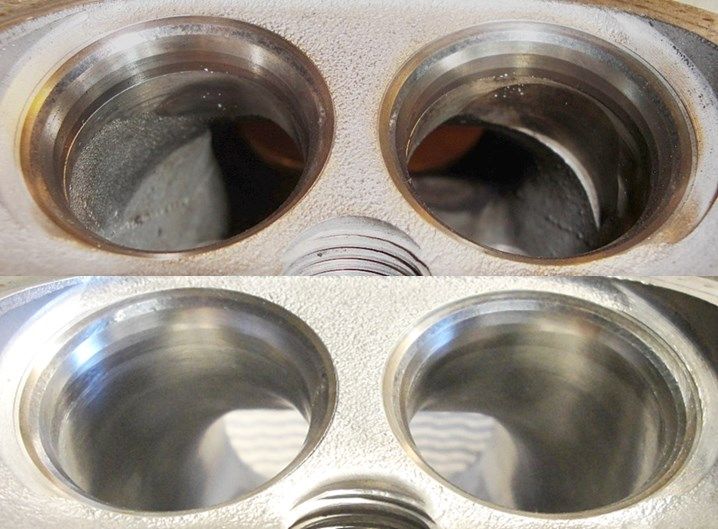
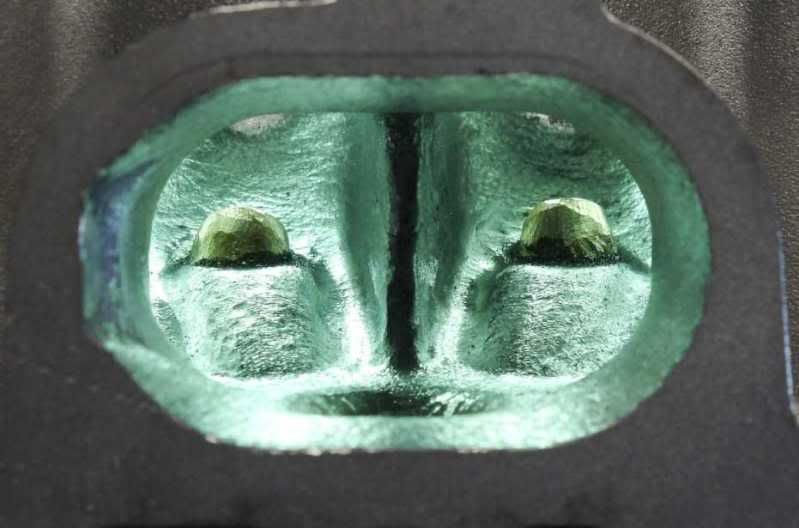
and one of the exhaust

Image


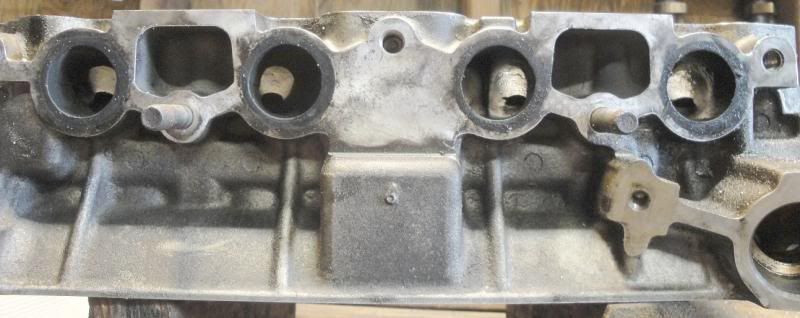
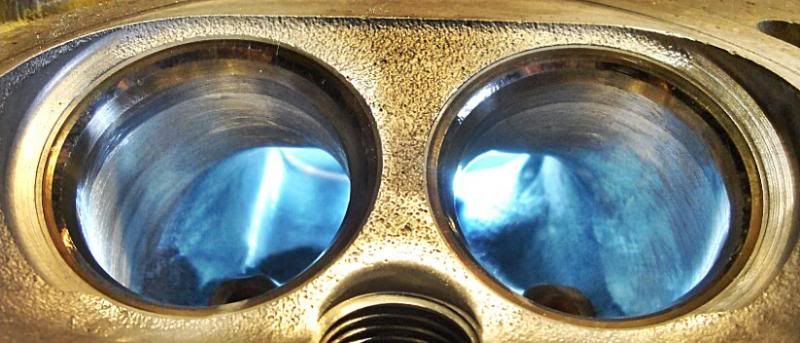
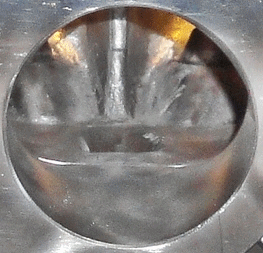
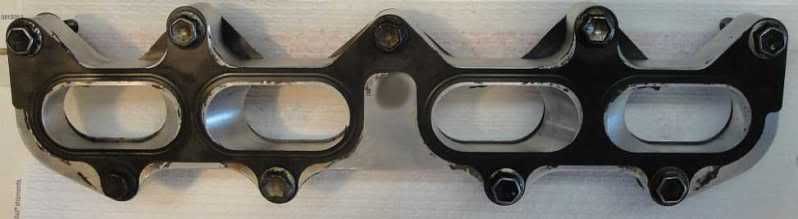
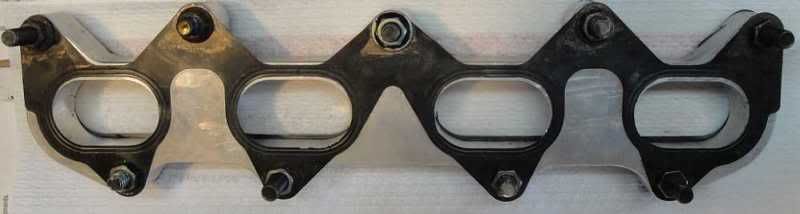
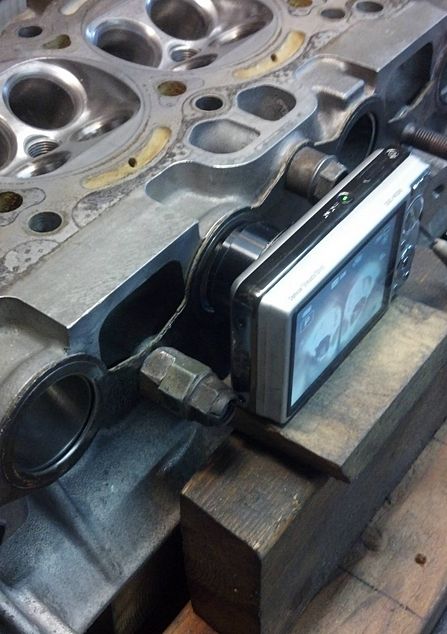
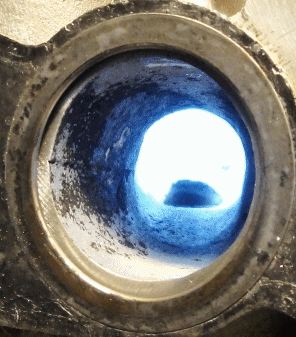
By the way, this is an uncut head...

Image


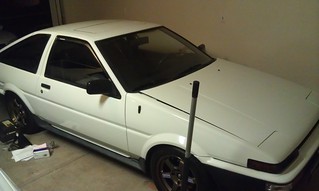
To see the car build - http://club4ag.com/forums/viewtopic.php?f=7&t=1486


More to come..... :mrgreen:
OST Cyl head porting, - viewtopic.php?f=22&t=300

Building a great engine takes knowing the end... before you begin :ugeek:

Enjoy Life... its the only one you get!

my86mystory
Club4AG Enthusiast
Posts: 193
Joined: Thu Jan 10, 2013 12:01 pm
Location: Socal

Re: OST-026: "My White Hatch"

Postby my86mystory » Wed Mar 26, 2014 9:20 pm

I love what seek ang has been doing to his car on his build. And I love reading about your porting services, maybe one day when my small port needs a rebuild or when I'm ready with the funds just to want to rebuild I'll send it to you. Just making sure the pics of the head in the lower part of the first post is the same one as the one in the garbage bag right? And it's a small port for sekang? I just want to make sure I'm following right.
Regardless can't wait to see more updates

User avatar
oldeskewltoy
Club4AG MASTER
Posts: 2183
Joined: Wed Jan 09, 2013 4:44 pm
Location: Portland, Oregon

Re: OST-026: "My White Hatch"

Postby oldeskewltoy » Fri Mar 28, 2014 4:31 pm

my86mystory wrote:I love what seek ang has been doing to his car on his build. And I love reading about your porting services, maybe one day when my small port needs a rebuild or when I'm ready with the funds just to want to rebuild I'll send it to you. Just making sure the pics of the head in the lower part of the first post is the same one as the one in the garbage bag right? And it's a small port for sekang? I just want to make sure I'm following right.
Regardless can't wait to see more updates


The head is the same from beginning to end, it is a smallport, and it is for sekang.....


I got the head back from it being cleaned... even a good cleaning makes it look better...


Chambers....

Image


exhaust ports...

Image

These look pretty good... there is enough meat on the port roofs to allow me to get a good shape to them.


intake ports...

Image


Lets look at those intake short radius's.... (1 on right, 4 on left)

Image


Hmmm, and on closer inspection...

cyl 1...
Image

cyl 2...
Image

cyl 3...
Image

cyl 4...
Image


I'll be earning my fee on those....... :lol:


More to come..... :mrgreen:
OST Cyl head porting, - viewtopic.php?f=22&t=300

Building a great engine takes knowing the end... before you begin :ugeek:

Enjoy Life... its the only one you get!

User avatar
oldeskewltoy
Club4AG MASTER
Posts: 2183
Joined: Wed Jan 09, 2013 4:44 pm
Location: Portland, Oregon

Re: OST-026: "My White Hatch"

Postby oldeskewltoy » Sun Mar 30, 2014 4:03 pm

Well... the first task for me is always deburring the head. I do this first for a simple reason... I'll be handling this head quite a bit, and if I remove all the casting flash, and machined edge sharpness, I'll be doing my hands a big favor..... Image


Below are a couple of 2 panel, before and after of the deburring process.

Image

Above is the last four bucket cylinders, and last 2 cam journals (#4 and #5) on the exhaust side of the engine.


And here are the first 4 bucket cylinders and cam journals #2 and #3 for the intake cam

Image


More to come..... :mrgreen:
OST Cyl head porting, - viewtopic.php?f=22&t=300

Building a great engine takes knowing the end... before you begin :ugeek:

Enjoy Life... its the only one you get!

sekang0
Club4AG Expert
Posts: 202
Joined: Fri Jan 11, 2013 7:46 pm
Location: Stockton, CA

Re: OST-026: "My White Hatch"

Postby sekang0 » Mon Mar 31, 2014 12:28 am

Nice progress!
'85 GT-S project since 2010
Image

User avatar
oldeskewltoy
Club4AG MASTER
Posts: 2183
Joined: Wed Jan 09, 2013 4:44 pm
Location: Portland, Oregon

Re: OST-026: "My White Hatch"

Postby oldeskewltoy » Mon Mar 31, 2014 9:25 am

thanks sekang....


oldeskewltoy wrote:
Hmmm, and on closer inspection...

cyl 1...
Image

cyl 2...
Image

cyl 3...
Image

cyl 4...
Image


So... any opinions (not just sekang...) as to which one is the worst???
OST Cyl head porting, - viewtopic.php?f=22&t=300

Building a great engine takes knowing the end... before you begin :ugeek:

Enjoy Life... its the only one you get!

User avatar
oldeskewltoy
Club4AG MASTER
Posts: 2183
Joined: Wed Jan 09, 2013 4:44 pm
Location: Portland, Oregon

Re: OST-026: "My White Hatch"

Postby oldeskewltoy » Mon Mar 31, 2014 3:42 pm

from another forum wrote:Hmm. Number 3 looks to be worst from the photos but just becasue of that I'm going to say number 2 ;)


Reminds me (your indecision) of an old "Let's Make a Deal" (Monty Hall era).... :D


"Well, contestant, your first instinct was correct, you should have stuck with chamber #3........"

"oh Monty..." :(


The reason I chose #3 was the factory machining mark came right to the edge of the seat, it had a big nasty under cut in the port floor, and the splitter was poorly machined covering a big part of the seat.

Image

Besides the bowl work... can anyone tell me what else I did that isn't inside the bowls?


Once I managed to get the bowls, and short radius worked out, it was time to begin the port work...

Image

Look past the short radius, into the port. The left side has been reshaped, note the light line from port face to the guide. The right side I've not yet touched, and you can see the "pocket" in front of the guide that I have yet to "excavate"


Image

All the rough work has been finished on the left(#3), you can see the bowl walls are beginning to blend into the port, the bowls, seats and ports on the right(#2) are still untouched.


oldeskewltoy wrote:I'll be earning my fee on those....... :lol:


nearly 6 hours worth of work on #3's seats, bowls, and port.


More to come..... :mrgreen:
OST Cyl head porting, - viewtopic.php?f=22&t=300

Building a great engine takes knowing the end... before you begin :ugeek:

Enjoy Life... its the only one you get!

User avatar
riddleyo
Club4AG Enthusiast
Posts: 106
Joined: Sun Mar 24, 2013 4:48 pm
Location: Ohio

Re: OST-026: "My White Hatch"

Postby riddleyo » Mon Mar 31, 2014 5:28 pm

Looks great, thanks for the pictures and the nice explanations!

User avatar
oldeskewltoy
Club4AG MASTER
Posts: 2183
Joined: Wed Jan 09, 2013 4:44 pm
Location: Portland, Oregon

Re: OST-026: "My White Hatch"

Postby oldeskewltoy » Tue Apr 01, 2014 6:30 pm

riddleyo wrote: Looks great, thanks for the pictures and the nice explanations!


I try... :) besides, I enjoy doing it


from another forum wrote:Amazing work....


You make me blush... Image

from another forum wrote:
Besides the bowl work... can anyone tell me what else I did that isn't inside the bowls?


I spot a deburred/smoothed edge to the sparkplug hole.


correct! You can see it again in chamber 4 below


And here are the short radius's of intake 4, as above... before on top

Image


Besides the short radius's, I'm also working the intake ports themselves. intake port 4 in mid "excavation"

Image


and after roughing to size... a bit more work left....

Image


another OST 2 panel... 2 down... 2 to go

Image


One of the problems with the 16V 4AGE design is the ports are horizontal. Being horizontal, the air/fuel charge must make a pretty significant turn to reach the back of the valve. In the diagram below you can see what I'm talking about

Image

Both the newer 4AF/7AF port, and the Formula One port are NOT horizontal, this allows for more cylinder filling, and therefore more power potential.

I borrowed the 4AG part of that diagram, enlarged it, and in typical OST fashion I've created a 2 panel that hopefully will show why I work the port roof.... In essence, I've adjusted the port roof a few degrees, this will assist the air/fuel charge to have an easier time making the bend, because adjusting the port roof the way I have is allowing the air/fuel charge to have a shallower angle to get to the valve... only a few degrees... but it all helps!

Image


Now, away from diagrams and to real life....

Image

Image


More to come...... :mrgreen:
OST Cyl head porting, - viewtopic.php?f=22&t=300

Building a great engine takes knowing the end... before you begin :ugeek:

Enjoy Life... its the only one you get!

User avatar
oldeskewltoy
Club4AG MASTER
Posts: 2183
Joined: Wed Jan 09, 2013 4:44 pm
Location: Portland, Oregon

Re: OST-026: "My White Hatch"

Postby oldeskewltoy » Thu Apr 03, 2014 1:36 pm

Well the next piece to the puzzle arrived today.... a T3 smallport ITB adapter

Image

Overall it came in good condition... although those 2 scratches in the far left flange... I have no idea how they got there... but they are just surface scratches, gaskets will seal that perfectly.


A 2 panel showing the manifolds fitment on the head...

Image


The adapter WILL NEED some OST special attention... I will need to modify the manifold a bit by adding small set screws to the end mounting points so the fit is perfect...

By the way... which of the two above views do I want to set the manifold too?? (top view is correct, or bottom view is correct?)


Besides the addition of "jack screws", the manifold needs the machining marks blended, and, potentially, the opening changed to accommodate blacktop ITBs.

Personally... I think silvertop throttles are more than adequate to make power... and keep up the air velocity


More to come...... :mrgreen:
OST Cyl head porting, - viewtopic.php?f=22&t=300

Building a great engine takes knowing the end... before you begin :ugeek:

Enjoy Life... its the only one you get!

User avatar
oldeskewltoy
Club4AG MASTER
Posts: 2183
Joined: Wed Jan 09, 2013 4:44 pm
Location: Portland, Oregon

Re: OST-026: "My White Hatch"

Postby oldeskewltoy » Fri Apr 04, 2014 1:06 pm

from another forum wrote:Top view is correct. The roof is connected with the adaptor correct to allow the airflow flow without big restrictions.

Is that correct? :D


I'm not sure you have it, I believe(not sure by how you described it) your visual is perceiving it correctly... but you don't quite have the grasp on what you see. First, the views are upside down... the top of each photo is actually the floor of the port.

So if you were going for roof alignment, then the choice was the bottom one... but this is a highly technical question.... and it somewhat refers back to changing the port roof angle. The VERY LAST thing I want to touch is any ports floor just before it bends to the valve. So if I position the manifold to the very bottom edge of the port, and hold that as my constant, I can then add a bit more angle to the port roof by matching the port to the manifolds roof. So the top view is correct, but because by placing it that way I can further increase the port roof angle....

and to paraphrase Margaret Stewart.... , "and that's a good thing" Image


A hint... before you look at anything of mine describing ports/bowls/valves... always look for the cues that tell you if it is port/bowls/valves up, or down


The 4 manifold/port/bowls...


#1

Image


#2

Image


These will be my controls... Since this is the first time I've worked an ITB manifold and the matching head.

#3

Image


#4

Image


note how all of them, even the 2 ports mostly shaped... can still benefit for a bit more removed from the roof...


It is also more than it appears...

Image


So besides now being able to further raise the roof, I also need to shape the inside of the itb manifold too


Image


The T3 manifold has a mild slope built into them, the round boring, which is also the mounting face of the ITB, is @ a shallow angle, while the manifold boring is horizontal, similar to the head. Where these two bored holes meet will also be ported...

Image

Image

The floors machined edge will get blended to minimize air disturbance directly behind the throttle plates.... I'm also working on a way to minimize those vacuum ports....


other person in forum above wrote:I'm wondering what will turn out of this, because I've done the same thing (smallport head, T3 adapter, Blacktop 45mm ITBs) last year, with the same ideas, and I had to remove a "half kg" of aluminium from the head to look like something good flowing thing. What cams will you(costumer) use for this setup, with what C/R ?


Cams... Toda 272 9.00mm lift... 1SZ buckets.... I've advised... the client to purchase a set of silvertop throttles... the blacktop throttles are unnecessary

I'm only doing the head work... but I'm advising a 4-4.25cc piston dome, as flat as possible... made for STANDARD valves... NOT OVERSIZE.(will provide a static CR between 11.9 and 12.9 depending on his choice of chamber volume (36cc down to 33cc) Final squish should be .9mm(.035"), deck and gaskets is by choice as long as squish gets to .035" and no less!


More to come..... :mrgreen:
OST Cyl head porting, - viewtopic.php?f=22&t=300

Building a great engine takes knowing the end... before you begin :ugeek:

Enjoy Life... its the only one you get!

User avatar
oldeskewltoy
Club4AG MASTER
Posts: 2183
Joined: Wed Jan 09, 2013 4:44 pm
Location: Portland, Oregon

Re: OST-026: "My White Hatch"

Postby oldeskewltoy » Fri Apr 04, 2014 2:56 pm

oldeskewltoy wrote:Image


Image

the top view is port 4... the lower is port 3....
Image

Image

I've only worked the top of port #3(bottom of right port in photo below), but I'm beginning to see something I thought might be there.... (kinda like a sculptor seeing the image he intends to sculpt within his medium... :shock: )

Image


Can you see what I see???


More to come.... :mrgreen:
OST Cyl head porting, - viewtopic.php?f=22&t=300

Building a great engine takes knowing the end... before you begin :ugeek:

Enjoy Life... its the only one you get!

User avatar
oldeskewltoy
Club4AG MASTER
Posts: 2183
Joined: Wed Jan 09, 2013 4:44 pm
Location: Portland, Oregon

Re: OST-026: "My White Hatch"

Postby oldeskewltoy » Sat Apr 05, 2014 9:07 am

from another forum wrote:I love learning :-)
Can we see pics of the jack screws, please.


Performed on both end mounting points.... apologies in advance... I used my cell phone for these photos

Image


the holes are drilled 3 times, 1st with 5/64 bit, then 5/32 bit, and finish with 13/64 bit. Then tapped to a 6 x 1.00 thread

Image


Once both sides are tapped... thread in the jack screws. Since I threaded it to 6 x 1.00, I used 6 x 1.00 set type screws that use an Allen drive.


Right side... (#1)

Image


and the left....... (#4)

Image


both sides now adjusted so the floor of the adapter meets the tapered edge of the intake port.


More to come..... :mrgreen:
OST Cyl head porting, - viewtopic.php?f=22&t=300

Building a great engine takes knowing the end... before you begin :ugeek:

Enjoy Life... its the only one you get!

sekang0
Club4AG Expert
Posts: 202
Joined: Fri Jan 11, 2013 7:46 pm
Location: Stockton, CA

Re: OST-026: "My White Hatch"

Postby sekang0 » Sat Apr 05, 2014 9:22 am

Can't wait for more updates. :)
'85 GT-S project since 2010
Image

User avatar
oldeskewltoy
Club4AG MASTER
Posts: 2183
Joined: Wed Jan 09, 2013 4:44 pm
Location: Portland, Oregon

Re: OST-026: "My White Hatch"

Postby oldeskewltoy » Sun Apr 06, 2014 9:23 am

sekang0 wrote:Can't wait for more updates. :)


;)


from another forum wrote:Thee work you do dan is just unreal


Image


:D


In the 2 photos below you can see the mounting hole is no longer round, but it is now oval-ized.


oldeskewltoy wrote:Image


oldeskewltoy wrote:Image


This procedure is performed with a 1/4" sanding drum. It could be performed with a cutting tool as well... although taking longer... the drum is far more forgiving

Image

To have the ability to raise the manifold, the bottom of the bolt holes were worked. HINT - the rotary tool will tend to pull the tool to the right as you work the mounting holes(tools torque) YOU must compensate... otherwise instead of elongating you'll produce something comma shaped.


More to come...... :mrgreen:
OST Cyl head porting, - viewtopic.php?f=22&t=300

Building a great engine takes knowing the end... before you begin :ugeek:

Enjoy Life... its the only one you get!

User avatar
oldeskewltoy
Club4AG MASTER
Posts: 2183
Joined: Wed Jan 09, 2013 4:44 pm
Location: Portland, Oregon

Re: OST-026: "My White Hatch"

Postby oldeskewltoy » Mon Apr 07, 2014 5:13 pm

Before and after.... All views are upside down....


manifold, port, bowls (#2) before any work is performed


Image


manifold, port, bowls (#3) after sizing, before finishing - note the port roof taper is smooth from throttle body mount to both bowls

Image


The port floors taper where it meets the manifold... before on top....

Image

After(still some finishing work required) on the bottom. I made the port floors taper less severe by moving it back about double its stock distance from the manifold mounting edge.


Image


Now, back to the ports of #2 and #3....

Image

The purple line shows the original taper on the left, and on the right you can see the new taper is about twice the depth... but note the port floor, where it turns to go to the valve (green line) is the SAME. The yellow box outlines the amount of material removed from the front roof of the port. Yet still inside the Toyota intake manifold gasket :D


The manifold is now nearly finished

Image


More to come..... :mrgreen:
OST Cyl head porting, - viewtopic.php?f=22&t=300

Building a great engine takes knowing the end... before you begin :ugeek:

Enjoy Life... its the only one you get!

User avatar
oldeskewltoy
Club4AG MASTER
Posts: 2183
Joined: Wed Jan 09, 2013 4:44 pm
Location: Portland, Oregon

Re: OST-026: "My White Hatch"

Postby oldeskewltoy » Tue Apr 08, 2014 6:25 pm

from another forum wrote:Excellent thread though! I do enjoy seeing detailed threads on headwork.


Thanks...... Odd you bring it up... I realized today that I don't post these threads for self-congratulation.... I post these threads so I have a purpose to take photos of my work......


Huh???

What??

You read that correctly... I wouldn't be nearly as good as I am... if I didn't take photos. Great example is this next view.....

Image


I took this photo after another 5+ hour session, this time after working intake port #2.... or so I thought "after"....


Port 2 looks pretty good, but take a closer look... the roof (photo is upside down so "floor" in view) shows a bit more of the roof then either ports 3 or 4...

Sure enough... port 2's roof is a bit too steep... which means the taper back to the base of the guide boss is incorrect

Image

So I went back and adjusted it...... :wink:

I can't speak to you about other porters... but I find posting all of my work an important ingredient in the finished product.


btw.... more to come.... :mrgreen:
OST Cyl head porting, - viewtopic.php?f=22&t=300

Building a great engine takes knowing the end... before you begin :ugeek:

Enjoy Life... its the only one you get!

User avatar
oldeskewltoy
Club4AG MASTER
Posts: 2183
Joined: Wed Jan 09, 2013 4:44 pm
Location: Portland, Oregon

Re: OST-026: "My White Hatch"

Postby oldeskewltoy » Fri Apr 11, 2014 8:52 am

from another forum wrote:Neat pics, I don't think we went it to too much detail about head work though.

I'm still collecting parts for my build


Some people like to see... but as I alluded too, I like to see, and if I didn't make these posts... I seriously doubt I'd be as good as I am.


3 down... one to go

Image

if you look carefully inside port 2, you can see where I adjusted the port roof for a more consistent taper.


Here is a close up before and after of port 3, this time instead of a 2 panel... a sliding gif... to show the work on port 3

Image


and now port 4 in mid work...

Image


More to come.... :mrgreen:
OST Cyl head porting, - viewtopic.php?f=22&t=300

Building a great engine takes knowing the end... before you begin :ugeek:

Enjoy Life... its the only one you get!

User avatar
oldeskewltoy
Club4AG MASTER
Posts: 2183
Joined: Wed Jan 09, 2013 4:44 pm
Location: Portland, Oregon

Re: OST-026: "My White Hatch"

Postby oldeskewltoy » Fri Apr 11, 2014 12:53 pm

from another forum wrote:I thought the T3 adapter would have better fitment.

My previous experience with a T3 adapter

Image
Image

solution... slotted bolt holes with jackscrews

Image


from another forum wrote:Good call on the ports though. But wouldn't it be easier to use a 20V engine instead of welding in parts to the head and rebuilding a complete intake plenum?


20V has problems of its own... and besides it is easy enough to make a 16V, especially a smallport, make similar power on similar specs .


As far as welding and completely new custom manifold... I have yet to add any material to any head I've worked.

I understand that Hasslegren adds (welds in) extra metal into the area of the stock injector ports, I know Loynings has figured out a way to significantly raise the ports with out welding. In both of these cases this is for professional racing, and so INVE$MENT is part of every last horsepower.

The 4AGE is a GREAT example of INVE$MENT... when Toyota was running the series they needed 12,000 rpm to make "only" 240 hp. These days... they are making close to 270hp, and only twisting them to 10,000 rpm to do it! Now the investment to get to 270hp @ 10k was likely close to $1,000,000 :shock:


Now back to work.... remember those short radius's - radii??

Image


How about a bit closer...


#1...

Image


#2...

Image


#3...

Image


#4...

Image


More to come...... :mrgreen:
OST Cyl head porting, - viewtopic.php?f=22&t=300

Building a great engine takes knowing the end... before you begin :ugeek:

Enjoy Life... its the only one you get!

User avatar
oldeskewltoy
Club4AG MASTER
Posts: 2183
Joined: Wed Jan 09, 2013 4:44 pm
Location: Portland, Oregon

Re: OST-026: "My White Hatch"

Postby oldeskewltoy » Sat Apr 12, 2014 11:43 am

The short radius's are done... and as can be assumed... so is the port roofs, and manifold...

Image


I move on to the chambers, and exhaust side next week.... :mrgreen:
OST Cyl head porting, - viewtopic.php?f=22&t=300

Building a great engine takes knowing the end... before you begin :ugeek:

Enjoy Life... its the only one you get!

User avatar
oldeskewltoy
Club4AG MASTER
Posts: 2183
Joined: Wed Jan 09, 2013 4:44 pm
Location: Portland, Oregon

Re: OST-026: "My White Hatch"

Postby oldeskewltoy » Sun Apr 13, 2014 7:57 pm

from another forum wrote:OST: I have a couple of inquiries relative to this entire thread? Specifically, 1.) how do you keep the set screws on the manifold from vibrating loose on a running engine?
2.) What is an approximate cost for you to duplicate a 16V head just like the one in this post?
3.) How many hours of labor does it require to duplicate if you do it.

This post and your pics are outstanding!! You are to be commended for your prowess as a head porter/developer.


1) Locktite 290

Image

2) It depends... Anywhere from $1000 and up... price depends on many things... some excluding my porting work*

LIKE:

Who is supplying the smallport head, and ITB adapter? (smallport heads are tough to come-by recently...)

Is the head in basic usable condition? That means it has the cam caps w/ good journals, it has good valve guides, and good valve seats.

Do you want OEM valves, OEM back cut valves, or aftermarket valves?

You will need aftermarket valve springs to function w/ 9mm lift cams

Do you want Toyota, or aftermarket valve seals?


* - my current pricing for porting work on a 4AG 16V head -

$600 (minimum service) to do the 16 bowls/seats, taper the valve guides, deshroud and balancing chamber volume, exhaust port re-taper, and polishing.
$150 to blend the intake guide bosses and to re-taper port roof - largeport
$175 to blend intake guide bosses, blend port walls, and re-taper port roof - smallport
$100 for machining of the heads surface
$80 for cam journal deburring and polishing, and overall deburring
$80 for hand lapped valves
$60 for re-assembly
$60 to set valve clearances - your supplied camshaft, special order shims not included
$80 to adjust T3 smallport/largeport adapter
$140 to blend T3 ITB manifold for silvertop throttles
$220 to blend T3 ITB manifold for blacktop throttle

Loynings valve jobs - a few hundred to a few thousand


3) Since it isn't finished yet, the best I can give you is a ballpark time estimate - 50 to 60 hours.


Just a small detail for me... but so much easier on my client when it comes to assembly, and fitment... check out the injector port clearancing

Image


More to come..... :mrgreen:
OST Cyl head porting, - viewtopic.php?f=22&t=300

Building a great engine takes knowing the end... before you begin :ugeek:

Enjoy Life... its the only one you get!

User avatar
oldeskewltoy
Club4AG MASTER
Posts: 2183
Joined: Wed Jan 09, 2013 4:44 pm
Location: Portland, Oregon

Re: OST-026: "My White Hatch"

Postby oldeskewltoy » Tue Apr 15, 2014 9:46 am

from another forum wrote:
oldeskewltoy wrote:
from another forum wrote:..how do you keep the set screws on the manifold from vibrating loose on a running engine?

1) Locktite 290

Image


We use about 20 different Loctite products in our aerospace assemblies. Callout for Loctite 242 seems more widely used in critical components.
.

So much to learn from OST builds.
Image

I bow down to you sir m(_ _)m


NEVER bow to another.... you'll miss the performance :P

seriously... I've failed at SOOO many things in my life it isn't funny.. I eventually found something I'm good at... it only took 35 years for me to find it :shock: ... but thank you for the sentiment ;)

I use the 290 for one reason... it is wicking.... (it seeps into the threads and then sets up) The 242, and other thread lockers don't have this capability. Why is wicking important to me... simple really... it allows for fine adjustment in the jackscrews, and once set, I don't have to remove them to apply thread locker...


Now as to how critical it is... it isn't that critical... for once the manifold is bolted tightly(14ft/#s) to the head the jack screws could (theoretically) come out and fall away, the manifold isn't going to move once tightened.


Now as to magic... watch these machining marks disappear.....


going....

Image


Image

gone!

More to come.... :mrgreen:
OST Cyl head porting, - viewtopic.php?f=22&t=300

Building a great engine takes knowing the end... before you begin :ugeek:

Enjoy Life... its the only one you get!

User avatar
oldeskewltoy
Club4AG MASTER
Posts: 2183
Joined: Wed Jan 09, 2013 4:44 pm
Location: Portland, Oregon

Re: OST-026: "My White Hatch"

Postby oldeskewltoy » Tue Apr 15, 2014 6:32 pm

Image


More to come.... INDEED... :mrgreen:
OST Cyl head porting, - viewtopic.php?f=22&t=300

Building a great engine takes knowing the end... before you begin :ugeek:

Enjoy Life... its the only one you get!

sekang0
Club4AG Expert
Posts: 202
Joined: Fri Jan 11, 2013 7:46 pm
Location: Stockton, CA

Re: OST-026: "My White Hatch"

Postby sekang0 » Tue Apr 15, 2014 6:59 pm

:D
'85 GT-S project since 2010
Image

User avatar
oldeskewltoy
Club4AG MASTER
Posts: 2183
Joined: Wed Jan 09, 2013 4:44 pm
Location: Portland, Oregon

Re: OST-026: "My White Hatch"

Postby oldeskewltoy » Wed Apr 16, 2014 1:48 pm

Image


#4 is basically finished... 1 down... 3 to go....

Image


More to come..... :mrgreen:
OST Cyl head porting, - viewtopic.php?f=22&t=300

Building a great engine takes knowing the end... before you begin :ugeek:

Enjoy Life... its the only one you get!

User avatar
oldeskewltoy
Club4AG MASTER
Posts: 2183
Joined: Wed Jan 09, 2013 4:44 pm
Location: Portland, Oregon

Re: OST-026: "My White Hatch"

Postby oldeskewltoy » Thu Apr 17, 2014 10:29 am

from another forum wrote:wow!

Recently the cylinder head of my 4age was worked, and wished it to look like the work you are doing! I really congratulate their dedication :evil: :tu:


I have clients from all over the world... if there is a next time... send me an email: oldeskewltoy@yahoo.com

from another forum wrote:you live so far away :-) would loved to come see you work


I've had a few people ask... I've never worked a head while others are here... it might be too distracting... but with that said, I am thinking of setting up a webcam one of these days.... :shock:


port #3....

Image

2 down... 2 to go..

Image


to get the above 2 panel view I "stuff" the camera into the port... notice the view screen on the camera... note how there is no special lighting

Image


More to come.... :mrgreen:
OST Cyl head porting, - viewtopic.php?f=22&t=300

Building a great engine takes knowing the end... before you begin :ugeek:

Enjoy Life... its the only one you get!

User avatar
oldeskewltoy
Club4AG MASTER
Posts: 2183
Joined: Wed Jan 09, 2013 4:44 pm
Location: Portland, Oregon

Re: OST-026: "My White Hatch"

Postby oldeskewltoy » Thu Apr 17, 2014 4:21 pm

from another forum wrote:
oldeskewltoy wrote:I am thinking of setting up a webcam one of these days.... :shock:


I might be able to help you with that. If you setup a camera to take a picture every 10 second, your 50 hours of work can be made into a movie of about 12 minutes ;)


Hmmmm... that would be pretty cool.... I'll get back in touch....


Not quite a movie... but...... here is port 2...

Image


More to come.... :mrgreen:
OST Cyl head porting, - viewtopic.php?f=22&t=300

Building a great engine takes knowing the end... before you begin :ugeek:

Enjoy Life... its the only one you get!

User avatar
oldeskewltoy
Club4AG MASTER
Posts: 2183
Joined: Wed Jan 09, 2013 4:44 pm
Location: Portland, Oregon

Re: OST-026: "My White Hatch"

Postby oldeskewltoy » Fri Apr 18, 2014 4:33 pm

from another forum wrote:Those ports look spectacular OST! Great headwork.


thanks... the previous "movie" seems like it worked.... so here's another.... and a trusty 2 panel

Port #1 from stock to not.... :shock:

Image


And with # 1 now finished... here are all four... before and after ;)

Image


More to come.... :mrgreen:
OST Cyl head porting, - viewtopic.php?f=22&t=300

Building a great engine takes knowing the end... before you begin :ugeek:

Enjoy Life... its the only one you get!

candamo
Club4AG Regular
Posts: 30
Joined: Mon Mar 10, 2014 2:53 pm

Re: OST-026: "My White Hatch"

Postby candamo » Fri Apr 18, 2014 7:07 pm

Always follow your posts but I never comment. Great work man. Love your detailed pictures :mrgreen:

User avatar
oldeskewltoy
Club4AG MASTER
Posts: 2183
Joined: Wed Jan 09, 2013 4:44 pm
Location: Portland, Oregon

Re: OST-026: "My White Hatch"

Postby oldeskewltoy » Mon Apr 21, 2014 8:56 am

candamo wrote:Always follow your posts but I never comment. Great work man. Love your detailed pictures :mrgreen:


thank you....


from another forum wrote:i really need to make tons and tons of money so i can finally refresh my 20v and send the head to you!!


A ball park figure to just port a 20V head is about $650 ish.... the little bit more would be for the 5th valve bowls and seats. That's less than a pair of 20V cams :eek:

Just so you know... that $650 is just for port work, if you need machine shop work (valves, guides, seats), or intend for me to rebuild the head as well as port it, then the cost does go up for those services.

from another forum wrote:a master at work


ty.... are you just about ready??? :shock:


Most often, when I'm finished, I show a multi-panel photo showing the progression from undone to finished... kinda like this...

Image


but with my new found gif work.... :)

Image

OST x-mas lights??????


More to come..... :mrgreen:
OST Cyl head porting, - viewtopic.php?f=22&t=300

Building a great engine takes knowing the end... before you begin :ugeek:

Enjoy Life... its the only one you get!